Some of our tools don't need to be a download. These run in a browser tab, on your machine, on a show day — no account, no install, and no file of yours going anywhere near a server we own.
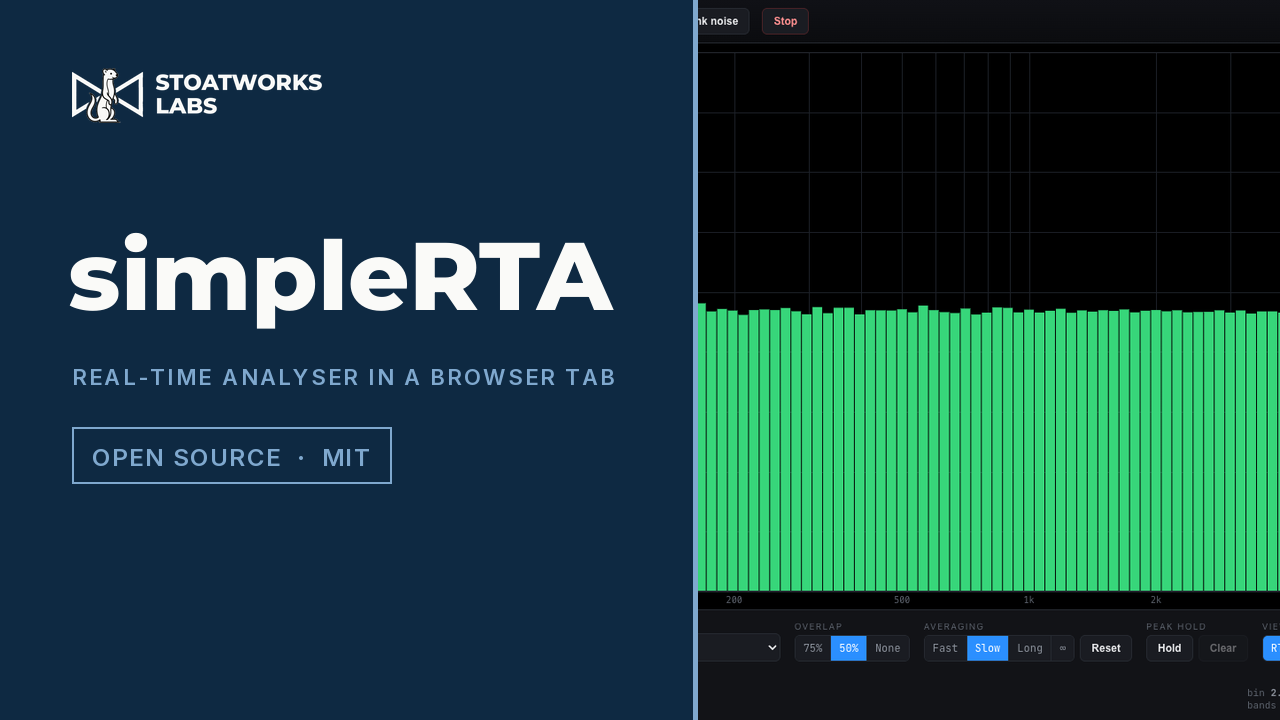
Pink noise is flat, or the analyser is lying to you.
A real-time analyser in a browser tab: an RTA from 1/3 to 1/48 octave, a spectrograph on the same frequency axis, and a full-height meter with peak, RMS, peak hold and broadband Z, A and C.
The audio is analysed in the page and never leaves the browser — there is no backend to send it to. The browser's echo cancellation, noise suppression and automatic gain are all switched off on the input, so what you see is the signal rather than the voice pipeline the browser would otherwise hand you.
The built-in pink noise source read at 1/12 octave: flat, which is what a constant-percentage-bandwidth display must show. That is the app checking itself, and it is the screenshot precisely because it is falsifiable.
What it shows
01
The transform, on your terms
1/3, 1/6, 1/12, 1/24 or 1/48 octave; a transform from 2048 to 65536 points; Hann, Hamming, Blackman-Harris, flat-top or rectangular; 75%, 50% or no overlap. Blackman-Harris to see a quiet tone beside a loud one, flat-top when the amplitude of a tone matters more than its frequency.
02
It shades what it cannot resolve
The honest part
At fine resolutions the low bands are narrower than the transform can actually resolve, so neighbouring bands report shares of one measurement rather than independent ones — and the RTA shades that region rather than drawing it as if it were real. A 341 ms transform simply cannot give 1/48-octave detail at 30 Hz. Lengthen it and the shading recedes.
03
Spectrograph on the same axis
The spectrograph shares the RTA's exact frequency axis, so in split view the two line up vertically and a feature in one is directly above the same feature in the other. Peak hold per band, and Fast, Slow, Long or infinite averaging for noise measurements.
04
Three ways in
An input — a microphone, a measurement mic on an interface, a return from a console. Tab audio, which captures what another tab is playing. Or the pink noise generator, which runs in the page and is analysed without going anywhere near the speakers.
What to check before a show
01
It has never been checked against a calibrated microphone
The analysis chain is pinned numerically — the power normalisation at every transform size and through every window, the band-integration invariants, and the agreement between the band levels and the spectrum they come from. That is arithmetic, not metrology. No reference analyser and no calibrated measurement mic has been near it.
02
The dB scale is dBFS, and the offset is your number
Levels read in dBFS on the convention that a full-scale sine is 0 dB. The offset field adds a constant so you can dial the scale into SPL against a reference of known level — but nothing verifies that number, and no microphone correction is applied anywhere. Do not quote an SPL off this.
03
Tab audio is Chrome and Edge only
And it has to be a tab: whole-window and full-screen shares carry no audio on most platforms, so the picker will succeed and the analyser will sit at silence. Tick "Share tab audio" in the picker.
04
Check it against its own pink noise first
Pink noise is flat on a constant-percentage-bandwidth display, so the built-in generator is a one-click proof that the analyser reads level correctly before you believe anything it tells you about a room. It costs three seconds and it is the difference between a measurement and a picture.
02 — ArrayCAD
A venue drawing is fifty thousand triangles. ArrayCalc wants forty planes.
Nothing closes that gap by itself, which is why the venue usually gets rebuilt by hand. Drop the CAD model in here instead: it merges the triangles back into flat surfaces, lets you throw away everything the prediction tool does not need, lets you say what each surface is, and writes the file — a .dbacv for d&b ArrayCalc, 3D room data for L-Acoustics Soundvision, or a project for AFMG EASE Focus 3 — and converts between the three.
DWG read directly, DXF, glTF, IFC, FBX, Collada, OBJ, STL, MVR from any lighting visualiser — and an existing ArrayCalc, Soundvision or EASE Focus venue, if what you want is to prune or convert one. MVR goes back out too, so the finished venue returns to the visualiser it came from. No 3D model at all? Drop a PDF or an image of the plan and trace the rooms off it. Vectorworks files are a closed binary format nobody outside Vectorworks can read, so drop one in and it names the export to run instead. There is also a Vectorworks plug-in that skips the intermediate file entirely.
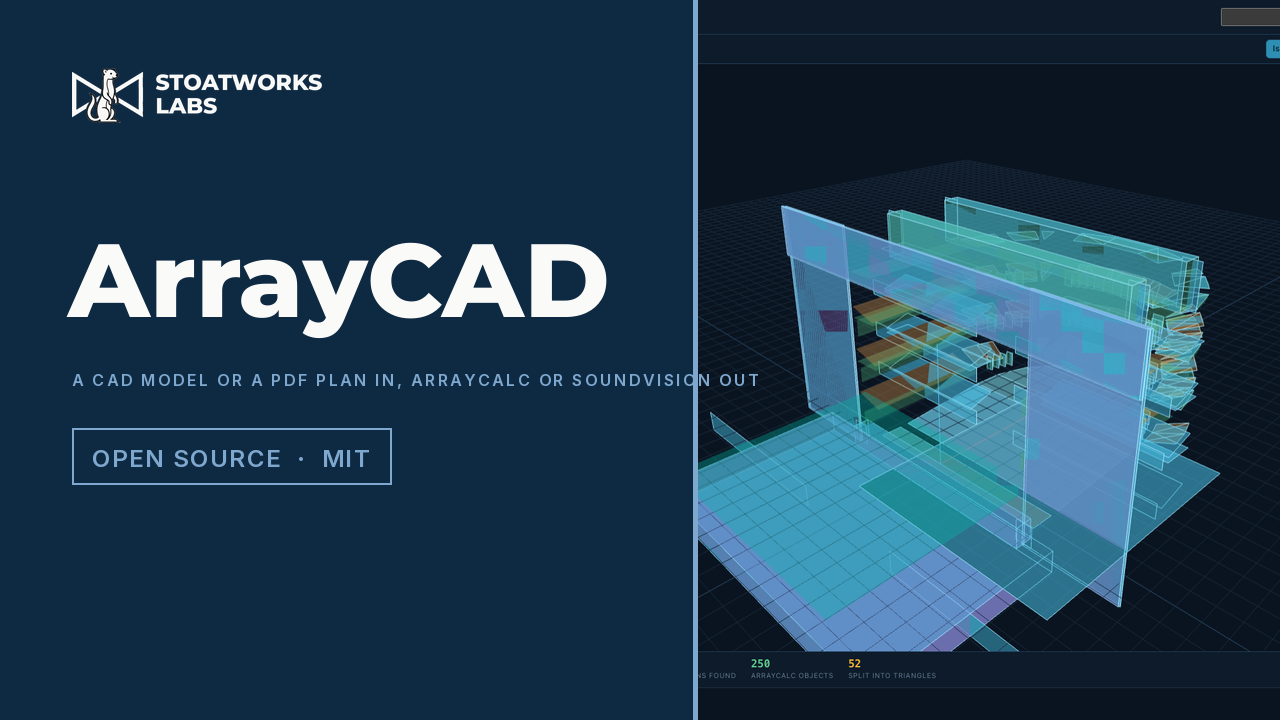
A real ArrayCalc theatre re-imported and reduced: 588 triangles, 198 flat regions, 198 ArrayCalc objects — one plane per region, no splitting.
What it does
01
The reduction is the tool
Vertices are welded, coplanar triangles are flood-filled into regions, and each region's outline is recovered and simplified. A raked seating deck becomes one plane however many triangles the model spent on it; a box becomes six. Handing ArrayCalc the raw triangles produces a file it cannot usefully work with.
02
Prune and classify what survives
The CAD object tree comes through intact — DXF layers, glTF node names, IFC entity types — so you prune by names you already use. Alt-click takes a whole branch. Then say what each surface is, and the listener height follows from that.
03
It writes the quads ArrayCalc actually accepts
The hard-won part
An ArrayCalc quad is not four free points. It is a symmetric trapezoid in a specific local frame, and a quad written the obvious way is silently collapsed to zero depth on import — sometimes not until weeks later, when the object ends up inside a rotated group. Anything that cannot be expressed that way becomes triangles instead, which are unconstrained.
04
You can see what it did
The source geometry and the planes it produced are drawn in the same viewport, so the merge tolerances are something you check by eye rather than trust. The object count is broken down, including how many faces had to be split and why.
What to check before a show
01
The output has been round-tripped through ArrayCalc — three times
Diagnostic venues written by this tool were opened in ArrayCalc 12.8.2, saved and exported again. The first attempt failed and found a real bug: every quad had been written with a centroid origin and ArrayCalc collapsed each one to a zero-depth line, with no error shown. By the third round every object came back byte-identical. That result is pinned as a test, because reproducing it needs a human with ArrayCalc.
02
Some plane type names are still guesses
"Positioning area" is ArrayCalc's own word, from a dialog it raised. "Listening" is near-certain — it is the only type that keeps a listener height you set. "Surface" and "Stage" are deductions from one sample venue, and there is a type the tool has never seen named. So the raw numeric code is shown beside every label, because that is what actually gets written to the file.
03
Curved tiers come out as flat quads
ArrayCalc stores a curved raked tier as an elliptical annulus sector. The format is understood and such a venue reads correctly, but nothing here generates one yet, so a curved balcony converts to a run of flat planes rather than a single swept surface.
04
Check the units before you check anything else
Only glTF and IFC state their units, and a DXF very often says "unitless". The size is guessed from the model's bounding box and the app tells you when it is guessing — but a wrong guess makes every distance in the venue wrong by the same factor, and it will look entirely plausible on screen.
05
Your drawing never leaves the machine
There is no backend and no upload. The model is read by the page from your own disk, converted in the tab, and the .dbacv is written back to your downloads folder. A venue drawing is somebody's building.
03 — PatchFerret (preview)
The show file already knows the patch. It just will not tell you.
Drop a console show file in and get the paperwork back out: an input patch list, a specification sheet and a wiring topology diagram, as PDFs you can put in a folder. It reads Behringer X32, Yamaha DM3, DM7 and TF, and Allen & Heath Avantis and dLive.
This is an early preview and still very much in development — the honest list of what it does not do yet is below, and it is longer than the list of what it does. The file is parsed and the PDFs are drawn in the page: there is no backend to upload a show to, which matters when the channel names are the performers and the scene names are the running order.
The repo's own X32 fixture: the show identified, its slots, strips and outputs counted, four documents ready to download, and the lines it did not model listed under conversion fidelity.
What it does
01
It follows the patch all the way through
The point
Getting from an XLR to a fader takes three hops on an X32 — a routing block maps eight connectors onto input slots, the channel picks a slot, and the preamp belongs to the connector. Assume channel 12 is fed by socket 12 and you get a confident, wrong patch list. In the test file, slots 25 to 32 are on the other AES50 link entirely and six channels reach no connector at all.
02
Head amps belong to the socket
Gain and phantom are stored against the connector, not the channel, because on a shared stage box that is what they are: one preamp feeding whoever is listening. A patch list that hangs gain off the channel quietly misrepresents which desks share it.
03
Your header, on every page
Logo, event, date, act, venue, production company, engineer and contact — none of which a console stores, so you type them once and they land on all three documents. Any key it does not recognise becomes another header field, so "Truck call" works without the tool knowing what one is.
04
It tells you what it could not read
The honest part
Every document carries a fidelity section listing what the adapter recognised but could not carry across. A show that converts with nothing in that list is one the tool genuinely understood; anything else says so on the page rather than leaving you to find out.
What to check before a show
01
It is a preview, and it reads much less than a console holds
Channel names, the strip inventory and the input patch come through. Head-amp gain, bus sends, EQ, dynamics and the output patch mostly do not yet. The reports say which, per file.
02
Nothing it prints has been checked against a console
The formats were worked out from real show files and, for Allen & Heath and Yamaha CL/QL, by changing one patch point in the manufacturer’s own offline editor and comparing the saved files. That pins the encoding. It is not the same as sitting at the desk with the printout and agreeing with its patch screen, which nobody has done.
03
It cannot write or convert show files
It reads. Converting a show between consoles is the reason the interchange format underneath exists, but no adapter can write yet — and at least two of these formats carry a checksum that would have to be solved first.
04
Some consoles are recognised without being understood
A Yamaha TF scene parses and names every channel, but none of its connectors resolve, because its patch field is one byte that selects a source class rather than a port. The tool leaves those blank and says why instead of inventing an XLR number.
04 — QuickDaw
Press record, and the last thirty seconds are already in the file.
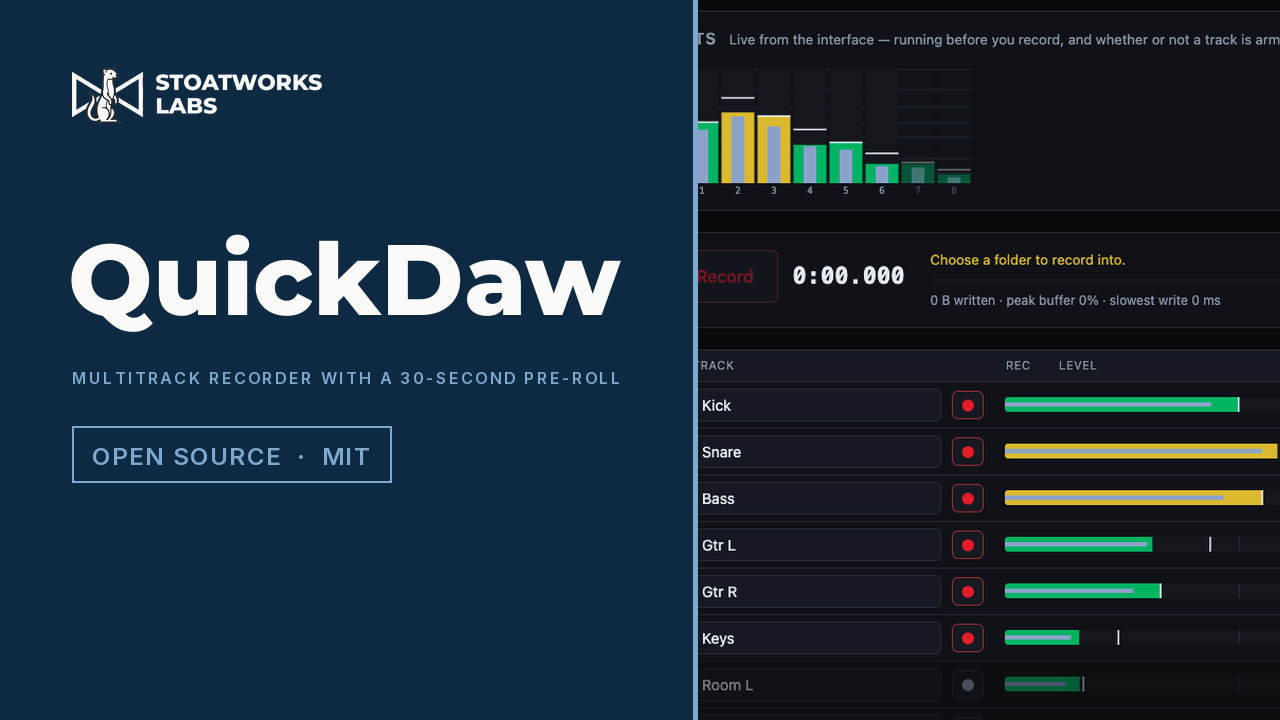
A multitrack recorder in a browser tab: one track per input on your interface, mapped 1:1, named and armed individually, streamed straight to a folder on your disk as mono WAVs.
The audio goes from the converter to the folder you chose and stops there — there is no backend to send it anywhere. The browser's echo cancellation, noise suppression and automatic gain are all switched off on the input, so what lands on disk is what the interface converted rather than the voice pipeline the browser would otherwise hand you.
Eight inputs from the built-in test signal, so this is the app metering audio it generated itself through the same worklet, ring and writer a live interface uses. Input 1 reads -18.0, because the generator's channel 1 is a 1 kHz tone at exactly -18 dBFS. That is the app agreeing with a number, which is the part worth photographing.
What it does
01
One track per input, mapped 1:1
The interface is asked how many inputs it has and the track list is built from the answer — no channel picker, no mapping to get wrong. Name each track, disarm the ones you do not want, and every armed input becomes its own mono WAV in a folder named for the take. Alongside them, a take.json recording the sample rate, the format, the length, how much of the head is pre-roll, and any gaps.
02
The take starts before the button
The point of it
Every input is held continuously — ten seconds to two minutes — so pressing record puts the audio from before the press at the head of the file. The soundcheck that turned out to be the performance is already on disk. It costs nothing to leave armed, because the pre-roll is not a second buffer: there is one lock-free ring shared with the worker writing to disk, and recording simply starts the writer at a read position that is already thirty seconds behind. Nothing is copied at the moment the take begins.
03
A gap costs content, never time
The honest part
If the disk stalls for longer than the buffer holds, frames are lost and nothing can prevent that. What this will not do is hide it: the hole is filled with exactly as many frames of silence as were lost, and its position goes into the take.json. Writing the surviving frames end to end instead would shorten every track by the same amount — perfectly in sync with itself, wrong against picture and clock, and impossible to find afterwards. The buffer readout during a take shows the fill, the worst fill, the slowest single write and any frames lost, so you can see the disk coping rather than hope it is.
04
A signal to check it with
A generated eight-channel test source, needing no interface and no microphone permission, running through the whole real chain. Input 1 is a 1 kHz tone at exactly -18 dBFS, so the meters can be checked against a number rather than admired — and a take recorded from it exercises the ring, the writer and the files exactly as a live one does. Three seconds, and it is the difference between believing this works and having seen it.
What to check before a show
01
No real multichannel interface has ever been connected to it
The buffer arithmetic is pinned by 80 tests — the ring across its 32-bit wrap and through a deliberate overrun, the WAV headers byte by byte, the 24-bit conversion against its own quantisation step — and the invariant that a take is the same length as the time it covers is tested by driving a producer and a consumer against each other through stalls. That is arithmetic. The channel mapping, the sample-rate matching, the disk throughput across many simultaneous files and the behaviour of hours-long takes are unproven against hardware. Record the test signal, then record something you can afford to lose, before you record something you cannot.
02
The files appear when the take stops, not during it
The browser stages a streamed write and moves it into place at close, so the take is on disk the whole time but is not visible as the file until you press stop. A tab that is killed part-way through leaves nothing behind. That is the price of the single-pass write that keeps the throughput up, and it is the same for anything that streams to a folder from a browser.
03
Chrome or Edge, on a desktop
Two things gate it. Streaming a take into a folder you choose needs the File System Access API, which Firefox and Safari do not have. And the recorder is built on a shared buffer, which a browser only grants to a cross-origin isolated page — the site sends the headers for that, but there is no version of this that works without it. Multichannel input above two channels is a Chrome capability, and how many channels a given interface offers a browser is up to its driver.
04
Levels are dBFS, and nothing here is calibrated
Peak, RMS and peak hold are all relative to full scale on the convention that a full-scale sine reads 0 dB. There is no SPL, no reference and no correction curve anywhere in it. The one number you can hold it to is the test signal, which is exact by construction.
05
It records and it plays back — it is not a DAW
No editing, no arrangement, no plugins, no overdubbing onto an existing take, no punch-in, no loop record. The armed set is fixed for the length of a take, because changing it means opening a file mid-recording and that track starting late against every other one. Playback is there so you can hear what you got: streamed from the files, with gain, pan, mute and solo per track.
05 — Blend Calc
The overlap is the part that costs money.
Define the projection canvas, set the array, pick a projector and a lens, and get the system resolution, the pixel budget for the doubled regions, the lens requirement per position, a PDF report and a Resolume Arena advanced-output file.
Everything is computed in the page and kept in local storage — no backend, no account, no telemetry. The projector and lens library is yours to edit, with JSON import and export, so it can hold the stock you actually tour with rather than a list somebody else curated.
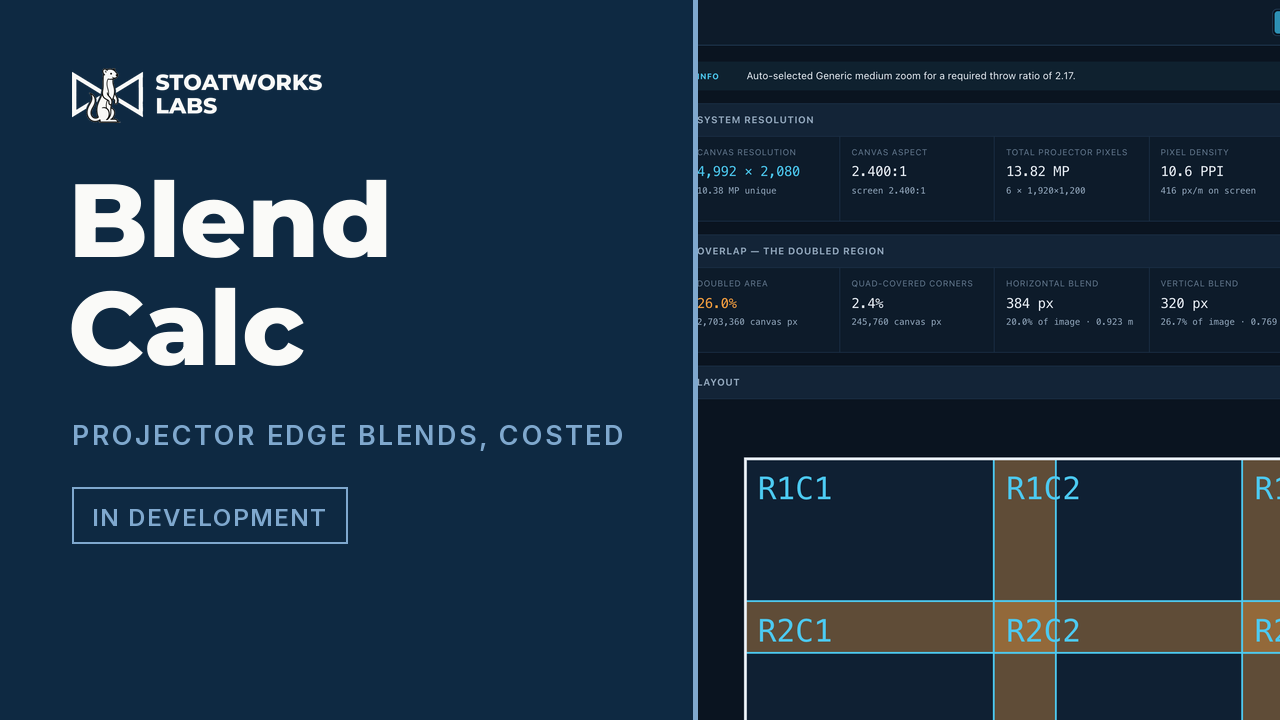
A 3 × 2 array on a 12 × 5 m screen: 26.0% of the canvas covered twice, 2.4% covered four times where the blends cross.
What it works out
01
Flat or curved
On a curve you give the arc width measured along the surface, the way a screen is actually built, and the radius; the wrap angle and chord fall out of that. The optics are not the flat maths with a fudge factor — you need a wider lens than flat suggests, and the image is shorter at the tile edges than at the centre.
02
The array closes on the screen
Pin one blend and the solver derives the other so the array lands exactly: fit width sets the horizontal and derives the vertical, fit height does the reverse. Manual mode reports the spill or the shortfall rather than quietly correcting it.
03
The doubled region
Blend bands are covered by two projectors, and where a horizontal and a vertical blend cross, by four. All three are reported separately, in canvas pixels and as a share of the canvas, with the redundant pixels — the ones you pay for twice and see once — totalled.
04
Throw and lens
Required throw ratio per column, the lens that covers it, where it sits in its zoom range, and the horizontal shift needed. Two placement models: one projector per tile on its own axis, or the whole array stacked at a common point, where off-axis tiles need shift and a curve changes the throw column by column.
What to check before a show
01
The shipped projector and lens data is seed data
It is flagged unverified throughout, badged in the UI and carried as a warning box on the PDF. Confirm lens coverage and brightness against the manufacturer datasheet, and the room against a site survey, before anything is ordered or quoted. The generic lens classes — "standard zoom, 1.3–1.8:1" — are honest by construction, because they describe a category rather than a product.
02
Every figure is geometric
It assumes square pixels, no keystone, no lens distortion, a perfectly built screen and zero optical losses. The luminance estimate is a ceiling in particular: it ignores lamp ageing, port glass and blend-region compensation.
03
The Arena file carries geometry, not soft edges
One Screen per projector, each with a slice covering that projector's share of the composition including its overlap. Blend parameters are deliberately absent — no reference file had blending enabled, and a guessed parameter name is worse than a missing one — so set the blend widths on each slice edge in Arena. The XML vocabulary was read off real files from an Arena 7.27.0 install, but it has never been round-tripped through a running Arena.
06 — Pixel Peeker
A wall that doesn't fit is a thing to find out in the office.
Lay out cabinets on a canvas, add processors, wire the ports, and see the load on each one, its headroom, and the highest frame rate it could actually sustain at that load — before anyone is standing in front of it on site.
This is the lite build: the design tool, the PDF report and the Resolume export — the parts with no caveats attached. The full build adds the NovaStar cabinet schedule, the LCT/VMP configuration brief and the JSON interchange file, and will replace this one here once it is ready.
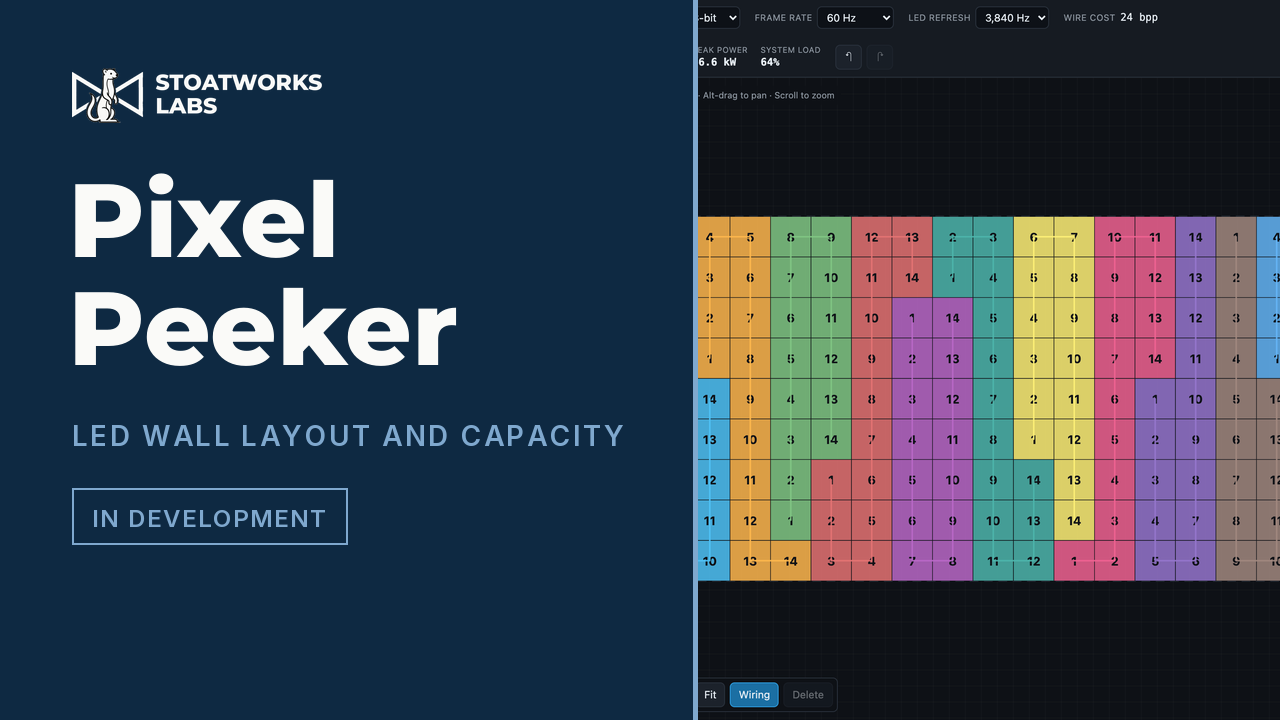
144 cabinets on one MX40 Pro, auto-wired: 11 of 20 ports used, colour-coded by port, 64% of the device's rated capacity.
What it does
01
Lay out a wall
Pick a cabinet from the library or define a custom panel by resolution and receiving card. Fill a canvas, build blocks, or place tiles by hand. Every record in the library was parsed out of the manufacturer datasheet it names as its source.
02
Wire it up
NovaStar and Brompton controllers with their real port counts, input connectors and device capacity limits. Auto-wire in serpentine or column order to a chosen fill limit, or patch ports by hand.
03
Then check it
Overlapping cabinets, unpatched tiles, over-capacity ports, a device that runs out before its ports do, an input too small to carry the wall, panels that cannot reach the refresh rate you asked for, and chains that jump around the wall.
04
Capacity maths that matches the datasheet
The point of it
Controllers pack each colour into a power-of-two container, so 10-bit costs 32 bits per pixel and not 30. With those containers a single 0.9500 link efficiency reproduces NovaStar's three published MX40 Pro per-port figures exactly. The usual spreadsheet formula overstates capacity by about 7% — in the direction that gets you into trouble.
What to check before a show
01
Alpha, and no wall designed here has been built
The capacity model is pinned in tests against published manufacturer figures, and it reproduces them to the pixel. That is not the same as site-proven: no processor, receiving card or panel has ever been connected to this, and nothing it has laid out has been rigged.
02
Check the cabinet against its own datasheet
Records carry a verified flag and a source, and unverified ones are badged in the UI and called out in the PDF. Receiving-card pixel limits specifically are conservative placeholders rather than verified figures.
03
The Resolume file's schema is verified; this arrangement isn't
Element names, nesting and number formatting were read off real files written by Arena 7.27.0, not guessed from documentation. What has not happened is this particular arrangement — one screen per processor, one slice per output port — being loaded into a running Arena, and Resolume change the format between releases.
07 — Negative Space
Three walls in a row are not one picture 1728 pixels wide.
Lay out LED walls or projection surfaces with their real dimensions and resolutions, say how far apart they are, and it works out the composite canvas including the blank pixels in the gaps. Content laid out across that canvas accounts for the space between the screens as though it were pixel surface — so a graphic crossing the stage goes behind each gap and comes out the far side at the speed it was really going, instead of jumping.
Everything is computed in the page and nothing you type is uploaded. The exports — the Resolume file, the guide plate, the starter deck, the CSV and the PDF — are all assembled in the browser and saved straight to your machine.
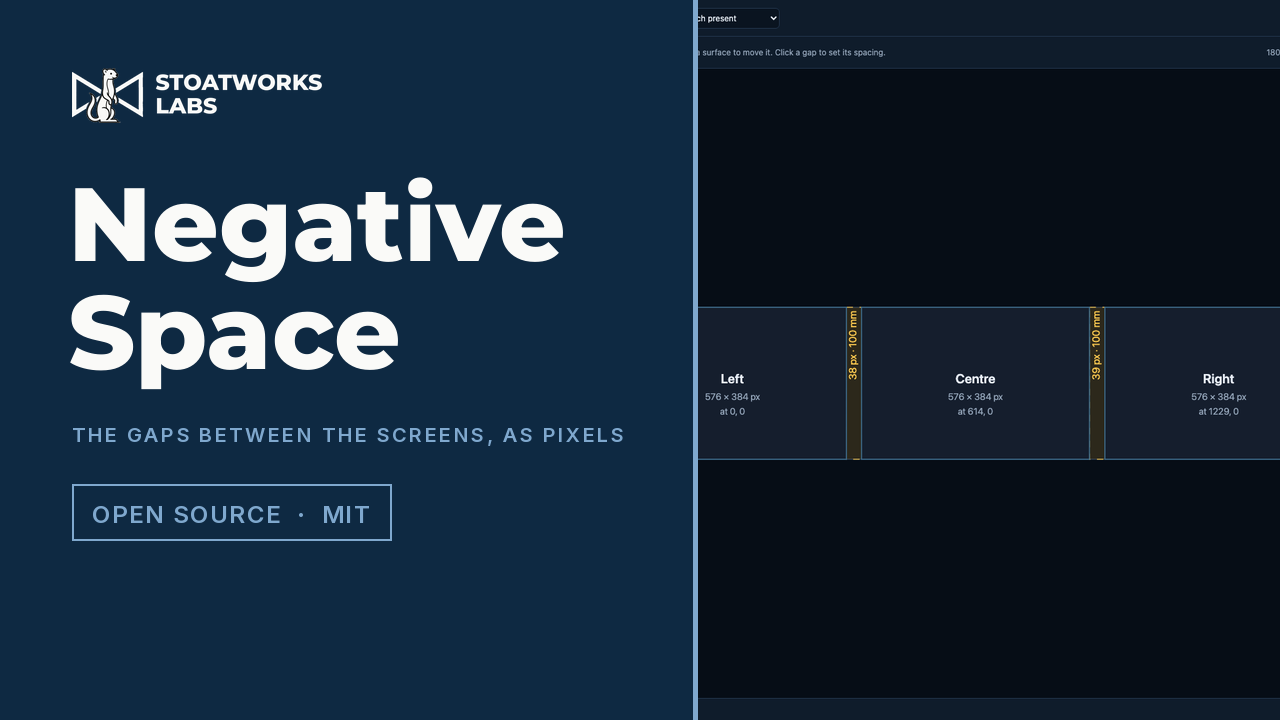
Three 576 × 384 walls on P2.6 cabinets, 100 mm apart: a 1805 × 384 canvas of which 29,568 pixels are gap — 4.3% of it — with each slice already offset past the blank columns, and the two equal gaps landing on 38 and 39 pixels.
What it works out
01
A canvas with the gaps in it
The point of it
Three 576 × 384 walls 100 mm apart composed as 1728 × 384 is the shape everyone builds and it is wrong: the composition has no idea the gaps exist, so anything moving across the array leaves the first wall and instantly appears on the second. The honest canvas is 1805 × 384, where the blank columns between the walls are composited into the dark. Out of it come the per-surface slice rectangles with the gap offsets already applied, so the Resolume composition and the input rects agree without anyone doing sums.
02
Pitch is almost never a round number
A cabinet sold as "P2.6" is 2.604166… mm, so the blank pixel count in a gap is a physical distance divided by a number with a tail on it, for every gap, with every later surface offset by the running total. Two equal 100 mm gaps can legitimately come out 38 pixels and 39 — each gap is rounded against its absolute position rather than independently, which is what stops the error drifting along a long row. The page reports the millimetre error it accepted on each one rather than hiding it.
03
Six ways out, all at the real raster
Resolume Arena advanced output, as the AdvancedOutput.xml and as preset forms. A guide plate in SVG and PNG at exactly the canvas resolution with the gaps shaded, to drop behind a PowerPoint slide or into After Effects and design against. PowerPoint slide geometry and a starter .pptx with the surfaces and gaps drawn on it. A CSV of every surface and gap. A JSON project file to save and reload. And a PDF report with a scale plan, for taking to site.
04
LivePremier pitch compensation
One Analog Way LivePremier screen spanning surfaces of different pitches needs each output told how much canvas its raster is worth, or a layer crossing between them changes physical size on the way. The two numbers per surface for Preconfig > Canvas > Pitch come from aquilon-pitch's engine, vendored as source — which carries the four things about the device that are easy to get backwards and still look right, each established by driving a simulator rather than by reading the manual: the ratio multiplies a raster to give its canvas footprint, so a coarser wall goes above 1.000; the field is an integer in thousandths from 0.100 to 10.000; an out-of-range write is discarded rather than clamped; and the footprint floors.
05
Ragged layouts still have gaps
Gutters are merged bands rather than adjacent pairs, which is what makes a layout that is not a tidy row still answerable: "the gap between A and B" stops meaning anything once the surfaces are staggered, but "the columns nothing lights" always does. Mixed pitches are handled too — the canvas defaults to the finest pitch present, so no surface is ever asked to show fewer pixels than it has.
What to check before a show
01
The Resolume XML has never been through a running Arena
The structure conforms to real Arena files and that is asserted in CI, but no slice has been round-tripped through Arena and put on a wall. Check one against the real output before trusting a show to it.
02
It gives a LivePremier the ratios, not the layout
A LivePremier lays its canvas out from each output's own area of interest, which nothing here can reach into. So the gaps that are the entire point of the canvas still have to be built on the device by hand, from the canvas rectangles shown beside each ratio. The ratios are the part that is solved.
03
Two equal gaps that differ by a pixel are correct
It looks like a bug and is the opposite of one. Rounding each gap against its absolute position rather than on its own is what keeps a long row from drifting, and the cost is that two identical physical gaps can land a pixel apart. The behaviour is pinned by a test so nobody tidies it away.
04
Those ratios are always built on the finest pitch
A reference below 1.000 would set the whole screen upscaling, so the finest pitch present is the reference. If the canvas pitch is set to coarsest or to a manual value the two canvases are different sizes, and the panel says so — the rectangles it shows there are rescaled to match the ratios and are deliberately not the pixel numbers shown elsewhere on the page.
05
The saved file is the project, not the answers
The JSON holds what you entered, never the solved outputs. Saving those would be saving a cache: reopened after a rounding change it would contradict what that version computes, with no way to tell which of the two was right.
08 — Dead Air (preview)
Find the dead air, then let Resolve do the cutting.
Drop a recording, set a threshold and a minimum gap, and every silence shades red on a loudness waveform. Export a cut list that DaVinci Resolve imports as the ripple-deleted timeline, a marker list to review the silences before anything is cut, an FCPXML for Premiere and Final Cut, an ffmpeg command — or render the cut file right there in the browser, with its own hardware codecs, streamed to disk.
An early preview. Resolve 20.2 and later have Ripple Delete Silence built in; this is for the review-first marker pass, batch prep, and cutting outside Resolve.Everything runs in the page and the recording is never uploaded. The browser decodes the audio locally; the exports are text files assembled in the page and saved to your machine.
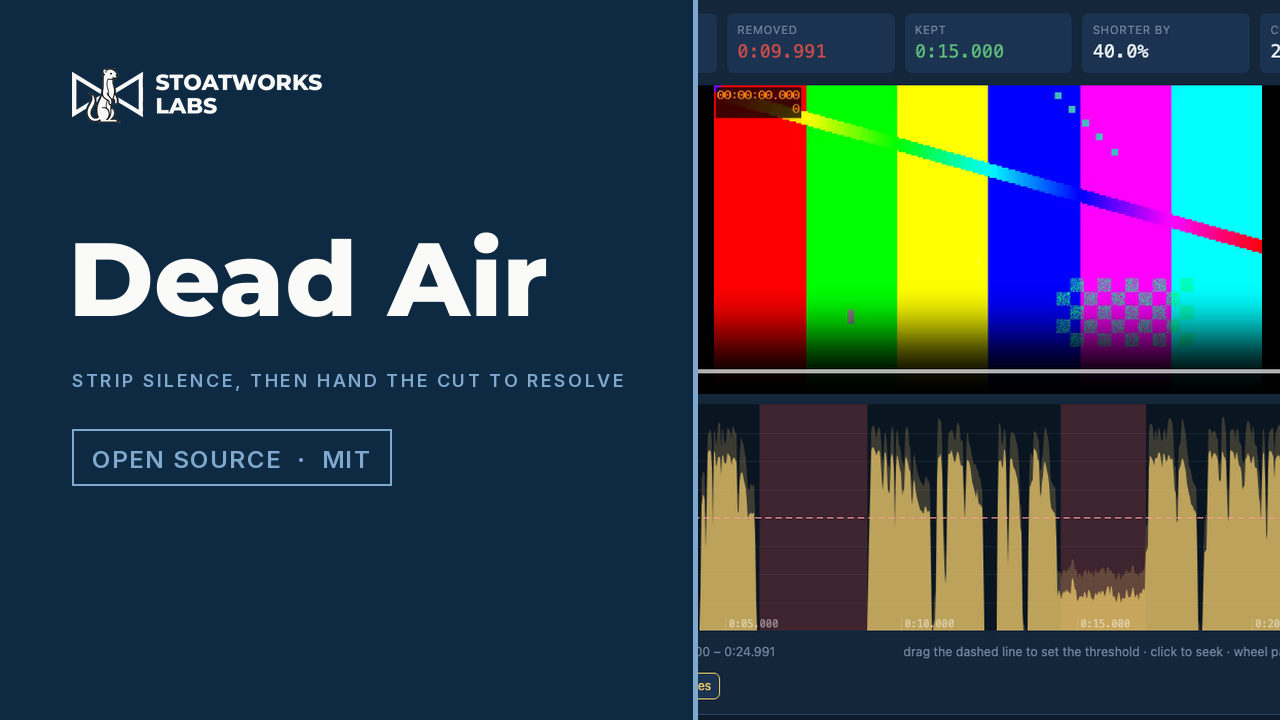
A 25-second test recording at 25 fps with a 01:00:00:00 timecode track: four silences found at −40 dBFS, ten seconds removed, three kept spans — and the same three events in the EDL Resolve imported.
What it does
01
A cut list Resolve links, not a rendered file
The point of it
The kept spans are laid end to end as a CMX3600 EDL whose source timecodes are offset by the clip's start TC, so File › Import › Timeline links every event to the clip already in the bin and the result is the ripple-deleted timeline with video and audio still linked. Nothing is re-encoded and nothing leaves the grade.
02
Review first, as markers
The marker EDL puts a coloured span on every silence and touches nothing else — Resolve reads it from the media pool's Timeline Markers from EDL. Step through them, delete the ones that are dramatic pauses, then cut. It is a level detector, and it does not know dead air from a pause for effect.
03
The timecode comes from the file
For MP4 and MOV the frame rate, the picture size and the start timecode are read from the tmcd track the way cameras and Resolve write it, from the box headers alone — a 40 GB ProRes file costs kilobytes. A phone recording has none and starts at zero, which is also what Resolve shows for it.
04
One decision, four files
The EDL, the FCPXML and the ffmpeg command are all written from the same frame-quantised spans, so they cut on identical frames whichever you use. Kept spans floor their start and ceil their end, so quantisation only ever keeps more, never less.
05
Or just make the file, in the page
The Render panel decodes the recording with the browser's WebCodecs decoders, re-encodes it with its H.264 and AAC encoders — hardware-accelerated where the machine has them — and muxes an MP4 on exactly the frames the EDL describes, streaming it to disk as it goes so there is no size limit. A 77-second 1080p file took seven seconds on an M-series Mac, and no ffmpeg build was downloaded to do it. The codecs are the browser's, so ProRes, DNx and MXF still go through the ffmpeg command.
06
Padding that never touches speech
A pre-head keeps quiet before speech resumes and a post-tail keeps quiet after it stops, so a word's attack and its ending survive the cut. Kept islands too short to be a word can be swallowed into the surrounding silence, and the silence at the very start and end is trimmed or kept as you choose.
What to check before a show
01
Verified on synthetic files
The cut EDL, the marker EDL and the FCPXML were imported into a running Resolve Studio 21.1 and read back frame-for-frame, and the ffmpeg command and the browser render each produced a file of exactly the expected frames with no silence left — on a 25 fps test recording with a synthetic timecode track and a 77-second 1080p H.264 file. A real camera file has not been through it yet.
02
Drop-frame is arithmetic-only
The 29.97 and 59.94 drop-frame conversions are tested against the standard minute and ten-minute boundaries, and a drop-frame MOV reads its 10:00:00;00 start correctly, but no drop-frame EDL has been imported into Resolve.
03
The browser holds the whole file
Decoding needs the entire file in memory, so anything over about 1.5 GB is refused with an ffmpeg command that extracts the audio to a WAV. Drop the WAV instead; the frame rate and timecode read from the original are kept. Codecs the browser cannot decode — most ProRes audio in MOV, MXF — need the same step.
04
Chromium only so far
Safari has not been tried. Its audio decoder and the sample-rate range of its offline audio context are the two things most likely to differ.
09 — Aquilon Pitch
One screen, two pixel pitches, and a layer that changes size at the join.
Work out the pitch compensation an Analog Way LivePremier needs when one screen spans LED walls of different pixel pitches. Type each output group's raster and its pitch — or its measured size, and let the pitch fall out — and get the H and V ratios to type into Web RCS, the canvas footprint each group will take, the screen canvas that results, and the millimetres the device's three-decimal field costs you at the far edge of each wall.
Everything is computed in the page and nothing you type is uploaded — a client's set design has nowhere to leak to. It has no socket and will not grow one: the AWJ frames a script would send are printed for you, and nothing here connects to a switcher.
A 2.6 mm main wall and a 4.0 mm side wall on one screen: the side wall wants a ratio of 1.53846…, the field holds 1.538, and across a 1920-pixel raster that is 1.85 canvas pixels short — 4.8 mm of real wall at the far edge.
What it works out
01
Which way the ratio goes
Measured, not read
The manual gives pitch compensation four sentences and does not say which way round the ratio is. The ratio multiplies a group's raster to give its footprint on the canvas, so a coarser wall gets a number above 1.000 — established by writing pitchRatioH = 2000 to an output of a running LivePremier simulator and reading a 1920 × 1080 output back as 3840 × 2160. Fourteen such pairs are pinned as tests.
02
The finest wall is the reference
The ratio scales a raster up into canvas pixels, so the reference should be the group with the most pixels per millimetre: every other group is then handed more canvas than it has pixels and scales down, which a video processor does well. Pick a coarse group instead and the finest wall in the room spends the whole show upscaling. The tool defaults to the right one and says so when you override it.
03
What the field will actually hold
Integer thousandths, 0.100 to 10.000, three decimals and no more — and an out-of-range write is discarded, not clamped. The device says nothing, and the operator is looking at a field that still reads whatever it held before. So the tool refuses a ratio the switcher will never take rather than quietly reporting one it clamped.
04
The device floors, and it costs a pixel
pitchedWidth = floor(raster × ratio / 1000), measured four separate times against the values rounding would give. With the three-decimal field, that is where the drift comes from — and the tool reports it per group per axis, in canvas pixels and in millimetres on the wall, because that is the number that decides whether the rounding matters.
05
The screen drawn twice
The walls in the room above, the canvas below, at the same scale, so a mapping that is not uniform is visible rather than inferred. Alongside: the screen canvas the design needs, a plain statement when a blocked group makes it unachievable as specified, a CSV for the show folder, and the AWJ frames.
What to check before a show
01
Nothing here has touched physical Aquilon hardware
The arithmetic was driven into a running AW LivePremier Simulator 6.2.73 and read back off the wire, which runs the same web application and object model as the switcher — but it is not the switcher, and no pitch-compensated screen built from this has been driven onto real LED walls.
02
It gives you the ratios, not the layout
A LivePremier lays its canvas out from each output's own area of interest, which nothing here can reach into. The ratios are the part that is solved; the canvas rectangles shown beside them are what you build on the device.
03
A ratio written alone does nothing
If you do script it, xUpdate is not optional: writing a ratio on its own moves the command value and leaves the canvas exactly where it was. Verified, and the reason the printed AWJ frames include it.
10 — Aspect Calc
Nobody has ever ordered a 43:18 monitor.
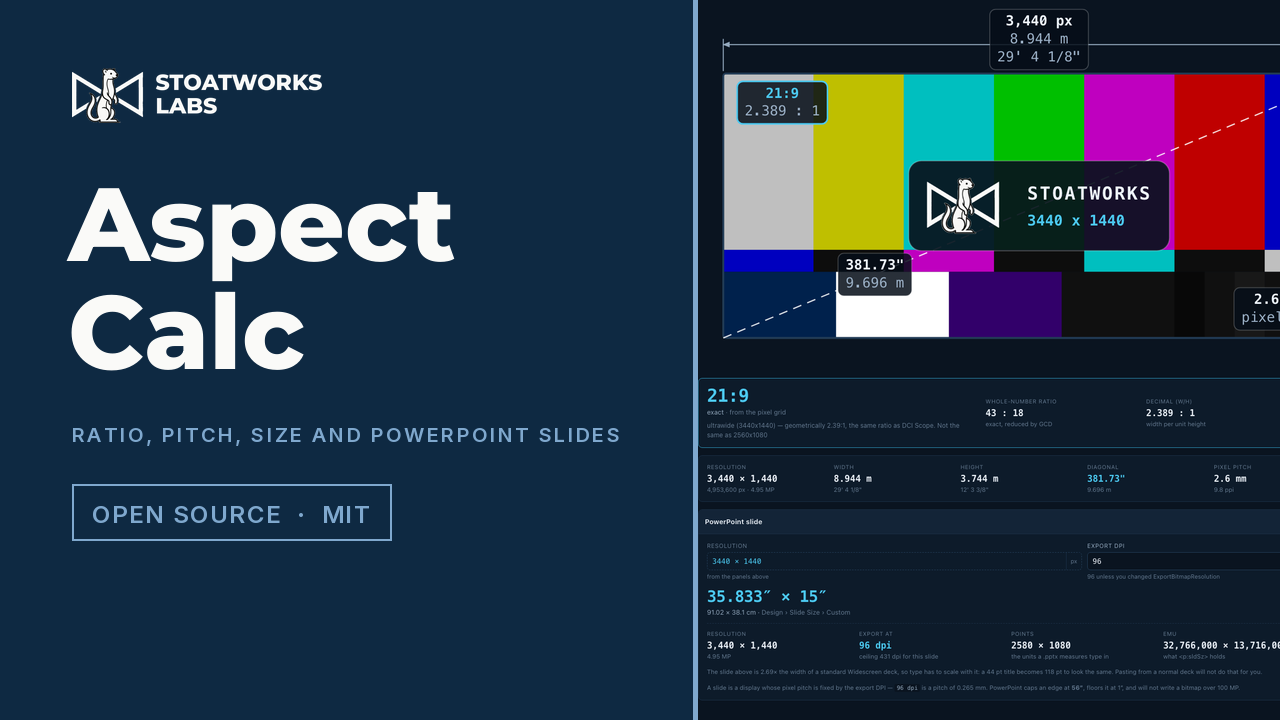
Resolution × pixel pitch = physical size. Give it any two and it works out the third — then names the ratio the way the trade names it, and tells you how far off that name actually is. It sizes PowerPoint slides on the same arithmetic, in either direction, limits and all.
Everything is computed in the page, and the state lives in the URL hash rather than on a server, so a calculation can be pasted into an email and opens showing what the sender saw. Nothing you type leaves the tab.
3440 × 1440 on 2.6 mm cabinets: nine metres of wall, the ratio named, the arithmetic it was named from sitting next to it — and the PowerPoint slide that fits it, at 35.833″ × 15″.
What it works out
01
Any two give the third
One relation, three panels, and the one being solved is marked calculated. Type into that panel and it becomes an input instead — whichever group you touched longest ago takes over as the answer. So pitch from a resolution and a size, size from a resolution and a pitch, or the resolution a size and a pitch imply.
02
It names the ratio properly
The point of it
3440 × 1440 reduces exactly to 43:18, which is arithmetic rather than an answer — it is sold as 21:9. So is 2560 × 1080, which is 64:27. They are 0.8% apart, and it names both and then tells you which one you are holding. Two lookups do it: trade names keyed on the exact reduced fraction, then nearest-by-decimal with the deviation always stated.
03
A near miss is never called exact
1366 × 768 reduces to 683:384, which is not so much a ratio as an accusation. The useful answer is 16:9 — and the honest one is that it is 0.049% off, which is what it says. A whole-number input that did not match a fraction exactly is reported as nominal, with the error, every time.
04
Pitch that matches the cabinet
Pitch is centre-to-centre and every pixel owns a full cell, so physical width is horizontal pixels × pitch. A 168 × 168 cabinet at 2.9 mm is 487.2 mm square, not 484.3. The other convention loses one pitch across a whole wall — invisible in a spreadsheet, very visible when the last cabinet does not fit the frame. Units are read as written, too: 2500mm, 8′ 2 1/2″ and 16ft 4in all parse, and an explicit unit beats the dropdown.
05
PowerPoint slide sizes
A slide is a display whose pixel pitch is fixed by the export DPI, so the same relation solves it: slide size × DPI = pixels, either direction, reported in inches, centimetres, points and EMU. What makes it worth working out for you is that PowerPoint caps a slide edge at 56 inches and a 7680-wide wall wants eighty — so it picks the divisor and the export DPI that land back on the exact pixel count, and says when a shape is too steep to be a slide at all. For a 16:9 target it will usually tell you not to resize the deck: leave it on Widescreen and export at 288 dpi, and every template, master and point size stays where it is.
What to check before a show
01
The colour bars are a picture, not a signal
The pattern is stretched to whatever aspect you are looking at, which is what a real generator does, and the values are the standard 75% bars — but they are not colour-managed and this is a browser. It is there to show you the shape of the display. Do not grade against it.
02
Pitch presets are trade names, not datasheet figures
A product sold as "2.6" is usually 2.604 or 2.5 exactly depending on who made it. The dropdown is there to save typing; put the real figure from the datasheet in before you commit to a cabinet count.
03
Solving for resolution rounds, and says by how much
Ask it for the pixel grid behind a physical size and the answer has to land on whole pixels, so the size you get back is not quite the size you asked for. It reports the difference in millimetres rather than hiding it — but if the wall has to finish on a cabinet boundary, choose the resolution and let it tell you the size, not the other way round.
04
PowerPoint has two 16:9 slide sizes and they are not the same size
Widescreen is 13.333 × 7.5 inches. On-screen Show (16:9) is 10 × 5.625, which is also what Google Slides defaults to. Both are exactly 16:9 and they are a third apart, so a deck moved between them keeps its shape and loses its type scale. It reports a size and never just a ratio — and the presets carry the exact figures, because the dialog displays 13.333 while the file stores 40/3, which is a measurably different slide.
05
Nothing is uploaded, and there is nowhere to upload it to
No backend, no account, no telemetry. The state is kept in the URL hash and in local storage on your own machine, which matters here because a screen size and a pixel pitch are the shape of somebody’s unannounced set.
11 — Test Card
The fastest way to find out the output map is wrong.
Import the file that already describes the outputs — a Resolume advanced output, a Pixel Peeker wall, a Blend Calc array — and get a test pattern for every physical output, each at that output's own raster.
Everything is rendered in the page and downloaded from it; no file of yours is uploaded. The importers are honest about what each format does not carry, and anything the app had to infer is badged in the UI and written into the manifest rather than quietly assumed.
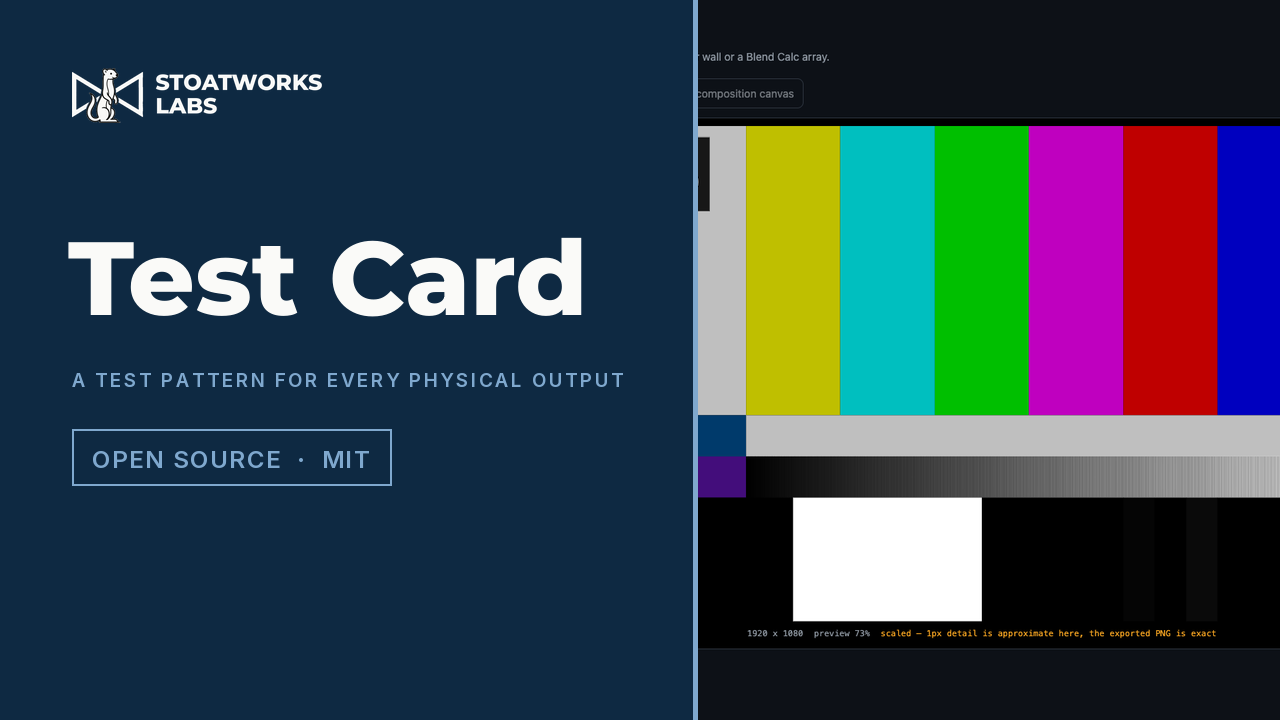
SMPTE RP 219 at 1920 × 1080 with the output name and resolution burnt in. The preview says it is scaled and that the exported PNG is the exact one — the app will not let a resampled preview pass for the file.
What it makes
01
Eight patterns
SMPTE RP 219, 75% bars, a grid on your own pitch, alignment marks, LED tiles, solid fields, greyscale ramps and a 1px pixel check. Each can carry a burn-in — output name, resolution, pattern, your own text — and can draw the imported slice or port outlines on top.
02
RP 219 measured, not transcribed
The point of it
Published descriptions of RP 219 disagree with each other and mostly omit the code values, so the geometry and colours were measured off a real generator instead. Two traps there each produce plausible, wrong output: decoding HD to rgb24 applies a BT.601 matrix, which turns 75% yellow into 189,202,7 instead of 191,191,0 — and default chroma upsampling smears the band edges. Anything built by sampling that inherits the error.
03
One file per output, or one for all of them
A PNG per output at its native raster — one downloads bare, several as a ZIP with a manifest recording which file is which output, the level range, and any raster the app had to infer. Or a single composition-sized canvas with each output's region drawn and labelled: play it out and every screen should show its own name.
04
It asks which range you mean
Bars are defined in Y′CbCr, a PNG is RGB, and a PNG cannot record which convention it was written in — so the app asks and puts the answer in the manifest. Full 0–255 for a media server or GPU output; legal 16–235 for an SDI chain, where sub-black survives and the pluge is actually judgeable.
What to check before a show
01
A Resolume raster can be inferred, and inference can come out small
One output per Screen. Where the file records an output device the raster is read from it; where it does not, the raster is inferred from slice bounds and can land smaller than the real output. Inferred rasters are badged in the UI and named in the manifest — correct them by hand before you render.
02
Pixel Peeker needs its JSON export, not the project file
Use Export → JSON. The project file stores cabinets as library references in millimetres, which cannot be resolved to pixels here, so it is refused outright with a message naming the right export rather than being half-read.
03
Blend Calc designs are missing two numbers by nature
The projector resolution is not in the file, and neither is the solved overlap — Blend Calc computes that and never writes it back. Both are asked for. Its Resolume XML export needs neither and is the better file to bring.
04
The preview is scaled; the PNG is not
The on-screen preview is resampled to fit, so 1px detail — the pixel check especially — is approximate there and says so. Judge those patterns from the exported file on the real output, which is the only place a 1:1 pixel test means anything.
12 — Wallslide
PowerPoint will not make an eighty-inch slide.
Type the wall's resolution and get a template that is actually its shape and its size — themed with the event's own colours, fonts, logo and background, and, if you want one, a deck of test patterns rendered at the wall's native raster. The arithmetic that makes an oversized wall fit a format that caps a slide edge at 56 inches is the part people get wrong in both directions, and it is done for you.
Everything happens in the tab. There is no backend, so a client's unannounced logo has nowhere to be uploaded to — the .pptx is assembled in the page and saved straight to your machine. Fonts are named by the theme rather than embedded, so check the playback machine with PowerPoint Font Manager before the show.
A 7680 × 1080 wall at 96 dpi wants an eighty-inch slide, and the format caps an edge at 56 — a schema limit, ST_SlideSizeCoordinate topping out at 51,206,400 EMU, rather than a dialog being fussy. So the deck gets built at 16:9 and stretched, or built at close enough and letterboxed, and the first anyone knows is at the tech rehearsal. Wallslide builds at half size and records the export multiplier. The build scale is always a whole number or a whole reciprocal, because "build at half and export at 200%" is an instruction a person can follow at 2 a.m. and "build at 1/2.37" is not.
02
Keynote's limits are not PowerPoint's
Measured by asking Keynote until it refused, not taken from documentation: Keynote runs 200 pt to 8192 pt where PowerPoint runs 72 pt to 4032 pt. A 7680 px wall is 5760 pt, which PowerPoint must halve and Keynote simply holds at 1:1 — no build scale, no export multiplier, nothing to get wrong. The floor runs the other way: a 1080 × 160 ticker strip is legal in PowerPoint and impossible in Keynote at native size. That is a real reason to choose one application over the other for a given wall.
03
A template, not a deck
Twelve theme colours and two font names in theme1.xml, a slide master and four layouts — Title Slide, Title and Content, Title Only, Blank — with the event's logo and background on the master where they can be changed in one place. An organiser changes the theme and the whole deck follows, which is the entire reason to ship a template. Master text styles are scaled by the slide's width against PowerPoint's 13.333″ default, because a forty-inch slide with 44 pt titles has titles a third of the size anyone intended.
04
A safe area measured in cabinets
Where part of the wall is masked, the insets are given in wall pixels — the reason is physical, and "the bottom two cabinets are behind the band" is measured in cabinets rather than in percentages. Every placeholder in every layout moves inside them.
05
Test patterns at the wall's own raster
Optional, rendered at the native pixel count and placed full-bleed with the master's shapes suppressed, because a test pattern with a logo on it is a picture of a logo. Every pattern is labelled with what it reads: most diagnose the wall, two diagnose the chain. A 1 px checkerboard that comes back flat grey means something between PowerPoint and the panels is scaling — worth knowing, and not a fault in the wall. A deck that does not make that distinction is how somebody spends midnight re-terminating a healthy wall.
What to check before a show
01
It does not write a .key file, and will not
Keynote's format has been IWA since 2013 — Snappy-compressed protobuf in an undocumented schema. Wallslide serves Keynote the two ways that work instead: open the generated .pptx in it, which imports and keeps the slide size, or type the two numbers it gives you into Document Setup.
02
This is not Test Card, and should not become it
What is here is the subset of patterns that survives a trip through a deck. Test Card is the serious generator — RP 219 measured against ffmpeg's own smptehdbars, real cabinet maps imported from Pixel Peeker, PNGs at the exact raster of every physical output. RP 219 is deliberately absent here: its whole value is that the fifteen colours are exactly right, and a pattern whose point is exact colour should not be sent down a path that may colour-manage it. The bars here are plain 75% bars and are labelled as such.
03
Fonts are named, not embedded
The theme asks for a typeface; it does not carry one. Embedding is licence-encumbered and Mac PowerPoint does not honour it, so a template that claimed to embed would be lying on one of the two platforms an event runs on. The themes also carry no script fallback table, which is what stops a two-font deck reporting thirty-nine — the cost is that a deck meant to carry Japanese or Devanagari needs its theme fonts set to a face that covers it, because there is no curated fallback to rescue it.
04
The slide is the right size; the playout is not tested
Four decks have been opened in a real PowerPoint and a real Keynote on macOS with no repair prompt, slide widths reported as 40.00″, 20.00″, 11.25″ and 40.00″ against exactly the computed values, and a full-bleed picture measuring 2880 × 810 pt on a 2880 × 810 pt slide. No deck produced by this has been played out to a real LED processor or wall and measured. What a playback machine and a processor then do with the picture is not something this can tell you.
05
A well-formed file is not a file PowerPoint opens
Every XML part is parsed by xmllint in CI and the unit tests prove the package is a well-formed ZIP of well-formed XML — and the gap between that and "PowerPoint will open it" is where every OOXML bug lives, for a format whose failure mode is a dialog that names no reason. That gap gets closed by hand, with sample decks opened in the real applications.
13 — Otter EDID Editor (beta)
Making an EDID is the easy half. Knowing what will accept it is the other one.
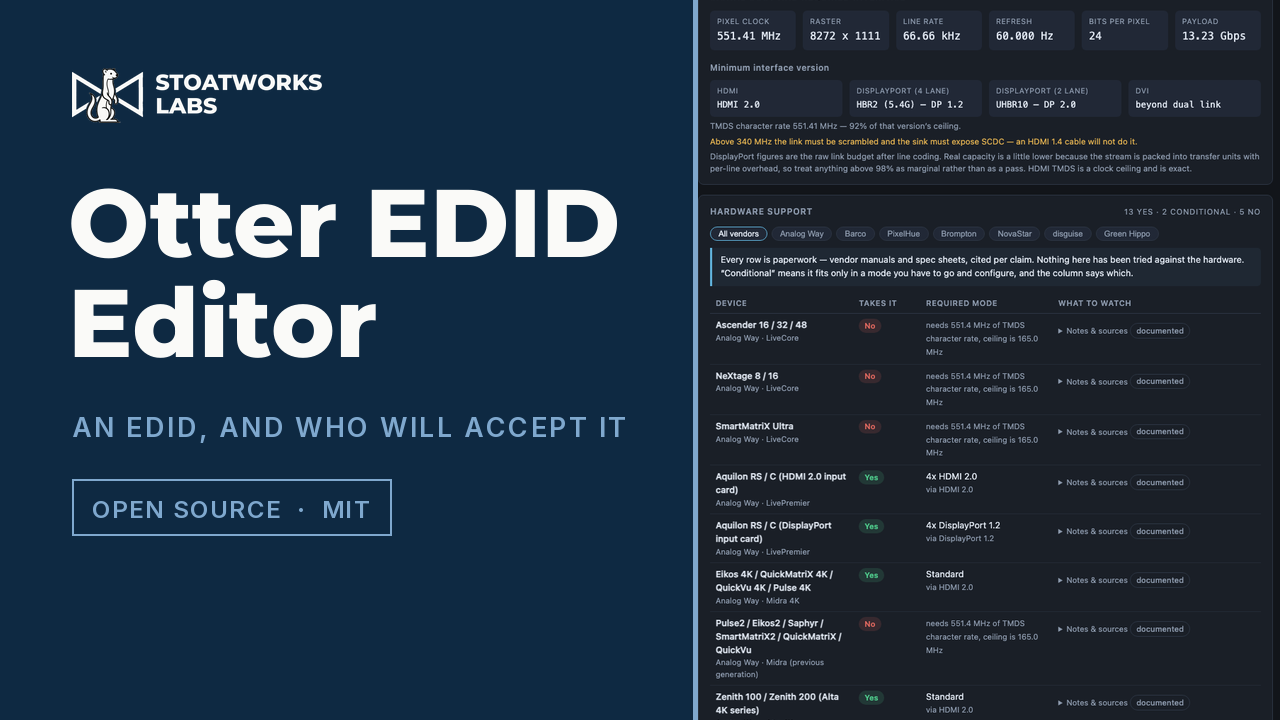
Type a resolution, a refresh rate and a name, and get a complete, valid EDID — or open every field and edit one by hand. Then the part that usually costs an afternoon and a rack of test gear: the smallest HDMI or DisplayPort version that carries the mode, and twenty-one models of event processor answering yes, no, or which input mode you would have to configure first.
It is a beta. The arithmetic is tested hard and the honest gap is stated on the page: no EDID this tool has produced has been fed to a real processor, and the compatibility table is built from vendor manuals rather than from bench results. Nothing is uploaded — an EDID never leaves the tab, and there is no server for it to leave to. Product names are used to state compatibility only; not affiliated with, endorsed by or supported by any of the manufacturers named.
An 8192 × 1080 wide format at 60 Hz. The panel on the left explains that this mode cannot be a detailed timing descriptor — not because it is too fast, but because 8192 will not fit a 12-bit field — so it is carried in a DisplayID block instead.
What it does
01
A resolution in, a whole EDID out
Simple mode writes the mode as a detailed timing, a range-limits descriptor sized to it, the name where every input menu will read it, and a CTA-861 extension carrying the standard video code when the mode has one. Pick the timing standard or let it choose — a mode that is a broadcast raster is generated as that raster, not re-derived from a formula that would give a different one.
02
Or every field, by hand
Advanced mode is the whole structure: identity, video input definition, chromaticity, established and standard timings, all four descriptors, the CTA-861 extension — video and audio descriptors, the HDMI and HDMI Forum vendor blocks, HDR metadata, colorimetry, 4:2:0 maps — and a DisplayID 2.0 extension. Open a .bin or paste a hex dump from anywhere and edit that instead.
03
The minimum interface that carries it
The point of it
Pixel clock, raster, line rate and payload, and from those the smallest HDMI version that will do it — 1.0–1.2, 1.3/1.4, 2.0, or which fixed-rate link — plus the DisplayPort rate at four lanes and at two, and whether DVI needs one link or two. 4:2:0 halves the character rate and drops 4K60 onto an HDMI 1.4 link; ten-bit pushes the same mode past 600 MHz and off TMDS altogether. Both are one dropdown away.
04
Twenty-one processors, and the mode you have to set
Cited per claim
Whether a processor takes a mode is rarely a plain yes or no. A dual-link input can cost you the neighbouring one. A 4K60 input can mean two cables carrying half the picture each. A card can be four inputs or two, depending which version of the port you switch it to — and which two ports survive is not always in the manual. Each row names the mode required and what it costs, and carries the document it came from, quoted, with the date it was read.
05
Compression and variable refresh, as switches
DSC and variable refresh are toggles, and both are real: they change the bandwidth arithmetic, they change which interface version is required, and they are written into the EDID itself. Turning compression on correctly makes every older HDMI input in the table say no, because a compressed stream only travels over a fixed-rate link.
06
It will open what you already have
A .bin, or a hex dump pasted out of xrandr, edid-decode, xxd or a C header — it works out which it is. A bad checksum is reported and the file is parsed anyway, because the dump off a device that is misbehaving is exactly when you need to look inside it.
What to check before a show
01
It is a beta, and this is the reason
No EDID this tool has produced has been fed to a real processor. What is proven is everything that can be proven without one: the timing generators reproduce published VESA values exactly, the DisplayID descriptor layout was checked byte for byte against a reference parser, and every EDID it builds survives a full round trip back through its own decoder. Eighty-two tests. None of that is the same as a switcher locking to it.
02
The compatibility table is paperwork, and says which kind
Every figure comes from a vendor manual or spec sheet, quoted and dated in the app. Each device is graded: documented where the vendor states the number, inferred where it follows necessarily from one they do state, and unverified where it is neither — one row is a deliberate placeholder with no source at all and is labelled as such. Nothing in it has been confirmed against hardware.
03
DisplayPort numbers are the link budget, not the last word
The DisplayPort figures are the raw signalling rate after line coding. Real capacity is slightly lower, because the stream is packed into transfer units with per-line overhead that depends on the blanking, so a mode landing within a couple of percent of a rate boundary is marginal rather than a pass — and the app says so when it is. HDMI is a clock ceiling and is exact.
04
The manufacturer field is somebody’s registered code
Those three letters are a registered identifier, and writing a real vendor’s into an EDID you invented makes a device report the wrong maker. The default is deliberately not a registered one, and the field says so where it is edited.
14 — Will My Show Fit? (beta)
The input count is not the question. Whether every signal has a plug it can actually travel down is.
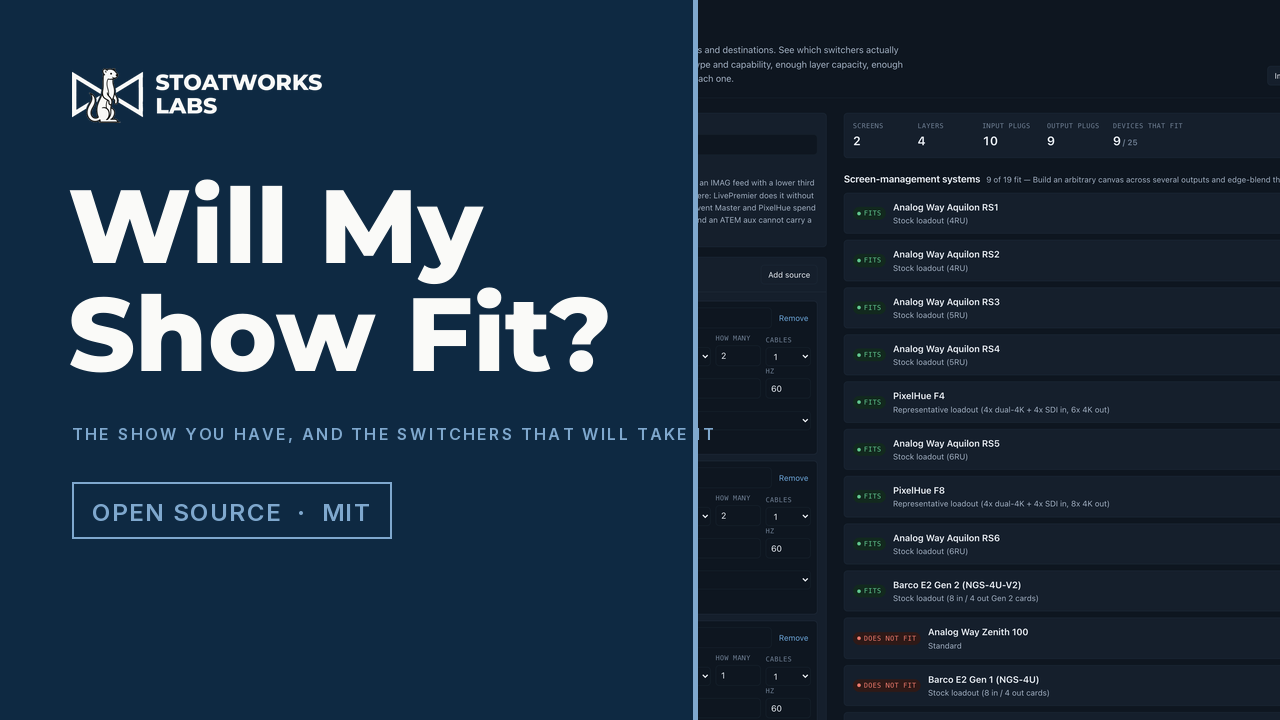
Describe the show — the screens and their canvases, the layers on each, every source with the connector it really has on the back of it, every destination that needs feeding. Thirty-seven machines are then checked properly: a specific plug found for every signal, the format checked against what that plug can carry, the layers spent against each manufacturer’s own arithmetic. Then a wiring topology for each one that fits.
A beta, on its own domain at willmyshowfit.com. Nothing is uploaded — the show stays in the tab, and export writes to a file you pick.
Twelve inputs and twelve sources is not an answer. Four cameras wanting the two SDI inputs is a no, and no amount of counting will see it — so every signal is matched to a specific connector, with the format checked against what that connector carries. A 4K60 source does not go into an older HDMI plug; 4:4:4 does not go down SDI; a DisplayPort link budget is checked as well as its clock.
02
Knows which sockets are not really separate
One popular chassis has outputs that look like two sockets on the back panel and are one signal on two connectors, and inputs where two sockets are an either-or. Counting the sockets overstates that machine by a third. Both cases collapse to one output, and the patch list says which connector to use and what the other one is doing.
03
Spends layers in each machine’s own units
One manufacturer charges a 4K mixing layer twice what it charges its smaller one. Another’s ladder runs one to two to four. A third budgets layers per output card, so a machine advertising sixteen of them still cannot put three on a screen that lives on one card. None of it is averaged into a house rule — the difference is usually the thing that decides the answer.
04
Treats layers on aux as a capability, not a preference
One switch, and it splits the field three ways: machines that build layers on an aux without touching the main layer budget, machines that charge exactly what an on-screen layer costs, and machines where an aux is a clean feed that cannot carry a key at all. With the switch off they all look alike. With it on, the shortlist changes.
05
Proposes the patch, and says where an adapter will do
Every machine that fits gets a wiring topology: which signal on which plug, which runs need a passive adapter and what that costs you, which signals arrive on more than one cable and have to be combined in configuration rather than just patched, and what is left spare. Machines that do not fit get the reason instead.
06
Suggests a card loadout when the stock one misses
For the chassis built from swappable I/O cards, a miss is only half an answer. The catalogue is searched for the smallest set of cards that would take the show, and the suggestion comes with the wiring that follows from it. It is capability-aware in both directions: five 1080p sources get one eight-plug card rather than two four-plug ones, and a single source gets a small card rather than the big multi-format one that merely has the right socket on it.
07
Saves, loads and prints
The whole configuration round-trips as XML that a person can read and hand-edit; a file with a mistake in it imports as far as it can and lists what it could not read rather than throwing away everything else. The answer prints as a report — input list, output list, compatibility matrix, topology, and every source behind the verdict — as a page or a standalone HTML file.
What to check before a show
01
Nothing here has met any hardware
That is the beta, and it is on the page rather than buried. The engine is tested hard — fifty-five tests covering the timing arithmetic against published figures, the connector matching including the cases a straight count gets wrong, dual-cable rate splitting, layer costing, every way a capacity budget can be scoped, the card-loadout search, and the file round trip. None of that is the same as a show built from a topology it proposed, and none has been.
02
The device database is paperwork, and says which kind
Every figure is read from a manufacturer’s manual or spec sheet and carries that document, quoted and dated, in the app. A test fails the build if anything claims to be documented without naming its source. Figures that could not be sourced are marked unverified rather than guessed at — one layer count is exactly that, because its manufacturer publishes none.
03
Two manufacturers’ own documents contradict themselves
One spec sheet duplicates its aux paragraph into the row that should describe layers, so that row says nothing; the figures come from a different section of the same document instead. Another disagrees with itself about how many output slots a chassis has, between its body text and its own diagram. Both are recorded with the discrepancy stated, and the second says to confirm against the chassis before ordering.
04
A suggested card loadout is a starting point, not an order form
The machines built from swappable I/O cards are profiled as they ship, and where that misses, the catalogue is searched for the smallest set of cards that would take the show. Slot-position rules are not modelled — some manufacturers require particular cards in particular slots, and one range's multi-format card carries six connectors but is capped at two of them at 4K60 — so a suggestion is a starting point to check against the manufacturer's own slot diagram, not an order form.
05
The four sockets on a card are not always the same socket
One manufacturer's output card has four HDMI connectors where the top two run to 297 megapixels a second and the bottom two stop at 165 — so a chassis advertising eight HDMI outputs really has four that carry 2560x1600 and four that do not. The chassis documentation quotes only the higher figure; the split is published on a different sheet, for a different product. This tool had the optimistic reading until one of its own tests disagreed with it, which is roughly the point of having them.
06
A canvas budget is not the same as a layer budget
Several machines meter total canvas or throughput separately from layer count, and offer more of it if you give up preview or the multiviewer. Where a show only fits that way it is reported as a trade-off with the cost spelled out, not as a pass — cutting a show blind is a decision, not a configuration detail.
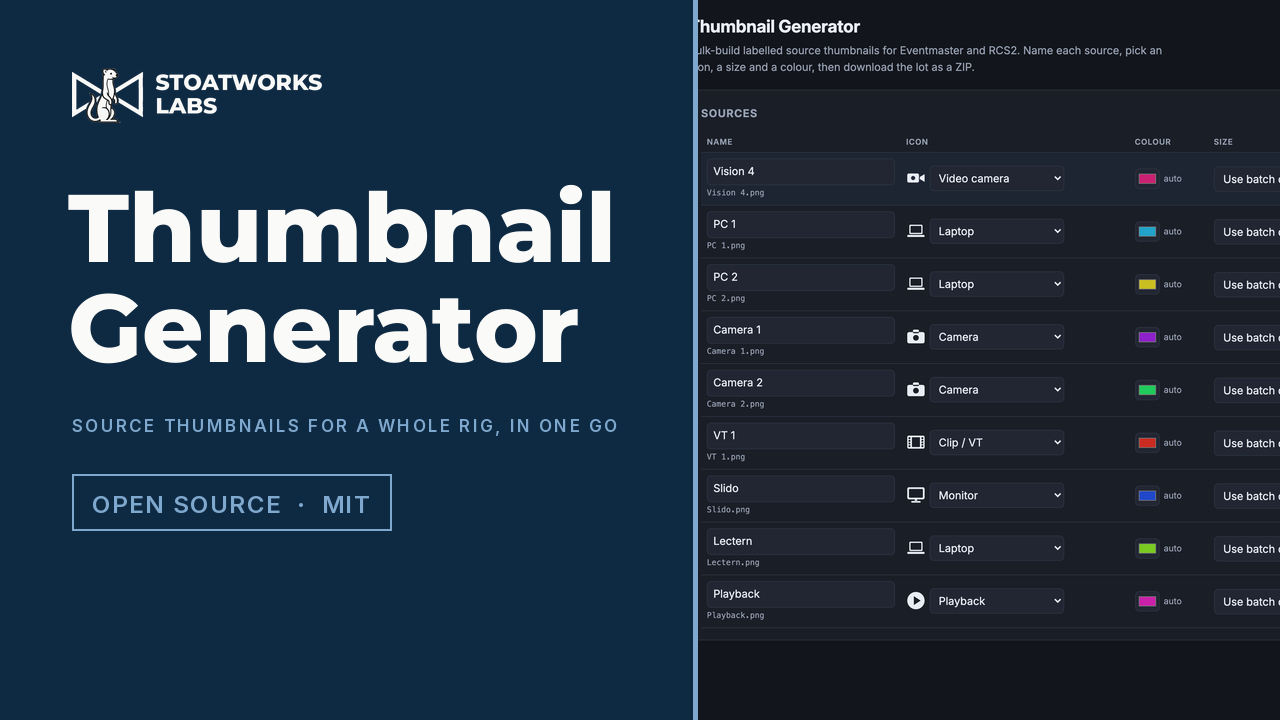
15 — Thumbnail Generator
Forty source thumbnails, from the list you already have.
Paste the patch list, give each source an icon, a size and a colour, and download a ZIP with one labelled thumbnail per source — named after it, ready to load onto an Eventmaster or an RCS2.
Everything is drawn in the page and downloaded from it; no list of yours is uploaded. The batch is kept in local storage on your own machine, because a source list is the shape of somebody’s unannounced show.
One card at 1920 × 1080: a radial gradient in the source’s colour, the icon knocked out of it, and the name underneath. The dimension label and the footer are both optional.
What it makes
01
A list in, a folder out
The point of it
Paste a column straight out of a patch sheet — newline or comma separated — and every line becomes a card. The label on the card and the name of the file are the same string, so a thumbnail is identifiable from the filename alone, and the ZIP carries a manifest.csv matching file to source, size and colour.
02
Nineteen icons, drawn to be filled
Camera, video camera, projector, monitor, laptop, desktop, tablet, phone, USB stick, drive, playback, clip, slides, microphone, speaker, server, network, web — or none. They are drawn as solid silhouettes rather than borrowed from an icon set, because icon sets are drawn as 24px strokes and turn to mush filled at 250.
03
Whatever raster the frame wants
1080p by default, and per source you can override it with a preset, an exact pixel size, or an aspect ratio and a long edge. The layout scales on height rather than being letterboxed into a 16:9 box, so a portrait card or a 2056 × 1329 one is laid out properly instead of painting a small landscape island in the middle.
04
A colour per source, without picking forty
Leave the automatic palette on and each source takes a hue from its position, stepped by the golden angle so the ninth is not a near-repeat of the first. Every card is one base colour turned into a light centre and a dark edge by formula — there is no table of colours to get one wrong in. Override any of them by hand.
What to check before a show
01
It has never been loaded onto a real frame
PNG is a reasonable assumption about what an Eventmaster and an RCS2 accept, not a measurement, and the size presets are generic rather than taken from either vendor’s documentation. Try one card before you commit to a batch of forty. If the gear turns out to want something else, adding a format is a contained change.
02
A gradient PNG is about 25 times a JPEG
A 2056 × 1329 card measures roughly 2.5 MB as a PNG and 93 KB as a JPEG — browsers dither smooth gradients, which leaves PNG’s compression nothing to work with. Forty-eight sources is around 100 MB. The export tells you the archive size; switching the gradient off brings PNG down to a few kilobytes.
03
Two sources called the same thing become two files
A rig routinely has two inputs called "Laptop", and a ZIP with duplicate names extracts to one file with the last one winning — silently losing a card. Names are made unique before packing, and the row shows you the filename it will actually get.
04
Turn on safe filenames when the target is a frame rather than a computer
Spaces and accented letters are fine on a desktop and are not always fine on embedded gear. The option folds everything to ASCII with underscores for spaces, and trailing dots are stripped either way because Windows discards them when it creates the file — which would collide two cards after extraction, past the point anything could catch it.
16 — Mynah (reference)
A thousand memories, and a mouse to find them with.
Mynah gives an Analog Way LivePremier the thing a lighting desk has had for forty years: a command line. Type "Recall Screen 1 Memory 5" and press Enter. grandMA3’s grammar rules — verb first, any unambiguous abbreviation, Thru/+/- ranges, and an If clause that masks a store — with the switcher’s own vocabulary throughout. Nothing here calls anything a fixture or a cue.
This hosted copy is the syntax reference and the compiler: it parses what you type and shows the exact device paths a command would send, but it cannot drive a switcher. A LivePremier serves its control interface over plain http with 443 closed, and browsers refuse an insecure connection from a secure page — so live control needs the desktop app, the container, or a local checkout, on the same network as the switcher. It says so on the page rather than failing quietly.Every device path was verified against a physical Aquilon C on firmware 6.2.73. Not affiliated with, endorsed by or supported by Analog Way.
A masked master store, compiled but not sent: one typed line becomes six ordered writes, the record mask narrowed to two screens and two categories, with every path shown before anything leaves the browser.
What it does
01
One line instead of a hunt
Screen, master, layer and multiviewer memories — recall, store, label and delete — plus Take. Ranges compose: "Recall Screen 1 Thru 8 - 5 Memory 7" is seven screens in one command.
02
It shows you what it will send
Nothing reaches the device until Enter, and the compiled device paths are visible before it does. A command that will not work is refused while you are typing it, with the reason.
03
Honest about what happened
An unqualified recall goes to preview, never to air. A recall of an empty memory is reported as empty rather than as success — the switcher accepts those silently and does nothing, which is the kind of thing you would rather find out now.
04
The same grammar on hardware
A keyboard, an X-Keys panel over WebHID, a Stream Deck plugin, and a Bitfocus Companion module whose preset library fills a deck with memory recalls — all running the same parser.
What to check before a show
01
This page cannot drive a switcher, and that is not a bug
A LivePremier serves its control interface over plain http on port 80 with 443 closed. Browsers block an insecure connection from a secure page, so a hosted https copy is refused before the request leaves the tab — no configuration fixes it. What you get here is the real parser and compiler: type a command and see exactly which device paths it would send. For live control, run the desktop app, the container, or a local checkout on the same network as the switcher. The app detects the situation and explains it rather than showing a mystery failure.
02
The device paths were verified on hardware
All twenty-one memory-bank paths resolve on a physical Aquilon C running firmware 6.2.73, and every verb was executed on it — store, recall, label, delete, a layer memory, a program recall, a Take, and a masked master store whose filters were read back off the device exactly as compiled. Test memories were deleted afterwards. Analog Way move control paths between firmware versions, so the table is versioned and a much older or newer box may differ.
03
It is careful about claiming success
A recall of an empty memory is accepted by the switcher and silently does nothing — no error, no response at all. Reporting that as done would be a lie, so it is reported as an empty memory. An unqualified recall goes to preview and never to air; reaching program always costs an explicit word.
17 — ATEM Fleet Admin
Twelve switchers, one set of forms, a folder each.
Build every ATEM's configuration through forms that already know what that model can do, then download one folder per switcher containing a config.xml that ATEM Software Control will load. The alternative is the same settings typed into the same dialogs twelve times, on a flight case, the night before.
This is the browser build of a desktop app, and it does the part that matters — the XML is generated here in the page by the same code the download runs. What it cannot do is reach a switcher: a web page has no way to open a socket to one, so the desktop app is what you want if you would rather apply the config live over the network than load a file at each unit.
A 47-second tour of this build, filmed at this address: a four-switcher fleet built from scratch, the forms adapting to each model, and a .zip of loadable config.xml folders assembled in the tab. The fleet is invented; the export is real.
What comes out
.zip
A folder per switcher
One directory per device, named after it, holding that switcher's config.xml — the same tree the desktop app writes to a folder you pick, delivered as a download instead. Unzip it onto a stick and walk the room.
.xml
A loadable ATEM profile
Matched to real autosaves
A <Profile> in ATEM Software Control's own format — element names, nesting and ordering matched against real autosave files. Load it with Software Control's own Load button; nothing here talks to the switcher.
.json
The fleet, saved
The whole fleet as one project file you can save, reopen and hand to someone else. It is written and read entirely in the page — Save downloads it, Open reads it back — so the fleet never leaves your machine.
.txt
A media manifest
Each device folder that has media-pool items carries a MEDIA.txt naming what belongs in which slot, and where you said the source file was. The browser cannot read a file from a path you typed, so it lists them rather than pretending to gather them.
What to check before a show
01
Live apply is desktop only, by construction
Connect & apply opens a TCP connection to the switcher. A web page cannot do that at any privilege level, so the button is absent here rather than present and failing. Everything else — the forms, the model catalog, the generated XML — is identical to the download.
02
Media files are not bundled
The export carries the XML and the manifest, not your stills and clips. Load the media pool from ATEM Software Control as you normally would; the pool slots and names are already in the config either way.
03
Verify the Mini streaming and recording sections on hardware
The XML generator was matched against real ATEM autosave files, but no ATEM Mini save existed as ground truth — so the Mini <Streaming> and <Recording> sections are reconstructed from the protocol rather than copied from a known-good file. For those specific settings the desktop app's live apply is the authoritative path.
04
Nothing is uploaded
There is no backend and no upload endpoint. The XML is generated and the zip is assembled in your own tab, which matters here because a fleet file is a list of your switchers, their names and their addresses.
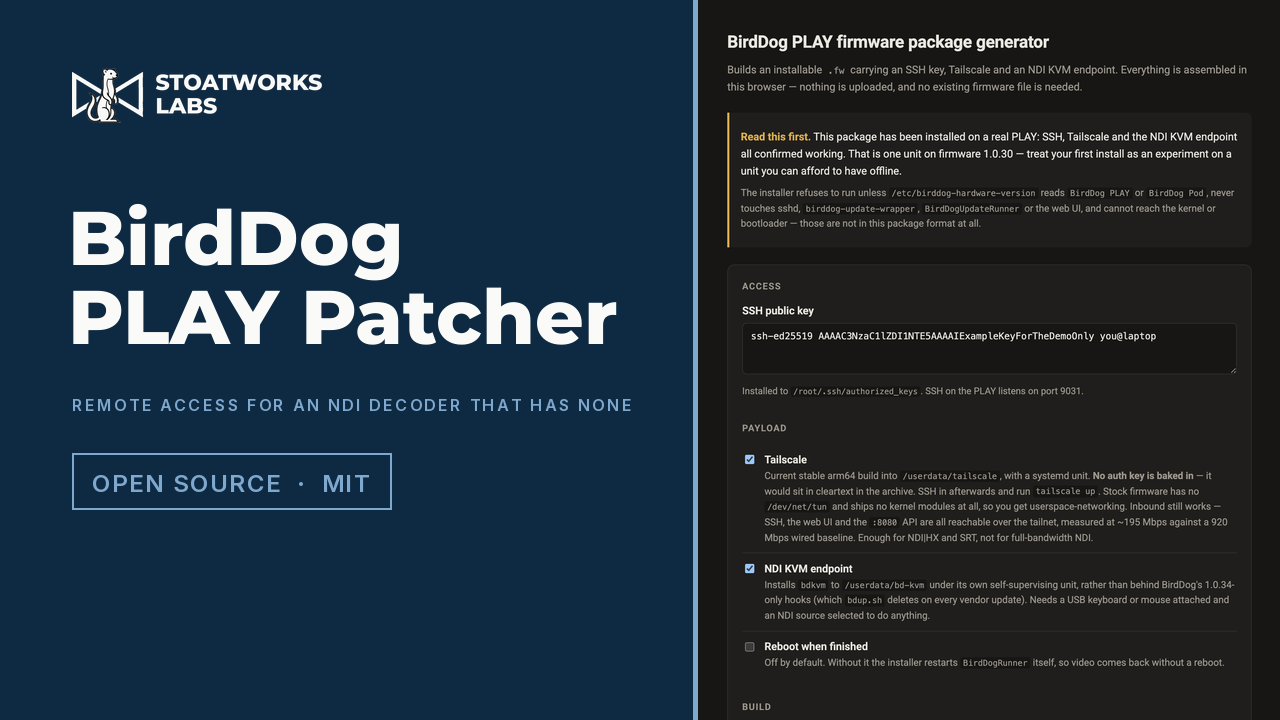
18 — BirdDog PLAY Patcher
A BirdDog PLAY has no way in from outside the room it is sitting in.
This builds the firmware package that gives it one. Tick what you want — an SSH key, Tailscale, an NDI KVM endpoint, a USB media player, a camera input — paste a public key, and download a .fw you upload through the decoder's own web page. The archive is assembled in the tab, and you do not need a copy of your existing firmware to make one.
It can be a static page because a valid package turns out to need nothing of the vendor's: the stock updater runs a script out of the uploaded archive as root without checking a signature, so the package is an ordinary gzip'd tar with no key anywhere in it. The patches it installs, the flasher for a unit that no longer answers, and the replacement operating systems for one you want to stop being a decoder are all on the BirdDog PLAY page. Not affiliated with, endorsed by or supported by BirdDog, and installing it will not do your warranty any favours.
46 seconds at the live address, driven through the tool's own controls: the Tailscale release really is fetched and checked against its published SHA-256 during the take, and the package at the end was assembled in the tab. The key on screen comes from the page's own demo mode. Filmed before the USB player and the camera option were added.
What you can put in the package
01
A key, and a tailnet
Your public key appended to the root account, and the current stable arm64 Tailscale alongside it. No auth key is baked in — one in a file a web page hands you is one in cleartext — so the unit arrives installed and signed out. Stock firmware has no TUN device and ships no kernel modules at all, so Tailscale runs in userspace networking: inbound still works, measured at ~195 Mbps against a 920 Mbps wired baseline. Enough for NDI|HX and SRT, not for full-bandwidth NDI.
02
Signed in from the decoder's own page
Choosing Tailscale also adds a Tailscale panel to the System page of the PLAY's own web interface, so the unit joins a tailnet from a browser rather than over SSH. Reading status is open; changing anything needs a live login to that interface, because an open Tailscale API would let anyone on the LAN join the box to a tailnet of their own.
03
NDI KVM
A keyboard and mouse on the PLAY's USB port drive the machine it is displaying, forwarded to the NDI source as metadata. The agent opens its own receiver at metadata-only bandwidth, so it costs nothing on the wire and coexists with the decoder's own. It uses the free NDI SDK and loads the device's existing library at run time, so no NDI code is redistributed.
04
A USB stick as a source
Beta
USB joins the source dropdown, and a stick plays video, stills and PDFs straight to HDMI — hardware-decoded, in order or shuffled, looping until you pick something else. The media stack was already on the box and unused; what was missing is that nothing mounts a stick and USB is not on the list of names the web UI accepts.
05
A camera in, NDI out
Beta
The decoder run backwards: a USB camera on the same port, out as NDI, NDI|HX, SRT or HDMI, any combination from one capture, with its settings in a tab in the decoder's own interface. The chip's hardware encoder is fitted and switched on, and the vendor's software never touches it — a decoder has nothing to encode.
06
Built here, not on a server
No upload
tar, gzip and SHA-256 are browser APIs now, so the whole archive is assembled in the tab: no upload, no account, and nothing you type leaves the page. The only server-side code in the project is a proxy that fetches the Tailscale release, because their download host serves no CORS header — and you can hand the tarball over yourself instead, to pin a version or build offline.
What to check before a show
01
One unit, on one firmware version
All of this has been installed on a real PLAY on firmware 1.0.30 and confirmed working there — SSH, Tailscale, the KVM agent driving a Windows machine, the player running from a genuine exFAT volume. That is one unit on one firmware, not the range of PLAY and Pod firmware in the field. Treat the first install as an experiment on a unit you can afford to have offline.
02
The two beta options take the display, and the vendor's decoder minds
Playing from USB, or sending a camera straight to HDMI, means standing BirdDog's own video process down and putting it back — one process owns the screen at a time. Switching between that and NDI repeatedly destabilises it: on the test unit its runner went from no aborts to thirty over an afternoon of flicking between sources. Recovery is handled and the picture comes back, but treat USB as a mode you set for a session rather than something you cut to and from.
03
A PLAY on a tailnet has no access control of its own
The decoder's REST API has no authentication of any kind and allows any origin. Putting the unit on a tailnet does not change that — anyone who can reach it there can reconfigure it without credentials. Scope an ACL for the node, because there is nothing on the device to fall back on.
04
Read the installer before you run it
It is a couple of hundred lines of commented bash, in the repository rather than compiled into the page, and it runs as root on your device — you should not take anyone's word for what it does. It refuses to run unless the unit reports itself as a BirdDog PLAY or Pod, and never touches sshd, the update wrapper or the web UI, because those are how you get back in.
05
There is a way back from every option
Nothing here writes to the kernel, the bootloader or the partition table — they are not in this package format at all, so a bad install cannot break the boot chain. The player and the camera tab are the only things that edit a firmware file, each keeping a pristine backup beside it and restoring it byte for byte on request, and everything else is confined to the data partition. Worst case, reflash stock firmware through the normal upload page.
19 — BirdDog PLAY Flasher (beta)
The other case: a decoder that has stopped answering.
The Patcher assumes a unit whose web page still loads. This is for one that does not — a PLAY held in Rockchip recovery mode, flashed from a browser tab over USB, with the factory image read off your own disk. It can also park a firmware package inside that image on the way, so the unit comes up already patched instead of needing a second pass.
It is a beta, and the reason is stated plainly on the page itself: no injected package has yet been watched to install on first boot. The parsers, the partition table and the filesystem injection are tested against genuine vendor files, and the USB half has met a real PLAY — the loader push, the re-enumeration wait after it and the read-back verification were each corrected against what the device actually did. The Patcher, the firmware patches and the replacement operating systems are all on the BirdDog PLAY page. Not affiliated with, endorsed by or supported by BirdDog.
A genuine factory image and an update package chosen: the nine-entry GPT read off the 2.4 GB file in slices, the package parked for first boot, and nothing connected yet — everything after that needs a PLAY in recovery mode on the other end of a cable.
What it does
01
The whole device, put back
Bootloader, u-boot, trust, kernel, device tree, rootfs and the partition table, written from a factory image you supply. This is the brick-recovery path: it does not need the unit to boot, to hold an address, or to serve its web page.
02
A package that installs itself
Optionally, the .fw the Patcher built goes into the image on the way through, and a one-shot service hands it to the decoder's own updater on first boot — so the unit arrives patched. It marks itself done before installing rather than after, so a package that kills the box cannot reinstall itself on every boot.
03
It costs the filesystem nothing
The rootfs partition is 3.5 GB and the image inside it is 2.2 GB, so there is over a gigabyte at the end that nothing ever grows into. The package is parked there as raw bytes. The three small files that call it back are added to a plain ext2 filesystem — no journal, no extents, no checksums — which is what makes writing them from JavaScript defensible rather than reckless.
04
Nothing is uploaded, and no key is involved
Your image never leaves the machine: it is read through the file picker, parsed in the tab and pushed straight down the USB cable. Even the loader that gets sent to the device first is extracted from your own file at run time. There is no vendor key anywhere in this, which is the only reason it can be a public page at all.
What to check before a show
01
No injected package has been watched to install yet
That is the beta, and it is the first thing on the page. What is proven is the image parsers, an independent check of both partition-table checksums, a write plan that provably overlaps nothing, and a filesystem check that accepts the patched 2.4 GB rootfs and reads the injected files back — and, since 15 August 2026, the USB half against a real PLAY, where the loader push, the re-enumeration wait after it and the read-back verification were each corrected by what the device did. What is not proven is the first-boot install of an injected package: nothing has yet been seen to boot and apply one. Do not learn that on a unit you need on Monday.
02
You supply the firmware image
Nothing of BirdDog's is hosted here or bundled with the page — it is a tool for a file you already have. Getting the right factory image for your unit is on you, and flashing the wrong one is how a working decoder becomes an interesting paperweight.
03
The recovery button is inside the headphone socket
Not on the outside of the case. A straightened paperclip or a SIM tool pushed gently to the bottom of the 3.5 mm socket finds it — hold it down, apply power, keep holding for a few seconds, then connect USB. If the unit boots normally instead, the button was not held far enough down or long enough.
04
Windows needs a driver swap, and it needs Chromium
WebUSB can only reach a device bound to WinUSB, and Rockchip's own driver claims the unit first, so Windows needs Zadig to rebind it. macOS needs nothing; Linux needs a udev rule. And this is WebUSB, so it is Chrome, Edge or another Chromium browser — Firefox and Safari do not implement it, and the page says so rather than failing quietly.
05
A working unit does not need any of this
If the decoder still serves its web page, upload the .fw through the System tab and be done. This exists for the unit that will not boot, will not take an update, or needs putting back to a known state.
20 — stagewash
A rig can be even on the floor and flat on every face.
Model the stage, hang the rig, aim each fixture at a point on the deck and let it work out the pan and tilt — then read the illuminance off a heatmap with the beam cones drawn over it, before anyone is standing in the venue holding a wrench.
The whole calculation runs in the page: no backend, no account, and nothing you build is uploaded anywhere. Import your own IES or EULUMDAT files and the fixtures you care about stop being estimates.
The default rig on a 10 × 6 m stage — five front-of-house Zooms, five Source Four 36° and four PAR backlights — solved on the horizontal plane at head height, with every beam cone drawn over the heatmap. That solve reads 2,056 lux average and 98% of the deck at the 500 lux target.
What it works out
01
Build the rig, then focus it
Truss, scaff, bars and wind-up stands. Hang fixtures along a bar at a spacing or place them one at a time, then aim one at a point on the stage and it resolves the pan and tilt for you — checked against the fixture's real pan and tilt range, so a moving head that cannot get there says so rather than quietly pretending.
02
Two planes, and they disagree
The point of it
Horizontal is illuminance on a surface parallel to the deck — the floor wash. Vertical is a surface facing the audience at head height, which is what a face receives. Overhead light arrives nearly edge-on to that plane and contributes almost nothing to it, so flipping between the two inverts the ranking of your fixtures: on the default rig the backlight contributes exactly zero to the face plane and the front-of-house units more than double. That inversion is the most common mistake in a stage rig, and it is one toggle away.
03
Every number says where it came from
Provenance
Each fixture is badged measured, published or estimated. Measured is read from a manufacturer photometric file you imported. Published has its beam angle, field angle and centre-beam candela transcribed from a named datasheet, with only the roll-off between them modelled. Estimated is a generic archetype synthesised from lamp output and beam angle — and anything containing an estimate is named Generic, which a test enforces, so there is no such thing here as a real product with invented numbers.
04
It finds the problems, then writes them down
Uniformity, coverage against a design level, and contiguous hot and dark patches listed by area with their centres — so "there is a hole downstage left" becomes a number and a coordinate. Out comes a PDF with the levels, the problem areas, a full fixture schedule with focus and heights, and the structural loading per bar, plus CSV of the schedule and of the raw grid.
What to check before a show
01
Nothing here has been near a light meter
The photometry is pinned against eight published rows transcribed from ETC Source Four datasheets, and the readers are checked against 132 real ETC photometric files and a corpus of EULUMDAT files covering every symmetry the format defines. That is arithmetic agreeing with a datasheet. No stage, no meter, no measurement of a real rig has ever been compared against a number this produces.
02
It is direct illuminance only, and that is on every page of the report
Inverse square, the cosine law, and each fixture's own intensity distribution. It does not model inter-reflection from the deck, walls or a cyc, atmospheric haze, shutter cuts, gobos or barn doors, or shadowing by people and scenery. On a dark stage that is the right model. In a white studio, bounce can add a third again to these figures — so the caveat prints on every page of the PDF rather than living in a settings dialog.
03
Two first-party sources disagree by up to 15%
For four of eight fixtures, ETC's own IES file and ETC's own datasheet agree to within 1%. For the other four they differ by 5–15%, because the files and the sheets are different revisions — the Source Four 36° measures 21.3° beam in the file and is published as 27°. That gap is larger than anything the maths in here contributes, and it is the real floor on accuracy in this business. When the answer has to be right, import the file.
04
An estimated fixture is a shape, not a promise
The estimator lands within about 10% given the manufacturer's own field lumens and angles, and about 25% from bare lamp lumens alone — those figures are in the test suite rather than in the marketing. The residual is dominated by optical efficiency being one number for a class that really runs 42% to 65%, which is not closable by better arithmetic. Some archetypes are cruder still: the cyc does not model the vertical asymmetry that is a real cyc unit's whole point, a batten is treated as a point source, and there is no colour mixing.
05
Your rig never leaves the machine
There is no backend and no upload. The rig, the photometric files you import and the reports are all handled in your own tab — which matters here for the same reason it does everywhere else on this page: a rig plot and a stage plan are somebody's unannounced show.
21 — RFutils
Any coordination file in, any other one out — and the frequencies worked out.
The conversion and coordination half of RFutils, running entirely in the page. Drop in a Shure .shw or .cws, a Sennheiser .wsm project, a WSM or WWB coordination report, a bare frequency list or any CSV at all, and export it back out as any of the others — or set the equipment and the band and let it place a compatible set of carriers for you.
RFutils merges three earlier tools into one suite, so it also supersedes PMSE → Wireless Workbench on this page. The hosted build has Convert, Coordination, Inventory and Allocation; Monitor and Deployment are missing, because discovering receivers over mDNS, decoding AES67 audio and programming frequencies over TCP all need sockets a web page cannot open. For those, download RFutils.
Reads Shure .shw and .cws, Sennheiser .wsm projects, WSM HTML coordination reports, WSM Frequencies/Bands CSV, WWB coordination report CSV, a bare frequency list, or any other CSV through a column-mapping dialog. Writes a WWB frequency list, WWB inventory CSV, WSM Frequencies/Bands CSV, generic CSV, or an experimental WWB7 .shw. Everything routes through one internal channel model, which is what makes any input re-exportable as any output.
02
An Ofcom licence is an input
Upload a PMSE licence schedule PDF and get a WWB frequency list, a reference sheet mapping each frequency to a suggested name and coordination group, and an experimental .shw. Validated against a real schedule — all 116 assignments, with their frequencies, sites, periods, fees and header metadata.
03
Coordination that knows what you own
Mode, not model
Pick the equipment profile, the band variant you actually own — a ULX-D G51 coordinates differently from an H50 — and the operating mode, because spacing is a property of the mode: Axient Digital wants 350 kHz standard and 125 kHz in High Density. The engine builds each radio's candidate grid and places carriers clear of third-order and optional fifth-order intermodulation products. Bands with gaps are respected, mixed rigs take the wider of any two spacings, each radio keeps its own tuning raster, and the result is deterministic — the same request always reproduces.
04
Every number says where it came from
Provenance
Each spacing figure is labelled from the manufacturer's documentation, calculated from published figures, or no source — assumed, verify before a show, with the URL it came from. Shure, Sennheiser, Lectrosonics and Wisycom are researched; the rest of the catalogue still carries placeholders and says so on screen rather than in a footnote.
What to check before a show
01
The .shw exporter is reverse-engineered, and the frequency list is not
The WWB7 show file was worked out from a single real .shw and has never been validated by Shure. Open one in Wireless Workbench and check it before it goes anywhere near a show. The .txt frequency list is the documented import format and is the safe route when it matters.
02
The licence parser is calibrated to one Ofcom template
The original tool used a table detector; this port buckets positioned text into the columns of the fixed Ofcom ST16 template, scaled by page width. That is exact for the template it was calibrated against and would need re-calibrating for a materially different revision — so sanity-check the parsed assignments against the source PDF.
03
Occupied bandwidth is not the spacing to coordinate at
A PSM 1000 occupies about 175 kHz, but Shure's own compatible-frequency count implies roughly 1.85 MHz of separation. Both figures are shown, and reading the first as the second is the classic way to build a plan that measures fine and fails in the room.
04
Monitor and Deployment are not here, and Deployment is untested anywhere
The hosted build simply does not carry them. In the desktop app, live programming is experimental, dry-run by default, untested against hardware, and only reaches Shure command-string channels — everything else exports a file. Check the strings against your receiver's Command Strings PDF before sending any of them.
05
Your files and your inventory stay in the browser
The parsers, the .shw generator and the coordination engine all run on your own machine, in the page — the same shared code the server runs, which is what makes that possible. The inventory lives in the browser's own storage in place of the file the desktop build keeps, so clearing site data clears it. A licence PDF names a site, a date and a licensee, and it never leaves your laptop.
22 — PMSE Licence → Wireless Workbench
An Ofcom licence is a PDF. Wireless Workbench can't read a PDF.
So the frequencies get typed in by hand. Two dozen of them, from a schedule, into a coordination tool — which is slow, and is exactly the job that produces a transposed digit at four o'clock on a show day. This reads the licence and writes the import files instead.
It's free and open source, like everything else here, and it started life as a standalone app you could self-host. It still is one — but the version you'd actually use now lives inside RFutils, our RF suite, under Convert › Ofcom PMSE licence, where the PDF parser has been validated against a real Ofcom licence.
A 45-second tour. The licence on screen is the project's own synthetic fixture — the licensee, address and allocation are invented, so no real licence appears in a public video.
What comes out
.txt
WWB frequency list
Documented format
The licensed frequencies in Shure's own documented import format — megahertz, three decimals, one per line. Import it through Wireless Workbench's Import frequencies from file. This is the safe path, and for most jobs it's the only file you need.
.csv
Reference sheet
Documented format
Every frequency mapped to a suggested channel name and to its Ofcom coordination and fee group. An Ofcom licence carries no per-microphone names — it is a list of frequencies — so this is the sheet you label channels from, and the one you hand to whoever is patching.
.shw
WWB7 show file
Experimental
A native Wireless Workbench 7 show file with receivers built, channels named and frequencies already assigned. An in-page editor groups the frequencies into receivers of any channel count from one to eight — not fixed four-channel blocks — names every channel, and sets an IP per receiver.
What to check before a show
01
Read the parsed assignments back against the PDF
The browser build has no table detector, so it buckets positioned text into the columns of Ofcom's ST16 template and merges the several physical lines that make up one row. That's been validated against a real licence — all 116 assignments, sites, periods and fees — but the geometry is calibrated to that template, and a materially different Ofcom revision would need recalibrating.
02
Open the .shw in Wireless Workbench before you rely on it
The format is undocumented. The generator clones structurally-verified XML fragments from a real WWB7 file and substitutes frequencies and names — automated tests can prove the file is internally consistent, but only WWB can prove WWB accepts it.
03
Show files are G56 only, on purpose
The one verified receiver template is a Shure AD4Q-A in band G56. Rather than silently mislabel other hardware, the generator refuses to build a show file for any other band. The .txt and .csv exports work for every band.
04
Receiver IP addresses are a best-effort guess
The sample file this was built from never had a device with a real IP configured, so the packed-integer address and the static-mode flag are both inferences. If a receiver's IP doesn't take after import, set it again inside WWB.
23 — PDF Presenter Lite
A presenter view, without installing a presenter.
Open a PDF and get the two windows a presentation needs: Now and Next with a clickable thumbnail strip in front of you, and a clean fullscreen slide with no chrome on the projector. It is the whole app, running in a browser tab, on a machine you were handed ten minutes ago.
This is the browser build of a desktop app called PDF Presenter — the Lite in the name is this page. The rendering was always done by pdf.js in a page, so the presenter view, the output window, blanking and the laser pointer are the real thing here rather than a demo of it. What needs a desktop is the remote control: OSC and the Companion module need a UDP socket, and the watched folder needs to read a directory — so if you drive the show from a Stream Deck, use the download.
A 47-second tour of this build, filmed at this address: a deck opened from disk, Now and Next, the thumbnail strip, then the Output window on top of it. The deck is generated for these videos — nobody else's slides appear in it.
What you get
01
Presenter view
Now and Next side by side, and a strip of every slide underneath — click any of them to jump straight there. Arrow keys, Page Up/Page Down and Space all advance, so a presentation clicker works without configuring anything, because a clicker is just a keyboard.
02
A separate output window
A second window showing only the current slide, which you drag to the projector and make fullscreen. Keys pressed while that window has focus still drive the show — so a stray click on the output, or a clicker aimed at it, does not strand you.
03
Blanking and the laser pointer
Press B or W to cut the output to solid black or white without losing your place, the way PowerPoint's presenter shortcuts do. Move the mouse over the Now preview with the pointer enabled and a glowing dot tracks it on the output.
04
The PDF's own structure
Links authored into the deck — a contents page, "back to agenda" — are clickable on the Now slide and jump to the right page. Top-level bookmarks become named sections. There is also a timed auto-advance that stops at the last slide rather than looping.
What to check before a show
01
Allow pop-ups, and click once for fullscreen
The output opens as a pop-up window, so a blocker will stop it the first time. On Chromium it then puts itself on your second display — that needs the window-management permission, and refusing it just means you move the window yourself. What it cannot do either way is open fullscreen: only a gesture inside a window can make that window fullscreen, so it opens as a normal window with a prompt, and one click finishes the job.
02
Field proven, like the desktop app
This build has now been run on real events, not just verified on the bench. The bench came first: a real multi-page PDF on a dual-display setup, with the deck rendering, both windows staying in sync, keys from the output driving the control window, and the output window opening on the second display on its own. Still run your own deck through it once before it matters — the pop-up and the fullscreen click are two steps best met in rehearsal.
03
No OSC, no Companion, no watched folder
Those need a UDP socket and a readable directory, so they are absent here rather than shown and broken. The desktop app has all three, and its Companion module is a separate download.
04
Your deck never leaves the machine
There is no backend and no upload. The file is read by the page from your own disk and stays there, which is rather the point when the PDF is an unannounced product or somebody's results a week before publication.
24 — PowerPoint Font Manager
Your deck does not use thirty-nine fonts.
Drop in a .pptx and find out which fonts it actually uses, which of those are already on this machine, and what to do about the rest. Missing fonts that Google publishes can be fetched on the spot; whatever is left goes into a sidecar .zip with an installer for each platform.
The presentation is read in the page and never uploaded. The only outbound request is for the font files themselves, and that goes straight from your browser to the Google Fonts repository.
The repo's synthetic test deck: five fonts, four already installed on the machine that took the picture. Lobster Two Bold is reported as a weight the family does not have rather than as missing, and the twenty-eight fonts the theme names but never uses are behind a disclosure at the bottom.
What it works out
01
It ignores the fonts the theme only mentions
The point of it
Every Office theme carries a script-fallback table — thirty-odd CJK and Indic families to reach for if the deck ever contains Devanagari or Khmer — and it is there whether or not a single such character exists in the file. Search three real presentations for typeface= and you get 39, 36 and 9 distinct names. The true answers are 2, 4 and 6. A tool that counts the table tells you to install Mongolian Baiti for a slide that says Welcome in Calibri. The ones it dropped are listed at the bottom of the page, because the discrepancy is a fair question.
02
A face is not a family
Decks name faces, not families: Helvetica Neue Medium, Poppins Regular, Times Roman. Compared straight against the list of installed families, three of those four report missing when the font is sitting right there — and then you are offered a download of "Helvetica Neue Medium" from Google Fonts, which does not exist. Style suffixes are stripped to family, weight and slant first, and matched against full and PostScript names as well as families. Arial Black is left alone, because it is its own family and not a 900-weight of Arial.
03
It checks what is actually installed
Where the browser has the Local Font Access API it asks the system directly. Everywhere else it measures the width of a test string rendered in the candidate font against each of the three generic fallbacks — a difference means the font resolved to something real. Checked against CoreText's own list on macOS across nine fonts, the measurement method agreed on all nine.
04
Embedded fonts are reported, not demanded
A deck can carry its fonts inside it, in which case there is nothing to install. What is stored is not a TTF but EOT, and what happens next depends on who wrote the file: PowerPoint compresses the glyph data with MicroType Express and it cannot be unpacked, while Canva and LibreOffice do not, and those come back out as valid installable files. Either way the font travels with the .pptx, and the page says which case you are in.
05
A bundle that installs itself
The sidecar .zip carries the fonts, a manifest saying where each came from and under what licence, and a small installer for macOS, Windows and Linux that writes to your own account with no administrator password. It also heads off the two things that break this: on macOS anything extracted from a downloaded zip inherits a quarantine flag and Gatekeeper blocks the installer, and on Windows the same provenance makes PowerShell refuse the .ps1 — hence the .cmd wrapper. Both have a no-script route as well.
What to check before a show
01
Fonts you own are not fonts you can pass on
The manifest splits the bundle in two. Anything from Google Fonts carries OFL, Apache 2.0 or the Ubuntu licence and is marked free to share. Anything copied off your machine or pulled out of the deck is marked RESTRICTED, because font licences almost never permit redistribution — and permission to embed a font in a document is not permission to extract it and install it somewhere else. The bundle is built for moving your own deck between your own machines. Read the manifest before you send it to a venue.
02
A browser cannot install a font
No browser can write to a font directory, so the hosted version stops at handing you a zip. The desktop build does the last step itself, and reads the platform's own font registry rather than measuring text, which also makes it more precise — it resolves faces, so Helvetica Neue Medium comes back installed rather than "the family is there, the weight might not be".
03
Legacy .ppt is not supported
A binary .ppt from before 2007 is not a zip and has none of this structure in it. It is rejected with an explanation rather than a parse error. Open it and save as .pptx first.
04
It scans what is in the file, not what is on the slide
A font referenced by a text box that sits off the canvas, or by a layout the deck still carries, is a font the file names — so it is reported, tagged with where it was found. Fonts on unused layouts and in notes are held back behind a toggle rather than counted alongside the ones on slides, but "used" here means "named by the file", not "visible in the show".
05
Nothing is uploaded, and there is nowhere to upload it to
No backend, no account, no telemetry. The deck is parsed in the tab. That matters more than usual here, because a client deck is somebody's unannounced content and this tool has to open all of it to find the fonts.
25 — OpenFont Manager (preview)
Every open-source font, on every machine that needs it.
Search two thousand families, read your own sample text in each face, and take whole families or single weights to a checkout that downloads as one zip — the entire catalogue if you like, streamed to disk. Or hand it a list. The desktop app installs the fonts itself, at login, from a folder or a network share.
An early preview. The browser version downloads; installing needs the desktop app, which is this same page plus a tray, a login item, a watched folder and network sources.Nothing you do here is sent anywhere except the two font CDNs. The files are the complete originals from the google/fonts repository and Fontsource, never the subsetted web versions.
The catalogue with a two-family search, one family in the checkout and its weights opened; every card renders the sample text in the actual face.
What it does
01
The real files, not the web versions
The point of it
The Google Fonts CSS API serves woff2 cut down by unicode-range — one file for Latin, another for Cyrillic — and a browser cannot ask it for anything else. A subsetted font installs without complaint and then renders blanks for the first character outside its subset. So the files come from the google/fonts repository itself, complete, with jsDelivr as a mirror for when GitHub rate-limits a bulk pull, and the CSS API is used for one thing only: the preview line on each card, where a small subsetted file is exactly right.
02
Two catalogues, one search
Every Google Fonts family, plus the hundred-odd Fontsource carries that Google does not — Adwaita, Aileron, Chunk Five. The Fontsource ones are kept only where the family has a single subset, because its files are subsetted too and a single-subset family loses nothing to it. Search by name or designer; filter by category, source, licence, script, variable axes and italics; sort by popularity, name or date added.
03
A zip that fits the whole catalogue
Two thousand families is about 2.2 GB and 4,400 files, which no browser tab can hold in memory as one archive. On Chrome and Edge the zip is streamed straight to disk as it is built, so the whole catalogue costs nothing; elsewhere it is built in memory and split into parts. Inside: one folder per family with its licence text, a manifest naming the source and licence of every file, and installer scripts for macOS, Windows and Linux that write to your own account.
04
Lists, and honest answers for the names it cannot find
A CSV, an XML file or a plain list of names resolves against the catalogue, tolerating case, punctuation and a trailing style word, so Poppins-Bold finds Poppins. A name that is not open source gets a stand-in where one exists — Carlito for Calibri, Arimo for Arial, Tinos for Times New Roman, the same widths so nothing reflows — and a plain “similar, widths differ” where it does not. Export the checkout back out as a list to hand to another machine.
05
Provisioning: one folder, every machine
The desktop app runs at login in the tray. Point it at a watched folder, a mounted SMB, NFS or WebDAV share, or a WebDAV URL directly, and on every pass it installs the font files it finds there and fetches whatever the lists there name. Lists are remembered by content hash and processed again only when they change; a file already in the font folder is never touched; nothing is ever removed. Headless --sync and --install exist for scripts and login hooks.
What to check before a show
01
Verified on macOS, then on Windows 11 and Ubuntu 24.04 VMs
On macOS: the browser zip with real downloads, the list import, a cart install into a scratch font folder with CoreText registration, three headless sync passes, the provisioning panel and a WebDAV source with basic auth. Then the installers the release workflow builds went onto a Windows 11 VM and an Ubuntu 24.04 VM: silent install, a headless install that put the files in the per-user font folder and the registry values Windows expects (fontconfig on Linux), an install from the checkout in the running app, the login item on and off, and a background launch that stays in the tray. A real login with the item enabled, and a real SMB or NFS share, have not been tried.
02
Nothing is ever overwritten
A font already in the folder under the same name is skipped. That is deliberate — on Windows an in-use font file cannot be replaced anyway — and it means a new version of a font has to ship under a new filename.
03
The catalogue is a snapshot
Both catalogues are built into the app, because the Google metadata endpoint cannot be read from a browser. A family added to Google Fonts after the snapshot is not searchable until the next release; the files themselves are always fetched live.
26 — openflash
The instructions are not wrong. They are just seventeen steps long, and step eight is irreversible.
Installing LineageOS on a Pixel 4a is seventeen steps: a codename you have to look up, a stock firmware version that has to be exactly right, four fastboot commands, a recovery menu navigated with the volume keys, and a sideload. Miss one and the failure usually turns up several steps later, by which time the phone is already wiped. This reads the handset over USB, works out which of the seventeen apply to it, does the ones a machine should do, and waits on the ones only you can.
It speaks fastboot and ADB directly from the browser over WebUSB, so there is nothing to install and no platform-tools sitting three years out of date. Chromium browsers only — in Firefox and Safari it becomes an ordered, device-specific list of the exact adb and fastboot commands instead, which is still a good deal better than a generic one. The device data is generated from the LineageOS wiki rather than transcribed from it, so all 733 devices the wiki documents are covered: 554 get a full procedure, and the other 179 are told plainly that this cannot flash them. The source is on GitHub — which is worth a read before you point anything at a phone you rely on. Verified end to end on a Pixel 4a, from bootloader unlock through to a booted LineageOS.
Plug it in and it reads the codename, model, Android version, security patch level, bootloader version, slot layout and lock state — over ADB if the phone is booted, over fastboot if it is in the bootloader. If the codename does not match the procedure on screen it stops there. Flashing one device’s build onto another is the single most reliable way to end up with a paperweight.
02
The procedure is for your phone, not for phones
A Pixel 4a is told about its dtbo partition and its stock-Android-13 requirement, because it has both. A Xiaomi is told that Mi Unlock, a Mi account and a seven-day wait stand in front of everything else on the page. A Samsung is told this tool cannot flash it at all, because Odin is not fastboot and no browser speaks it.
03
It checks the files before it flashes them
LineageOS publishes a machine-readable manifest for every build, so a file you drop in is hashed in the page and checked against the SHA-256 for that exact build. A file that does not match is refused rather than flashed — which is the entire reason for hashing it.
04
It shows its working
Every automated step prints the adb and fastboot commands it stands in for, whether or not you let it run them. That is what makes the page useful without WebUSB, and it is how you check what it is about to do before you allow it.
What to check before a show
01
Verified end to end on a Pixel 4a, which is one device out of 554
A complete run: device detection, bootloader unlock, the dtbo partition, Lineage Recovery, format data, LineageOS 23.2 sideloaded, MindTheGapps sideloaded, and a first boot into a working system — every step driven from the page. That first contact with real hardware also turned up two faults inside an hour that no amount of checking without a handset had caught, which is worth knowing about the parts that have still not met one. This is one device, one vendor, one install method and one OS. The other 553 recovery procedures come out of the same code, which is a reason for some confidence rather than a substitute for trying it, and the factory-image path that GrapheneOS and CalyxOS use has never been run at all.
02
It cannot download the ROM for you, and that is not laziness
The OS projects’ mirrors send no CORS headers, so a web page is not permitted to fetch from them — no configuration changes that. So you download the files and drop them back in, and the page verifies them. For LineageOS that verification is real: it has the official SHA-256 to compare against. For the others it shows you the hash and tells you to compare it yourself, because inventing a checksum would be worth nothing.
03
It will not pretend a locked bootloader is one command away
Of the 554 devices it can generate a procedure for, 328 cannot be unlocked by any command — they need Mi Unlock, a Motorola unlock code, a Sony key against your IMEI, an HTCdev token, or in Huawei’s case nothing at all, since they stopped issuing codes in 2018. Each of those says so, with the reason and a link, instead of offering a button that fails at the exact point where the next wrong move wipes the phone.
04
The LineageOS wiki is the authority, not this page
The device data and the steps are generated from the wiki’s own files, and every screen links back to the wiki page for the device you have selected. Where the two disagree, the wiki is right and this is a bug. Not affiliated with or endorsed by the LineageOS project.
Why they work this way
Your files stay on your machine
None of these upload anything. The parsing, the maths and the exports all run in the page, which is not a detail: a PMSE schedule names a licensee and their address alongside their allocation, and a wall layout or a projector plot is somebody's unannounced show. None of it is a document to hand to a stranger's server for convenience.