

Cogwheel is a Spirograph, as two plugins for Resolume Arena and Avenue — and again as an OpenFX bundle for Resolve, Vegas, Nuke and Natron.
A toothed ring is pinned to the paper. A smaller toothed wheel rolls around inside it, in mesh, and a pen dropped through one of the wheel’s holes is carried along for the ride. Nothing here evaluates a curve. Set the two tooth counts and the figure follows.
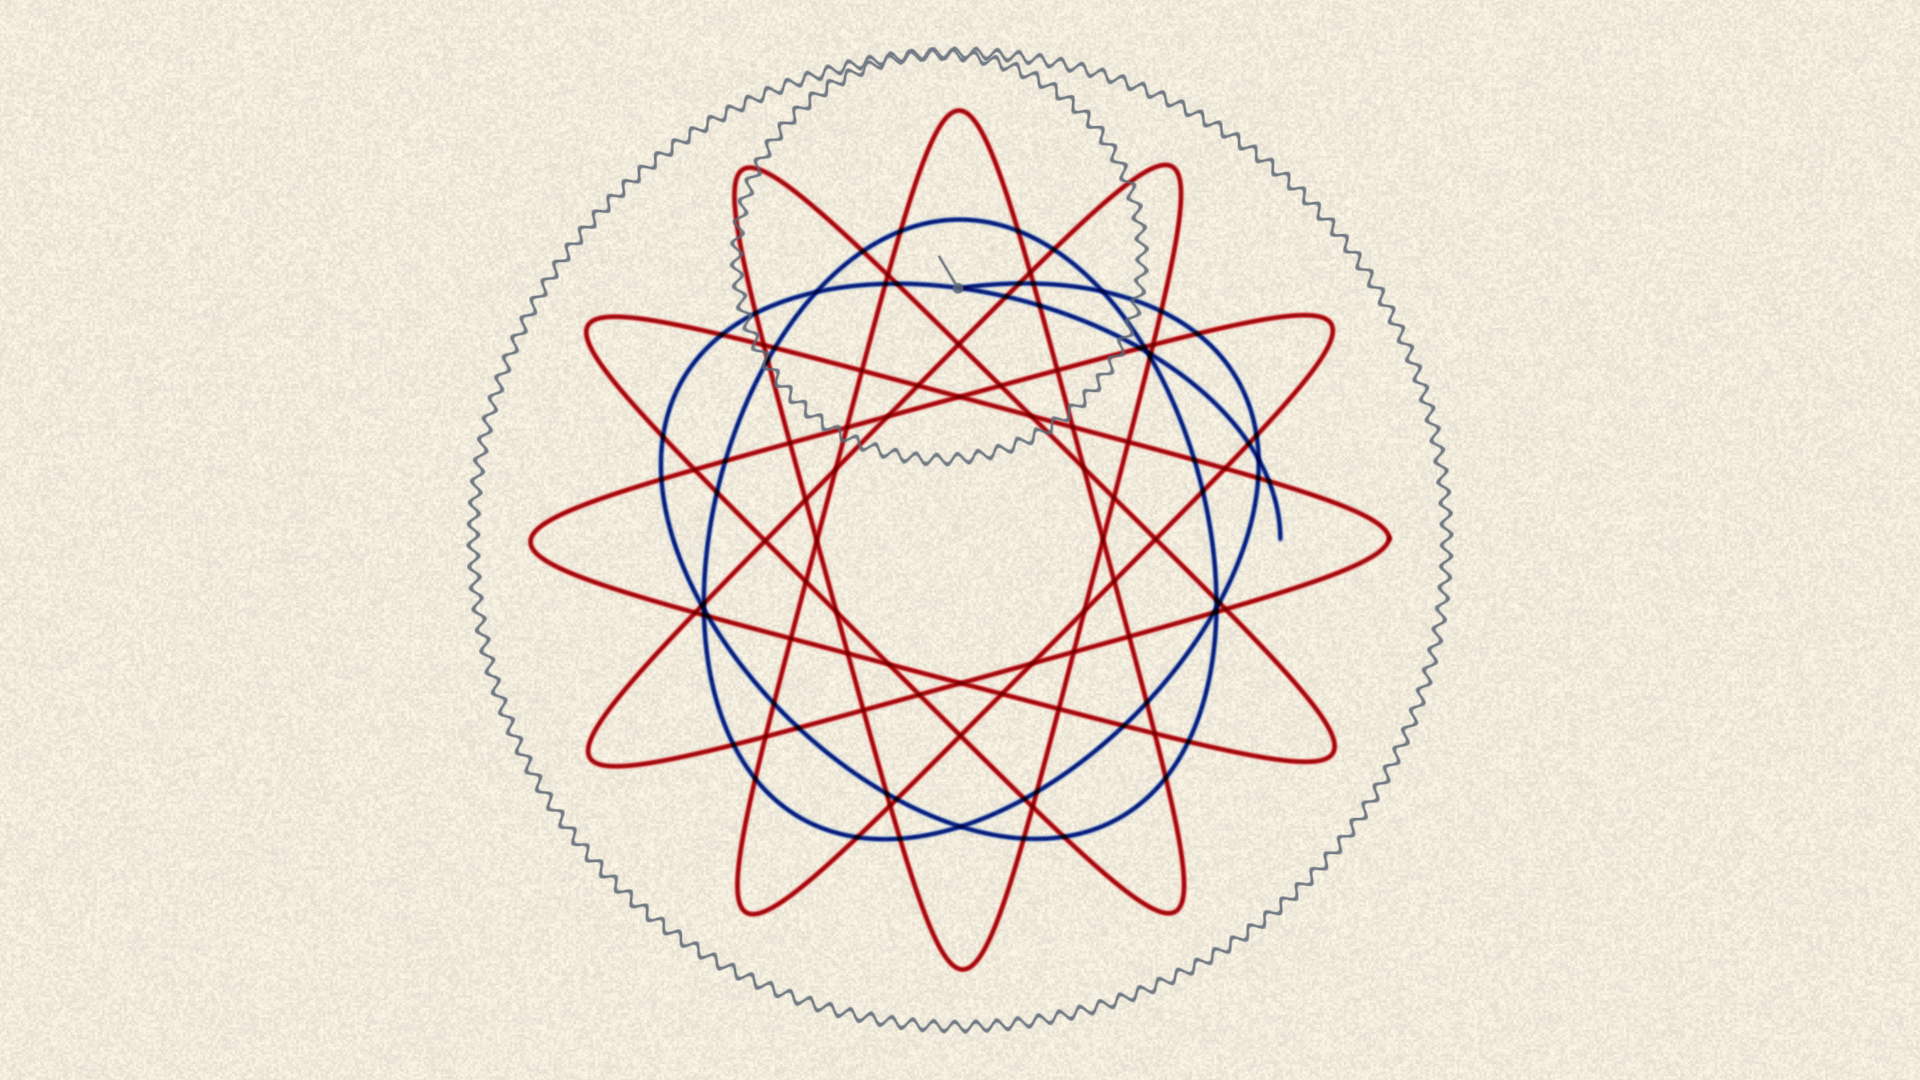
Before you rely on this: the central claims are measured rather than asserted. The pen is walked for the full number of turns the tooth counts predict and the test fails if it does not come home; a second fails unless two pens crossing transmit the product of what each transmits alone, which is what makes ink subtractive rather than additive. Both probe the same code that ships, and a control sweep fails if any parameter turns out to do nothing.
Both plugins have been loaded and run in Resolume Arena 7.27.1, on macOS and on Windows — they register with the right names and categories, expose all 50 controls with nothing truncated, render, and hold a factory preset through live rendering. DaVinci Resolve Studio 21.0.2.4 lists the OpenFX build, and it renders correctly in an independent OFX host. What is still unconfirmed is narrower: the OpenFX build has not been driven over a clip inside Resolve, so its CPU renderer is proven to run and not yet proven to match the GPU one pixel for pixel.
Released at v0.6.0.
This codebase was created with AI assistance, directed and reviewed by a human author.
Spirograph is a registered trademark of Hasbro, Inc. This project is not affiliated with, endorsed by, or connected to Hasbro. The name is used only to describe the kind of machine the plugin models.
Two plugins
- Cogwheel (a source) draws on its own sheet of paper.
- Cogwheel Ink (an effect) can use the clip below as the paper the pen draws on, as the ink the pen picks up, or both.
Both declare the same parameters, so a composition can be moved between them.
Start from a preset
The Preset dropdown is at the bottom of the list. Eight of them, and each is a recognisable drawing rather than a set of slider positions — which is only possible because the gear train is two integers.
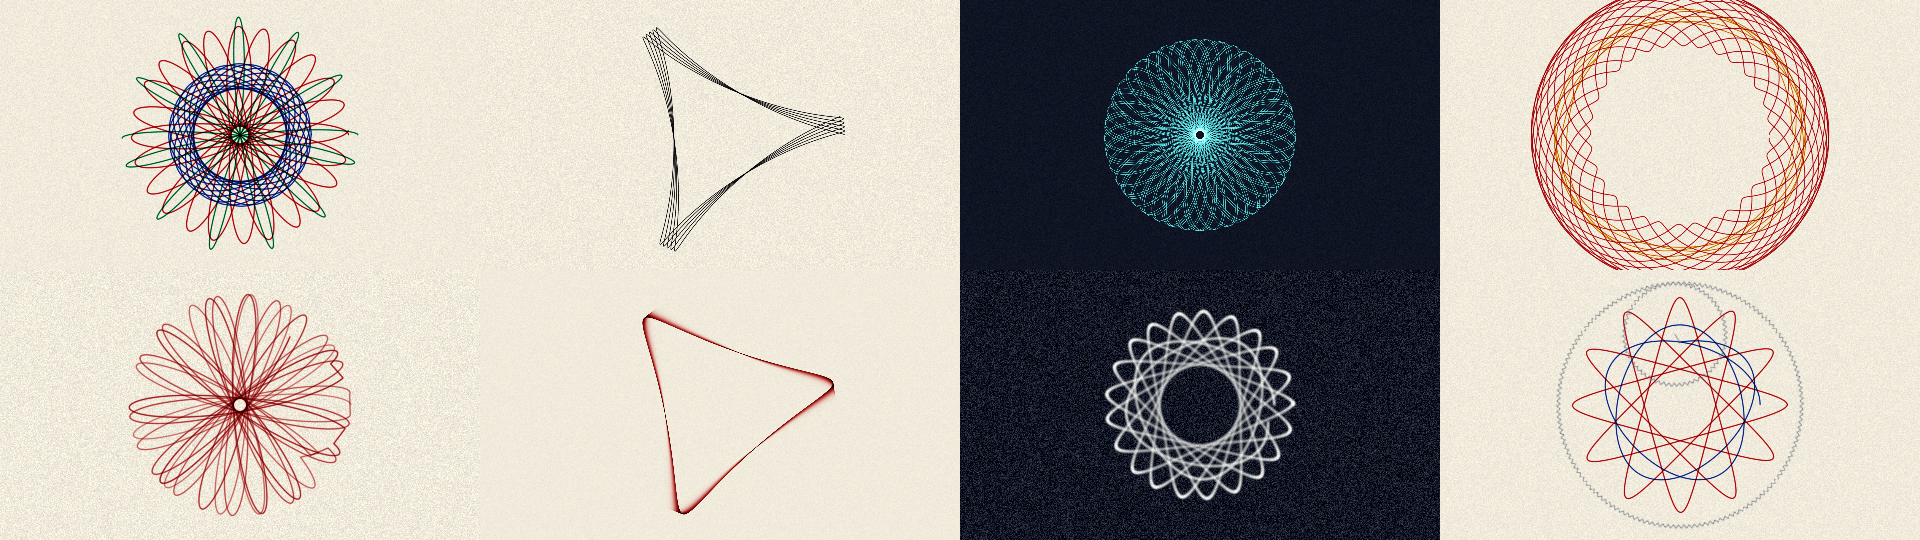
| Preset | What it is |
|---|---|
| Classic Rosette | 96 and 52, four pens through four holes. The one everybody made first. |
| Three Lobes | 96 and 32 mesh three to one, so the figure closes in a single turn. The pen never lifts, and a mesh half a tooth out of true walks it round the sheet. |
| Dense Web | 105 and 64 share no factor at all: sixty-four turns and a hundred and five lobes, printed as a negative. |
| Flower | Outside the ring instead of inside — the petal shape rather than the rosette. |
| Slipping Gear | The ruined drawing, on purpose. A mesh well out of true and a three-tooth jump every few turns. |
| Wet Trail | Not a drawing: a trail. A fibre tip against a two-second fade. |
| Chalkboard | Graphite, a heavy tooth and a wide soft nib, printed as a negative. |
| Show the Gears | The machine on screen — ring, wheel, arm and pen — cranked slowly. |
Keeping a look of your own
The presets are fixed — Resolume gives a plugin no way to add an entry to that dropdown while it is running, or to remember one between sessions. So there is no “save preset” button, and there cannot be one.
What there is instead is a pair of controls next to the dropdown. Export XML writes every control’s current value to a timestamped file:
~/Documents/cogwheel/cogwheel-20260901-152822.xmlEach line carries both the number the plugin stores and the readable version of it, so the file is worth reading as well as keeping:
<parameter id="1" name="Ring Teeth" type="integer" value="96.000000" display="96t - 24 lobes"/>
<parameter id="8" name="Speed" type="standard" value="0.737000" display="1.63 turns/s"/>
Load XML, new in v0.3.0, reads one back. It is a file picker: choose a file and every
control the file names is set from it, the sheet is wiped for the new machine, and the Preset
dropdown drops to Custom, because the file is now the truth. The row next to it says
loaded, remembered, or failed - see log. The full path — and any row the plugin could not
place — goes to the diagnostics log, because sixteen characters of parameter display is not room
for one.
Four things worth knowing:
- Rows are matched by name, never by number. A file written by the source loads into the effect and back, and a file from an earlier release still loads even though the controls have been renumbered since. A row naming a control that does not exist is skipped and logged.
- Choosing the same file a second time does nothing. A file is applied when the path changes, so a host that restates the same path every frame does not wipe the sheet every frame. To re-apply a file you have edited, pick a different one and then it again.
- A loaded file is held the way a preset is. Resolume goes on pushing the slider values it believed before the load; the plugin recognises those as the host repeating itself rather than as you editing, and keeps the file’s values until you actually move something.
- Reopening a composition does not re-read the file, since v0.5.1. Resolume restores your
saved parameters and then hands the plugin back the path that was in the picker; re-reading
it there would put the file’s values over the settings you saved, which is what #22 reported.
A path arriving before the first frame, on controls that have already moved off their
defaults, is the host restoring rather than you choosing, so the path is remembered and the
row says
remembered. Your composition wins, and picking a file yourself is unaffected.
The About block and the buttons are not settings and are not loaded, and a hand-edited value outside a control’s range is clamped to the range rather than applied.
Moving any control a preset covers drops the dropdown back to Custom. That is the preset letting go, not an error.
The two numbers that matter
Ring Teeth and Wheel Teeth are the whole machine. Because gears mesh, the wheel cannot roll by anything other than a whole tooth, so everything about the figure follows from those two integers:
| Ring | Wheel | Lobes | Turns to close |
|---|---|---|---|
| 96 | 32 | 3 | 1 |
| 96 | 52 | 24 | 13 |
| 96 | 31 | 96 | 31 |
Drag either control and Resolume shows you the answer before you let go — the Ring reports how many lobes you are about to get, and the Wheel reports how many turns it will take to close.
Snap to Set restricts both to tooth counts a real Spirograph set carries. Leave it on unless you are hunting for something specific; the figures people recognise are the ones those particular integers make.
Pen Hole is which hole in the wheel the pen sits in. Near the rim gives long thin lobes; near the axle gives something close to a circle. Snap to Holes restricts it to the twelve modelled positions, which is what a real wheel offers.
Mesh decides whether the wheel runs round the inside of the ring (a rosette) or the outside (a petal shape).
A wheel as big as the ring, or bigger, cannot run round the inside of it — there is nowhere for
it to go — so with Mesh on Inside and 100 wheel teeth against 96 ring teeth nothing is drawn.
The two controls say so as you drag them: the Ring reads too small and the Wheel reads
too big. Set Mesh to Outside, where a big wheel is fine, or choose a smaller wheel.
Why a drawing stops, and what to do about it
A closed figure retraces its own line for ever. That is not a bug and it is not something tuning fixes — it is what a Spirograph is. A drawing is finished when it is finished, and about ten seconds later nothing on screen is moving.
There are three ways out, and all three are things a person at the table actually does:
- Creep — the mesh is not quite true. A fraction of a tooth per turn precesses the figure so it never quite lands on itself, and the drawing keeps growing. This is on by default.
- Skip — a jumped tooth. Discrete, startling, and the classic way a real drawing is ruined. Skip Size is how far it jumps.
- Layers — when a figure closes, lift the pen, move to another hole, change the pen and draw the next one on top. That is how the multicoloured Spirograph drawing everybody remembers is actually made. On Closing decides what moves; Wipe Sheet starts a fresh sheet when the whole stack is done.
If the picture has gone still, one of those three is off.
There is a fourth way, new in v0.5.0, and it is the opposite of the other three: On Closing →
Keep Going. When the figure comes home nothing happens at all. The pen stays down, the same pen
in the same hole carries on round, and with Creep on the figure keeps precessing for as long
as the crank turns — the growing rosette, kept. A closure is not an event under Keep Going:
nothing is counted, nothing is wiped, Layers has nothing to do (it reads keeps going to say
so), and Fade by Figure has nothing to settle. With the ordinary Fade the drawing reaches
whatever balance the fade rate sets and stays there.
A stack of one Layer also keeps the pen down, but it still counts each closure — which with Fade by Figure on settles the drawing so far and starts it fading. Keep Going does not.
Selecting Keep Going holds the figure that is on the paper, since v0.5.1. Which wheel and which hole a figure uses is worked out from the seed, the layer number and On Closing itself, so switching to Keep Going part-way through a run used to lose two of those and fall back to what you originally threaded — a different figure, on the frame you asked it to stop changing (#24). It now latches the layer and the mode that produced what you are looking at. Switching back off hands the drawing to the live sequence again at the next closure.
There is a fifth, new in v0.6.0, and it is not a way out so much as a way of letting the drawing
choose: Unless Faded, the switch under On Closing. With it on, a figure closes only if it was
drawn inside the Fade time. One that took longer has faded from behind the pen by the time
the pen comes home — there is no whole figure on the paper to close — so it keeps going instead,
exactly as if On Closing said Keep Going, and is asked again the next time round. One that was
quicker closes as On Closing says. So with a single fade setting the quick wheels stack and the
slow ones keep going: at the default crank a 96/32 comes home in two seconds and stacks under a
ten-second fade, while a 96/31 takes a minute and never does. Turn Fade up past a figure’s lap
and it closes the next time it comes home; turn it down and the stack stops growing. The readout
next to the switch says the number it is working to — longer than 12s — so you can see which
figures will close without doing the sum.
It needs Fade above zero: with no fade nothing has faded and every figure closes, and the
readout says no fade: closes. The rule is the same under Fade by Figure, where the figure
being drawn does not literally fade — a figure slower than the fade keeps going in both modes,
so the switch means one thing whichever fade you are using. It came out of #25, which asked
exactly this question as a thought experiment.
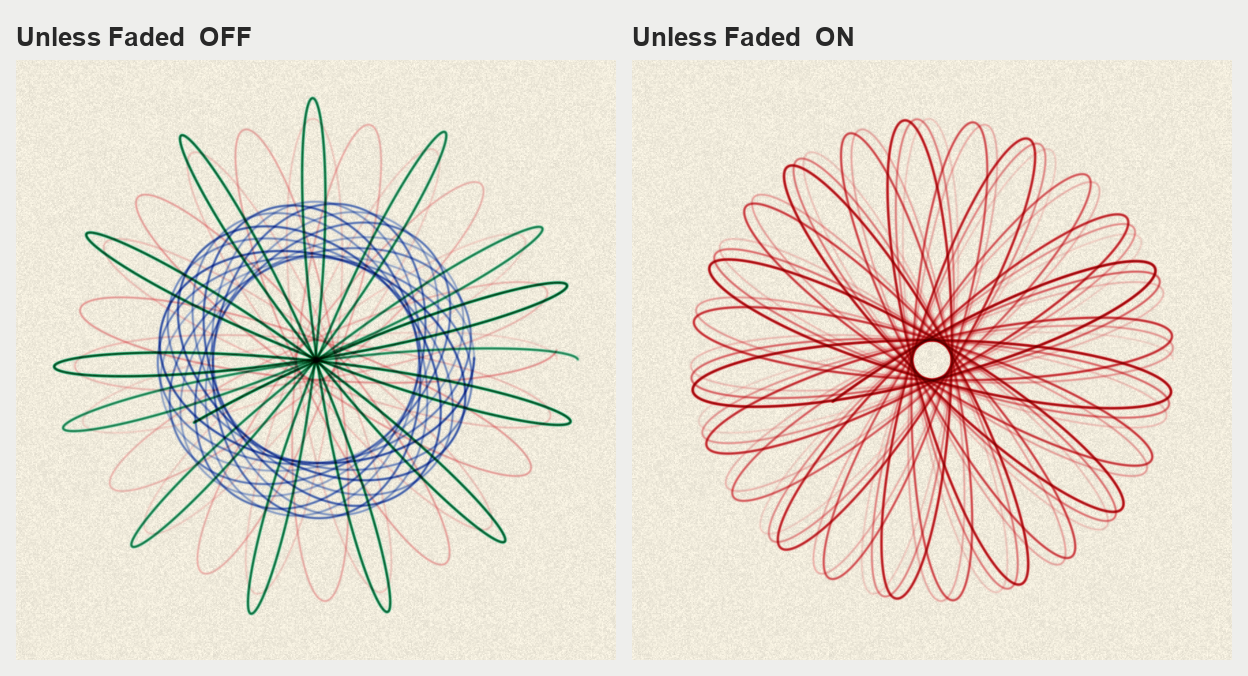
The same wheel, the same two-second fade, the same frame. On the left the figure took longer than the fade to draw, closed anyway, and the pen has lifted twice — red, then blue, then green, each fading behind the next. On the right it kept going: the same red pen, never lifted, the figure precessing under Creep with the fade following it round.
The pen
Pen Type is a real distinction between two real classes of pen, not a look.
- A ballpoint’s ball rolls, so it lays down ink per unit of distance: a line is the same darkness however fast your hand moved. That is what came in the box, and it is the default.
- A fibre tip feeds by capillary action, per unit of time, so it blooms wherever the pen slows down — which at a cusp is a great deal.
Blend is how new ink meets the ink already on the sheet, and each entry is a real thing you can put in the pen hole rather than a blend mode off a menu:
- Multiply is transparent ink — what every pen in the box does. Absorptions add, crossings darken, and red over blue is the near-black it is on the table. This is the default and the only one the next section describes.
- Cover is opaque pigment — a paint marker. New ink hides what is under it, a crossing is the colour of whichever pen came second, and a pen never darkens beyond its own colour however often it crosses itself. Set Pens to Ink Colour and the Ink sliders to white, or to the paper colour, and Cover is white-out.
- Lift is an eraser in the pen hole. The pen’s colour is ignored and the figure is drawn in whatever was underneath before the ink was laid — which on a clean sheet is nothing at all.
If what you wanted was add — a line that brightens the sheet — that is Print → Negative, because ink cannot add light. All three compose exactly with Fade by Figure, and a preset sets Blend along with the rest of the pen.
Flow is how dark the line is. It is multiplied by the nib’s width internally, so widening the nib does not lighten the line — a broader pen delivers proportionally more ink, which is what makes it broader rather than blurrier.
Nib is the line’s width, as a fraction of the sheet, so it is the same line at every output resolution. Pressure is how much a pressed nib spreads.
Pens chooses what the layers are drawn with — Four Pens is the set that came in the box. Ink Colour uses the Ink Red, Ink Green and Ink Blue sliders instead.
Ink is subtractive, and what follows from it
The sheet accumulates optical density, and what you see is the paper through it. A second pen crossing the first therefore gives the product of the two transmissions — the muddy near-black it is on the table — rather than the bright sum an additive renderer would produce. A pen that lingers lays down more.
Two consequences worth knowing:
- Changing the paper colour or the palette does not spoil what is already drawn. The sheet never held a colour to be wrong about.
- Ink can only ever darken paper. A pale line on a dark ground is not something the machine can make. Print → Negative is the honest route to it: a drawing, photographed and printed the other way up.
- Black paper hides the drawing. Turn the Paper sliders down to black and the ink has nothing to darken, so the whole sheet goes black — which is Beer’s law, not a fault. If what you wanted was to key the paper out and composite the line over other layers, that is what Clear Paper is for.
Clear Paper takes the paper away altogether. The output is the ink on a clear sheet, with an alpha channel: composite it over anything in Resolume and the line shows in its own colour, a black pen darkens whatever is behind it exactly as ink would, and over white you get precisely the drawing on white paper. The paper colour, Grain and Paper from Clip do not apply while it is on, because there is no paper. On the effect the ink goes over the clip and the clip keeps its own alpha.
Grain is how much of the paper’s tooth you can see. Tooth is a different question — how unevenly the sheet takes ink. Smooth board takes ink evenly and shows no grain; cartridge does both.
Fade is the one control in the plugin that is not something the machine can do. A drawing does not fade. It is here because a VJ needs the sheet to clear, and at zero it does not fade at all, which is what paper does.
Fade by Figure decides what the fade acts on. Off — which is how it has always behaved — the fade acts on the sheet, every frame. Ink laid down at the start of a figure has therefore been fading for longer than ink laid down at its head, so the line carries a gradient along its own length: it is palest where the pen started and darkest where the pen is now. On, the figure being drawn does not fade at all. It joins the drawing at the moment it closes, and fades from then on as one object, so a figure is a single even weight of line and the ones behind it lift away whole.
It needs Fade above zero to mean anything: with no fade there is nothing for it to change the shape of. Turning it off again does not lose anything — everything that had settled comes straight back onto the sheet.
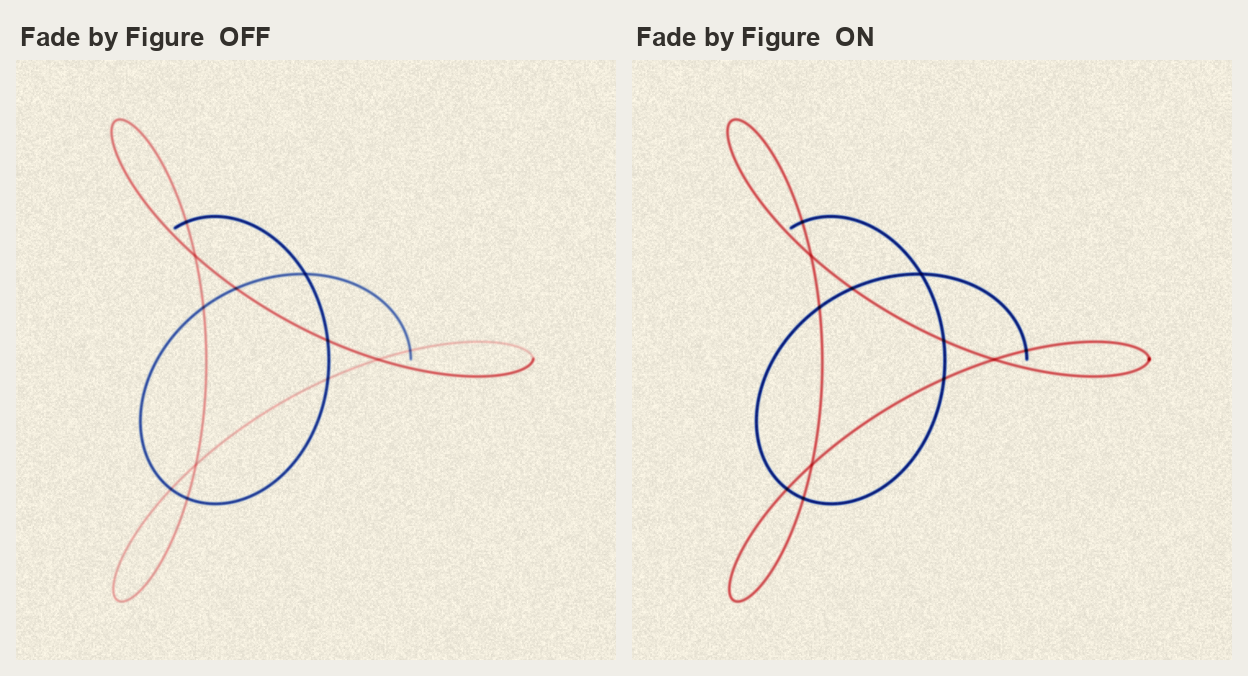
The same machine and the same fade, at the same frame. On the left the blue figure is being drawn and is palest where the pen started; on the right it is one weight of line all the way round, and the red figure behind it has lifted away evenly rather than in a gradient.
Cranking, and syncing to the music
Speed is turns of the ring per second.
Renamed in v0.2.0. This control was called Crank in v0.1.0. Every other plugin in the range calls it Speed, so it now does too. Two things follow, and both bite silently: a composition saved against v0.1.0 loses whatever Crank was set to and opens at the default, and any OSC or MIDI mapping pointing at “Crank” stops arriving. Re-point the mapping and re-save the composition once, and that is the end of it.
Sync overrides it: choose 1, 2, 4 or 8 bars and the figure is given that many bars to complete, whatever this particular train’s turn count is. So a thirteen-turn figure and a one-turn figure both land on the bar line together. That is the only sensible reading of “one figure per phrase”.
New Sheet throws the drawing away and starts again. It sits at the very top of the parameter list, above every group, so it is always in reach — clearing the paper is the one thing you want mid-show and it used to be folded away inside the Crank group.
Detail is how finely the pen path is walked — 360, 1440 or 5760 steps a turn. It is a cost dial with a visible symptom: at Draft a big figure is faintly polygonal. It does not change how much ink goes on the sheet.
Show Gears puts the ring, the wheel, the arm and the pen on screen, with the real tooth counts, so they can be counted. It is the quickest way to explain the plugin to somebody standing next to you.
In OpenFX hosts
Copy Cogwheel.ofx.bundle to:
- macOS —
/Library/OFX/Plugins - Windows —
C:\Program Files\Common Files\OFX\Plugins - Linux —
/usr/OFX/Plugins
⚠️ On macOS it must be /Library/OFX/Plugins, which needs an administrator. Putting it in
~/Library/OFX/Plugins is silently ignored — the plugin simply never appears, with nothing
logged and no error, which looks exactly like a broken plugin.
Two things behave differently there, both stated rather than hidden:
- The OpenFX build renders on the CPU. There is no OpenGL context to be had in an OFX host, so it is built for offline rendering rather than for live use.
- A drawing is history, so it replays from the beginning. A linear render costs nothing per frame beyond that frame’s own strokes. Scrubbing backwards through a long drawing is slow, and gets slower the further in you are. There is no warm-up window that would fix this: one would produce a different drawing, missing everything laid down before the window opened. Render forwards.
Sync works off a fixed 120 bpm in OpenFX, because OFX carries no transport tempo.
Export XML and Load XML are here too. Resolve has its own presets, so they exist mainly to share a look with the Resolume build: a file written by either loads in the other. In an OpenFX host Load XML is a file path with a browse button.
If it looks wrong
The picture has stopped moving. The figure has closed. Turn up Creep, raise Layers, or add some Skip. See “Why a drawing stops” above.
Everything is solid black. Flow is too high for the crank rate. A dense figure crosses itself constantly and every crossing darkens; Dense Web runs at a deliberately light flow for exactly this reason.
The drawing is off the edge of the frame. Check Size and Centre. Size is the ring’s radius as a fraction of the frame height, so at 1.0 the ring exactly fills it.
The lines look polygonal. Detail is on Draft. Move it to Normal.
Nothing draws, and Blend is on Lift. An eraser on a clean sheet takes nothing off. Set Blend back to Multiply.
Nothing draws, and Wheel Teeth reads too big. The wheel is as big as the ring or bigger and
Mesh is on Inside. Set Mesh to Outside or choose a smaller wheel. The log says the same.
Everything went black when I set the paper to black. Ink only darkens paper, so on black paper there is nothing to see. Use Clear Paper to key the sheet out, or Print → Negative for a pale line on a dark ground.
Nothing appears at all in Resolume. Check ~/Library/Logs/cogwheel/ (macOS) or
%LOCALAPPDATA%\cogwheel\logs\ (Windows). A shader that will not compile, or a sheet that would
not allocate, both look like “it does nothing” from outside and both say so there.
A control does nothing. Some are conditional: Skip Size needs Skip Chance above zero, On Closing and Pens need Layers above one, Layers and Pens do nothing under Keep Going because the pen never comes off the paper, Unless Faded needs Fade above zero and a figure that takes longer than it to draw (its readout says which), the Ink sliders only apply when Pens is set to Ink Colour, and Ink from Clip / Paper from Clip exist only on the effect.