

Intaglio is engraving for Resolume Arena and Avenue, as an FFGL effect. It turns a clip into a ruled copper plate. An engraver cannot choose a grey: the plate has lines, and tone comes from how close together they are and how thick each one is. A line swells where the picture darkens and tapers where it lightens. The lines run along the picture’s own structure, so they curve round a face or a building the way a burin would.
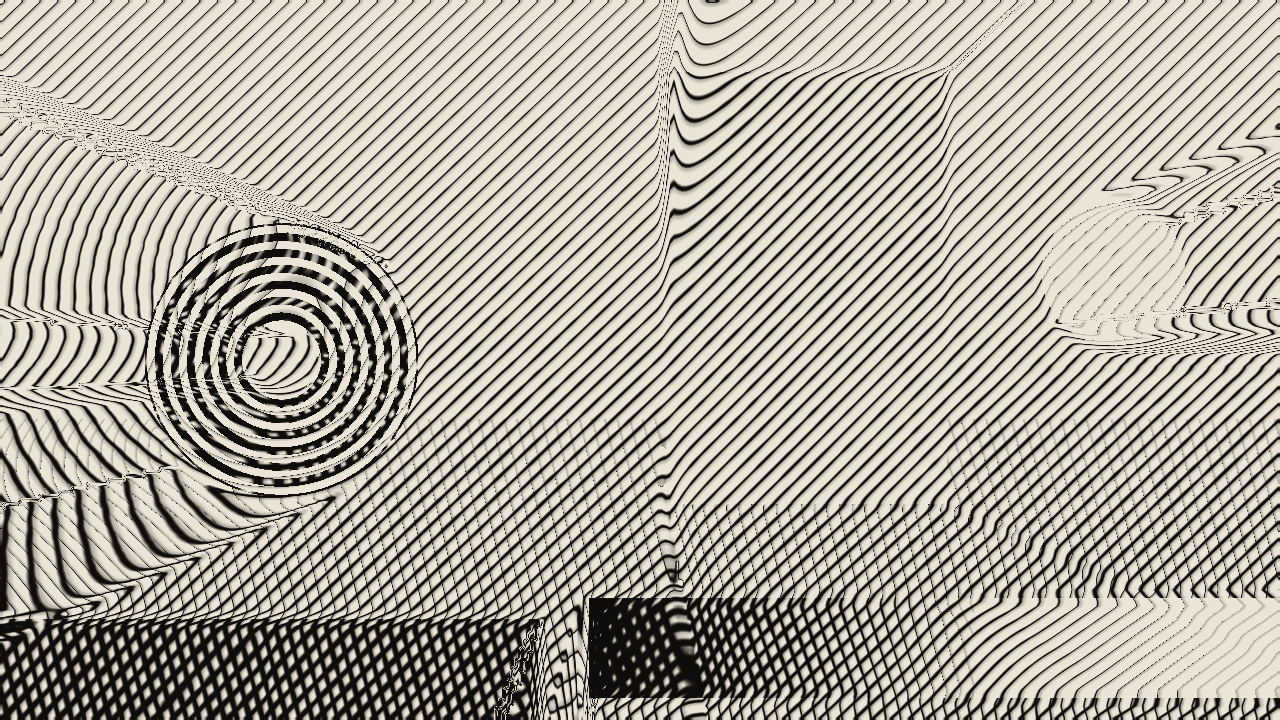
The plugin’s offline harness rendered this test card. It is not a Resolume screen capture. The rings on the left have a tangent that can be worked out exactly, and that is what the flow field is measured against. The strip along the bottom is a tone ramp covering every weight the curve can ask for.
Before you rely on this: released at v0.1.0, and honestly early. The central claims are measured on rendered frames, not asserted. A black input prints a coverage of 1.000000 (a solid plate) and a white one 0.000000 (bare paper). Ink coverage follows the weight curve to within 0.0005 at five tones. Every check runs at two resolutions and fails if the two disagree. All 25 controls are confirmed to change the picture. It has never been loaded into Resolume on macOS. On Windows, a build of v0.1.0 loads, registers and renders in Resolume Arena 7.27.1, with every control matching what the plugin declares and every one of them moving the picture — on software rendering, so that says nothing about a GPU. We have not tested how the controls look in the host’s inspector, for example whether Ink and Paper show as colour swatches. Try it on a spare layer first, and please report anything that misbehaves.
This codebase was created with AI assistance, directed and reviewed by a human author.
Installing
Drop the plugin into Resolume’s Extra Effects folder and restart Resolume:
macOS    ~/Documents/Resolume Arena/Extra Effects/
Windows  %USERPROFILE%\Documents\Resolume Arena\Extra Effects\
Avenue uses the same layout under its own folder name. The plugin appears in the effects browser as SW Intaglio.
There are two downloads:
- macOS: a universal build (Apple Silicon and Intel), as a
.dmgor a.zip. - Windows: an x64 build, as an installer or a
.zip.
The macOS build is Developer ID-signed and notarised, so it loads as it is.
You do not need to clear anything or run an xattr step. The Windows build is
not code-signed. Resolume loads plugin files normally, but the installer
triggers a SmartScreen warning the first time you run it: click More info,
then Run anyway.
Start here
Drop SW Intaglio on a clip. The defaults are chosen to look like an engraving straight away:
- dark brown-black ink on warm paper
- about 59 lines down the frame, laid at 45°
- a second hatch set at 60° that comes in with the shadows
Then try three things, in this order:
- Coherence to zero. The lines stop following the picture and become one plain, straight hatch at Angle Offset. This is the effect with the main idea taken out, and it is one slider away on purpose. Bring Coherence back up and watch the ruling bend round the shapes.
- Line Pitch. This is the ruling. Turning it up gives wider spacing and fewer lines. Turning it down gives a finer plate.
- Weight Curve. This decides where the tone sits. The default puts the detail in the darks, which is where an engraver puts it.
Every length is a fraction of the frame height, never a number of pixels. The same settings give the same drawing on a 720p preview and on a 4K output. You can set a look on a small monitor and get that look on the wall.
Flow
This group decides which way the lines run. Intaglio works out the direction of the picture’s structure at every point (its flow), and the lines follow it.
Detect On — which channel the plugin reads the picture from: Luma, Red, Green, Blue or Saturation. Luma is the default and is usually right. Saturation is for material where the subject stands out by colour, not by brightness. A red line on a blue field has plenty of colour contrast but almost no brightness contrast, so on Luma it would disappear. The same channel sets both the flow and the tone, so it changes how dark the engraving prints as well as which way the lines run.
Detail — how fine a structure the flow responds to. It runs from about half a pixel to about thirteen pixels at 1080. Low settings pick up every pore and grain. High settings see only the large shapes. The default, about 2.6 px at 1080, reads structure, not grain.
Flow Smoothing — how far apart two pieces of structure must be before they may disagree about which way the plate runs. More smoothing gives longer, calmer sweeps. It also reduces the shearing described under Known limits. The default is about 4 px at 1080.
Coherence — how strongly to trust the measured flow. The lines curve only where the picture has real structure. In plain areas such as a flat sky they fall back to Angle Offset. Higher Coherence makes the ruling follow fainter structure. At zero the flow is ignored completely and you get a plain global hatch.
Angle Offset — the plate’s own angle, 0° to 180°. Lines run at this angle wherever the flow has no preference, and across the whole frame when Coherence is zero. The default is 45°, the usual angle for an engraver’s lines.
Line
This group sets the ruling, and how the picture’s tone becomes line thickness.
Line Pitch — the spacing of the ruling, from 8 lines to 200 lines across the frame height. The control is named for the spacing, so it works in reverse to a line count: turning it up widens the gaps and gives fewer lines. The default is about 59 lines.
Weight Curve — the shape of the curve from darkness to ink coverage. The middle of the slider is exactly linear. Above the middle, the midtones stay light and the weight builds up in the shadows, so the darks carry the detail. Below the middle, the midtones fill in quickly. The default leans towards the darks.
Min Weight and Max Weight — the lightest and heaviest the plate is allowed to print, as a fraction of the ruling covered in ink. Together they set the two limits:
- At Max Weight 1, a black input makes each line as wide as the gap, so the plate goes solid.
- At Min Weight 0, a white input tapers the line to nothing and leaves bare paper.
Lower Max Weight and the darkest shadows keep their paper between the lines. Raise Min Weight and even the highlights keep a hairline.
Taper — how soft a line’s edge is. At zero it is a crisp burin cut, with a single pixel of antialiasing. At one it looks like a line etched with acid, with no hard edge left. It does not change the tone: whatever the softening takes off one side of the line’s nominal width, it adds back on the other.
Cross-hatch
Real engravers add a second set of lines at another angle when one set cannot get dark enough on its own. Intaglio does the same.
Sets — how many sets of lines the plate may carry: 1, 2 or 3. The default is 2. Extra sets only print where the picture is dark enough to need them, so a light picture looks much the same on any setting.
Cross Angle — the angle between one set and the next, 0° to 180°. Set 2 runs at Angle Offset + Cross Angle, and set 3 at Angle Offset + twice the Cross Angle. The default is 60°. Moiré appears where two sets cross, just as it does on a real plate.
Engage Threshold — how dark the picture must get before the second set starts to appear. The third set comes in a fixed distance further into the shadows, so three sets build up in steps instead of arriving together.
Engage Softness — how gradually each extra set fades in. Low settings give a clear boundary where the cross-hatching starts. High settings let it creep in over a wide band of tone. Tone stays exact either way: however the sets are engaged, their combined ink coverage adds up to the tone asked for.
Plate
This group sets the look of the ink and the metal.
Ink and Paper — the two colours of the print. Each is declared to the host as a red, green and blue triple, which appears as Ink, Ink_Green, Ink_Blue and Paper, Paper_Green, Paper_Blue. Depending on how Resolume presents them, you will see a colour swatch or three sliders. The defaults are a warm near-black ink on a cream paper. For a blueprint look, try white ink on dark blue paper.
Plate Tone — the thin veil of ink a wiped plate keeps over its whole surface, up to about a third coverage. The default is about 4%, which looks like a printed plate. At zero the paper between the lines is perfectly clean.
Bite — how uneven the etch is, up to three quarters of a line’s width. It roughens each line along its length without making the plate darker or lighter overall.
Burr — the curl of metal a drypoint needle throws up on one side of each line. The burr holds extra ink, so one side of every line prints heavier. It is what distinguishes a drypoint from an engraving at a distance. Burr adds ink, so turning it up darkens the plate slightly.
Bite and Burr were tuned by eye. Every measurement check sets them to zero, so the numbers in this guide describe the plate without them.
Output
Mix — fades the engraving back towards the untouched clip. At zero the clip passes through unchanged.
Invert — makes a white-line engraving, where the burin cuts the highlights instead of the shadows. This is not a swap of Ink and Paper, which would give the same drawing as a negative. The lines still follow the picture’s structure, so you get a different drawing.
The print only covers the parts of the frame where the clip has content. A logo on transparency comes back as an engraved logo on transparency, not as a rectangle of paper.
How it works
Tone is carried by the line. Each point in the picture has a darkness. The Weight Curve, Min Weight and Max Weight turn that darkness into coverage: the fraction of the ruling that should be ink. The line’s width is that fraction of the pitch. So a mid-grey at coverage 0.5 prints lines exactly as wide as the gaps between them. Viewed from far enough away, those lines read as grey, even though nothing in the plugin draws a grey.
The flow field is nib’s. Intaglio finds the flow from the structure tensor of the tone, which is a way of averaging the local direction of change that does not get confused when two directions point opposite ways. This part is copied from its sibling plugin nib, not written a second time, and it is measured the same way nib measures it. The test card’s rings have a tangent that can be written down exactly. The plugin’s answer is 6.74° off at the least-smoothed setting and 0.49° off at the best. There is one change from nib: Intaglio bends its ruling only where the structure is strong, not just where it has a direction. Otherwise the lines would follow the noise in every plain area of the picture.
nib draws the edges; Intaglio draws the tone. Put both on a flat grey area to see the difference. nib draws nothing there, because there is no edge. Intaglio fills it with evenly spaced lines of the pitch and weight that grey calls for.
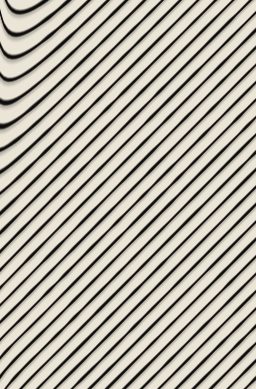
A crop of the test card’s flat panel. There is no edge anywhere in it, so the ruling is simply straight and even.
Time is declared unsupported. The plate depends only on the current frame. Nothing animates on its own, and the plugin tells the host not to send it a clock. Moving footage gives a moving engraving. A still gives a still engraving.
Performance
These figures are from macOS on Apple Silicon only, median of three runs:
| Resolution | Per frame |
|---|---|
| 720p | 0.59 ms (varies between 0.59 and 0.75) |
| 1080p | 1.19 ms |
| 4K | 4.57 ms, about 28% of a 60 fps frame |
Most of the cost is the flow field at full resolution. The line spacing is worked out on a smaller buffer sized to the ruling, not to the frame, so it costs about the same at every resolution. No timings have been taken on Windows.
Known limits
- Where the flow turns sharply, lines bunch, shear and split. This limit is mathematical, not a shortcut in the code. An evenly spaced family of curves that follows an arbitrary direction field does not exist, which is why real engravings have lines that fork. The ruling is exact on flat areas and on concentric circles. Everywhere else it is an approximation. On a hostile picture you may see a seam running out from the centre of the frame. More Flow Smoothing and less Coherence both make it milder.
- Three sets at a Cross Angle of exactly 60° print about 2.5% too dark. The three sets lock into step with one another. The default is two sets at 60°, which is exact, so this only shows if you change Sets to 3 without moving Cross Angle. Any other angle with three sets is exact.
- Very fine rulings on a 4K frame can alias. At the finest end of Line Pitch on a large output, the finest lines can stair-step.
- Other graphics drivers are unchecked. The plugin assumes the graphics driver smoothly filters a high-precision texture. Desktop OpenGL has supported this for years, but nothing checks it. If a driver fails here, lines would stair-step every few pixels.
- No presets and no OpenFX version in this release.
- There is a browser demo at intaglio-demo.stoatworks-labs.com. It is a port to a web page, not the plugin: the shaders run in WebGL2 and any CPU half is rewritten in JavaScript. The page lists what it does not reproduce.
If it looks like it is doing nothing
If a shader fails to compile, the plugin looks as if it is doing nothing. The log records which of the seven passes failed, along with the graphics card and driver:
macOS    ~/Library/Logs/intaglio/intaglio.YYYY-MM-DD.log
Windows  %LOCALAPPDATA%\intaglio\logs\intaglio.YYYY-MM-DD.log
If there is no error in the log, check these first:
- Mix is at zero.
- Ink and Paper are set to the same colour.
- Max Weight has been lowered to meet Min Weight. The weight then never changes, so the plate prints one flat texture whatever the picture.
About
The last group, About, shows the plugin’s name, version and maker, plus buttons that open this user guide, the project page, the source code and the Stoatworks support page in your browser. None of them change the picture.
Reporting something
github.com/stoatworks-labs/intaglio/issues. A screenshot, the composition’s resolution, and the settings you were using are usually enough.