

openrcs is a modern control surface for Analog Way Midra and LiveCore series video processors, with an early mode for the current range — LivePremier, Midra 4K and Alta 4K (see that section). A small bridge server holds one connection to the processor and serves a web UI to any number of browsers, so you can drive the device from a laptop, a tablet, or a touch panel — no vendor runtime required.
Running it
Start the bridge server, pointing it at the processor’s control port (TCP 10500), and open the web UI:
cargo run -p openrcs-server -- --device <processor-ip>:10500 --platform livecore
# then open http://127.0.0.1:8730/
Use --platform midra for the Midra family, --platform pls300 for a Pulse
PLS300, and --platform livepremier, --platform midra4k or --platform alta4k
for the current range, which listens on TCP 10606 instead (the port is filled
in from the platform when you leave it off). The header shows the device model, platform and a connection indicator;
every view updates live as the device — or another operator — changes state.
--device is optional. Started without one, the server comes up unconfigured
and shows only the Connection view: type the processor’s address (or a
hostname), tap it in on the on-screen keypad, or press Scan to look for
processors on the network; then pick the platform and press Connect (or
Enter). The choice is written to a config file
(~/.config/openrcs/config.json by default, or --config <file>) and used on
the next start, so this only has to be done once. Connection also retargets a
running server — useful when one surface covers more than one processor.
The scan is read-only: it opens a connection, listens for anything the processor volunteers, and never writes to what it finds — so it is safe to run on a live network. Some processors identify themselves that way and some say nothing at all; a result listed as unidentified was found and answered, it just did not name its platform, so pick that yourself and connect. A processor that already has a control session open elsewhere may not answer at all.
No command line? The openRCS tray app ships with every release beside the
server packages — openrcs-<version>-macos-app.dmg / .pkg on macOS (universal,
signed and notarised), openRCS_<version>_amd64.deb and .rpm on Linux,
openRCS_<version>_x64-setup.exe on Windows. It bundles the server in a menu-bar
app: click Start server, then Open, and point it at the switcher from the
Connection view. Nothing else to install.
The interface is a single dark theme, chosen deliberately for the blacked-out environments these processors live in. The left nav is grouped into Program (the things you touch during a show), Setup (configuration), and Tools.
It adapts to the device. openrcs reads the variable table the processor advertises and shows only the views that hardware actually supports — so a LiveCore unit exposes the full set below, while a Midra unit shows the subset it implements (and swaps in its own equivalents, e.g. a per-screen Freeze where LiveCore offers a master fade). The two families model some things differently — memories especially — and the UI follows each one’s model rather than forcing a single shape.
New in this release
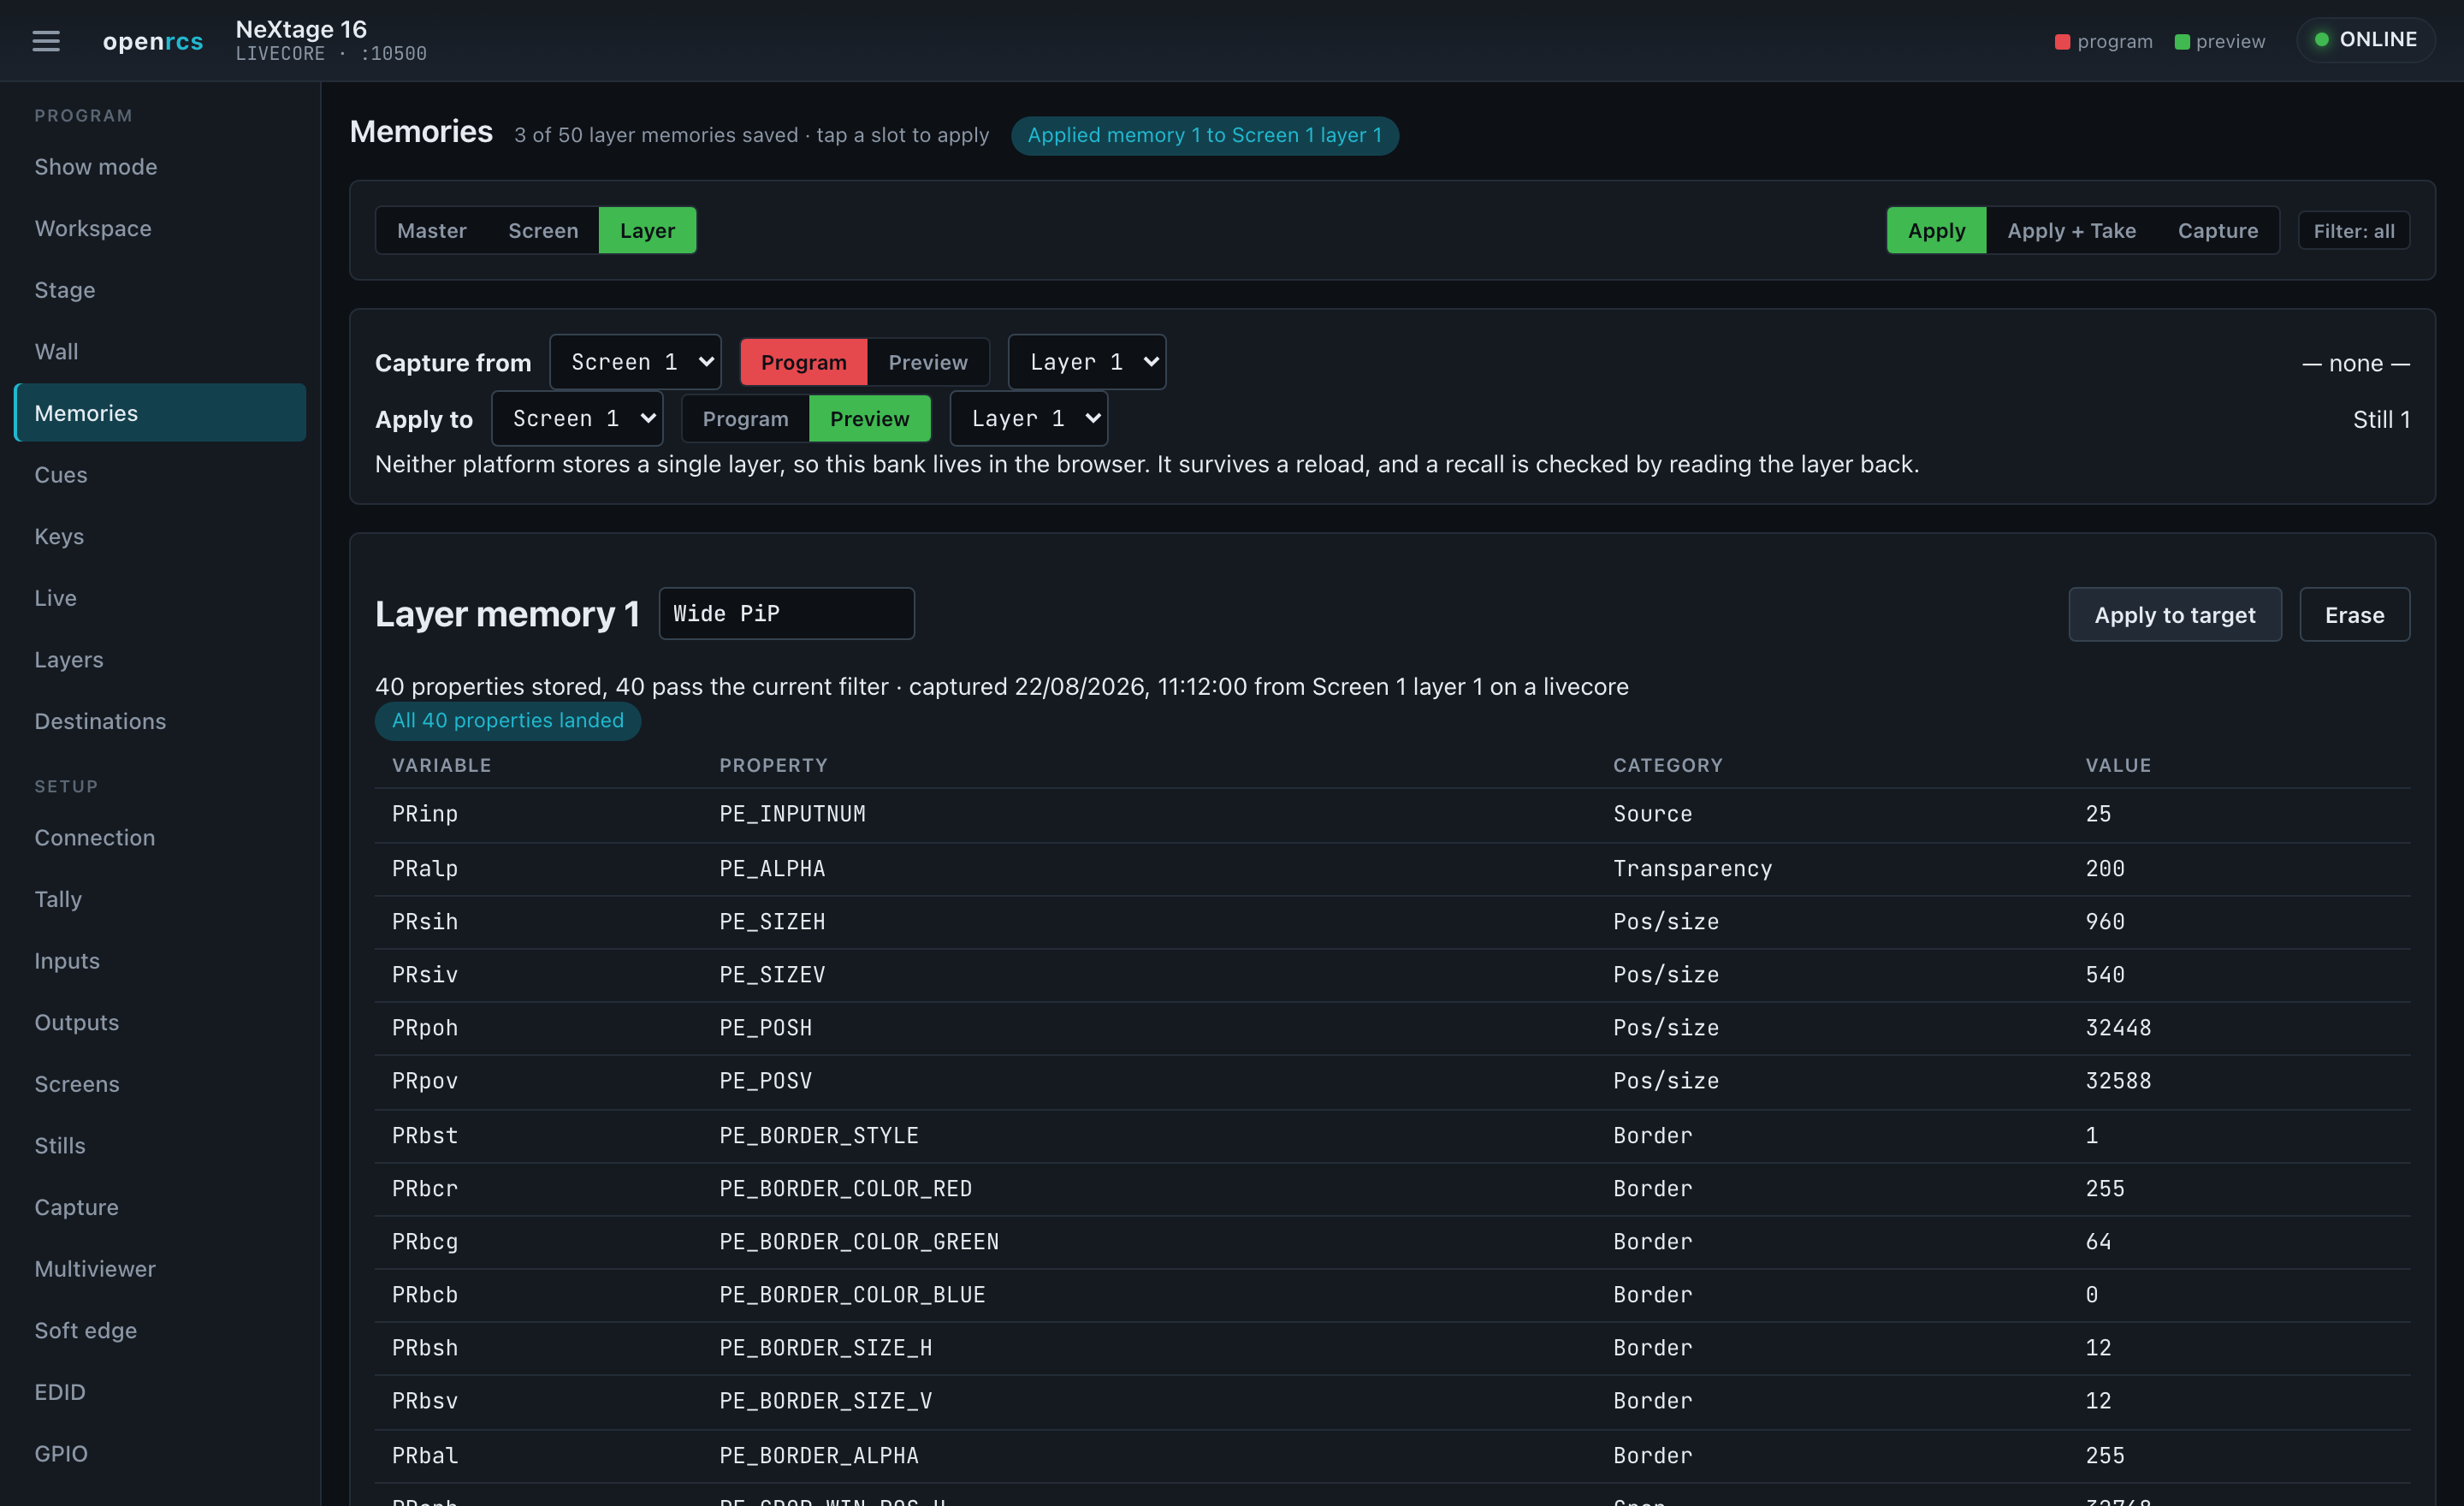
- Layer memories — a fourth memory bank beside master and screen. Capture one layer’s whole property set and apply it to any screen, preset and layer, under the same category filter as a screen memory. No processor stores a single layer, so this bank lives in the browser: it survives a reload, travels in a show file, and every recall is checked by reading the layer back — which is how it catches a Midra refusing a source that has no signal.
- Memories gains what only the Workspace panel had: each slot’s label as stored on the device, erase, an explicit preview-or-program target, and the device’s own twelve-category record filter applied to every recall.
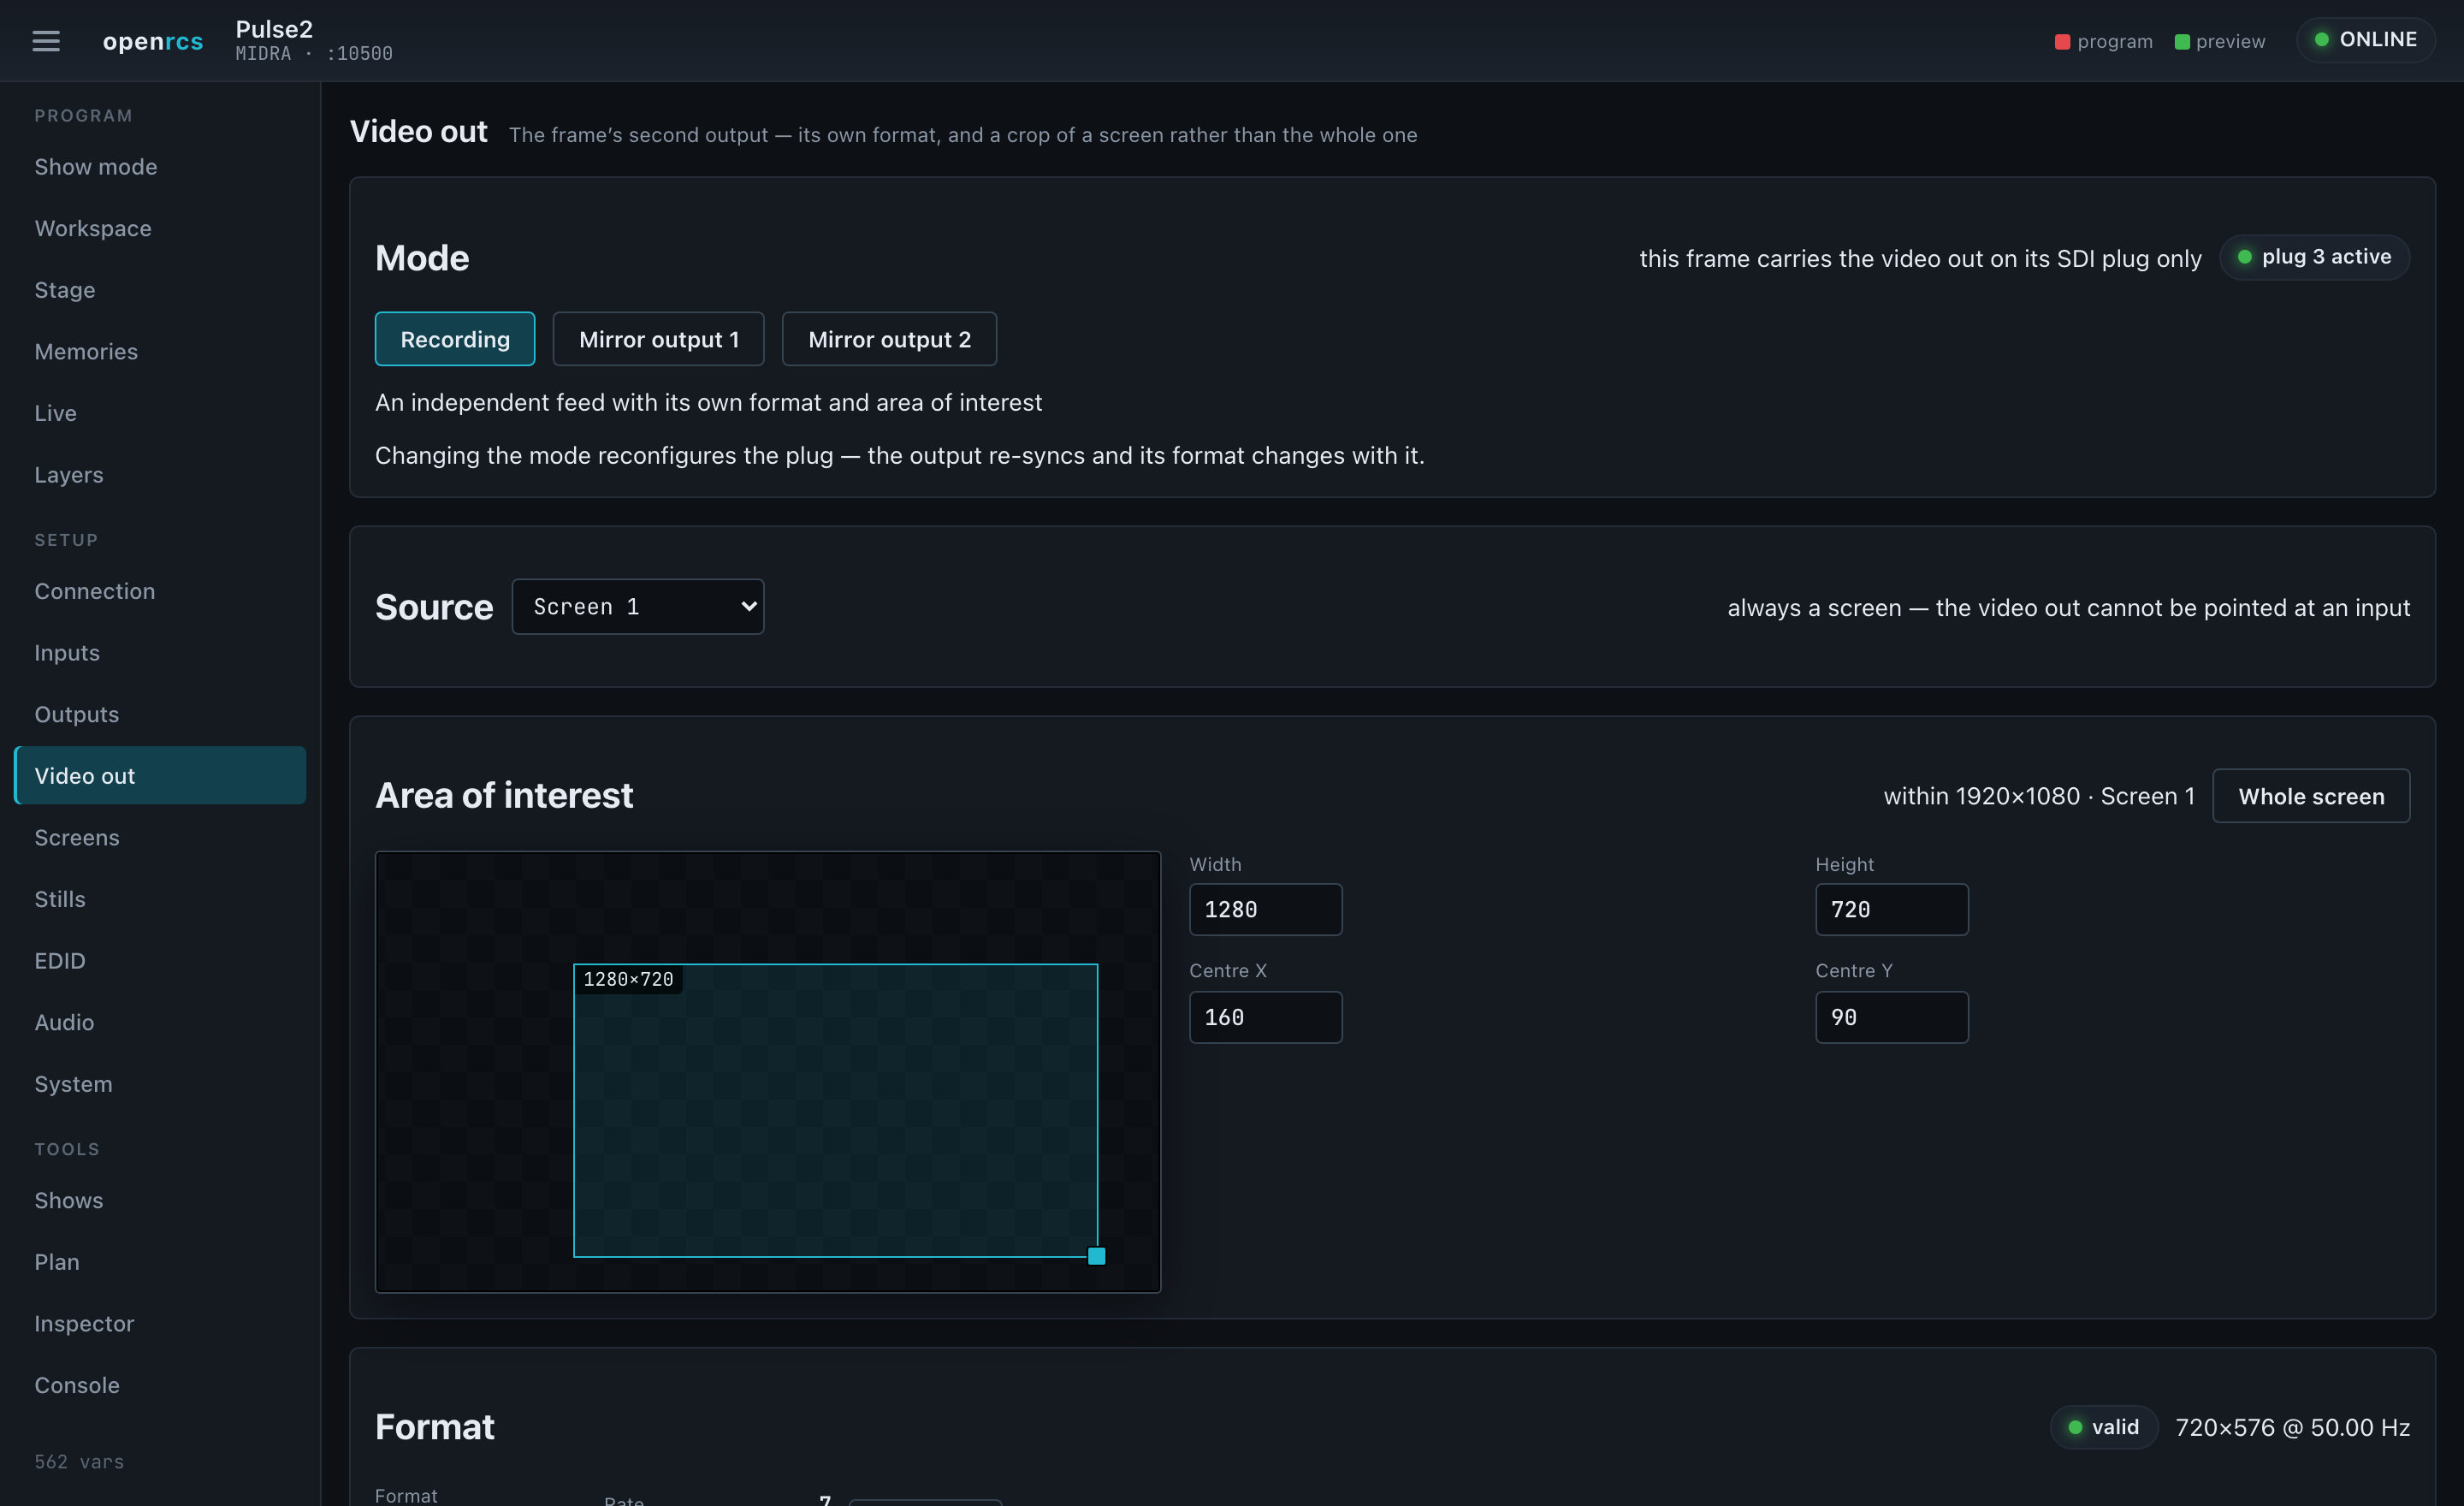
- Video out (Midra) — the frame’s second output, on its own view. Choose what its plug is for, pick which screen it looks at, and drag an area of interest to send a crop of that screen rather than the whole thing. See the note below about what it can and cannot carry.
- Area of interest on each LiveCore output — staged, then committed with Apply. Unconfirmed on hardware; the panel shows the device’s own readback rather than the numbers you typed, and says so.
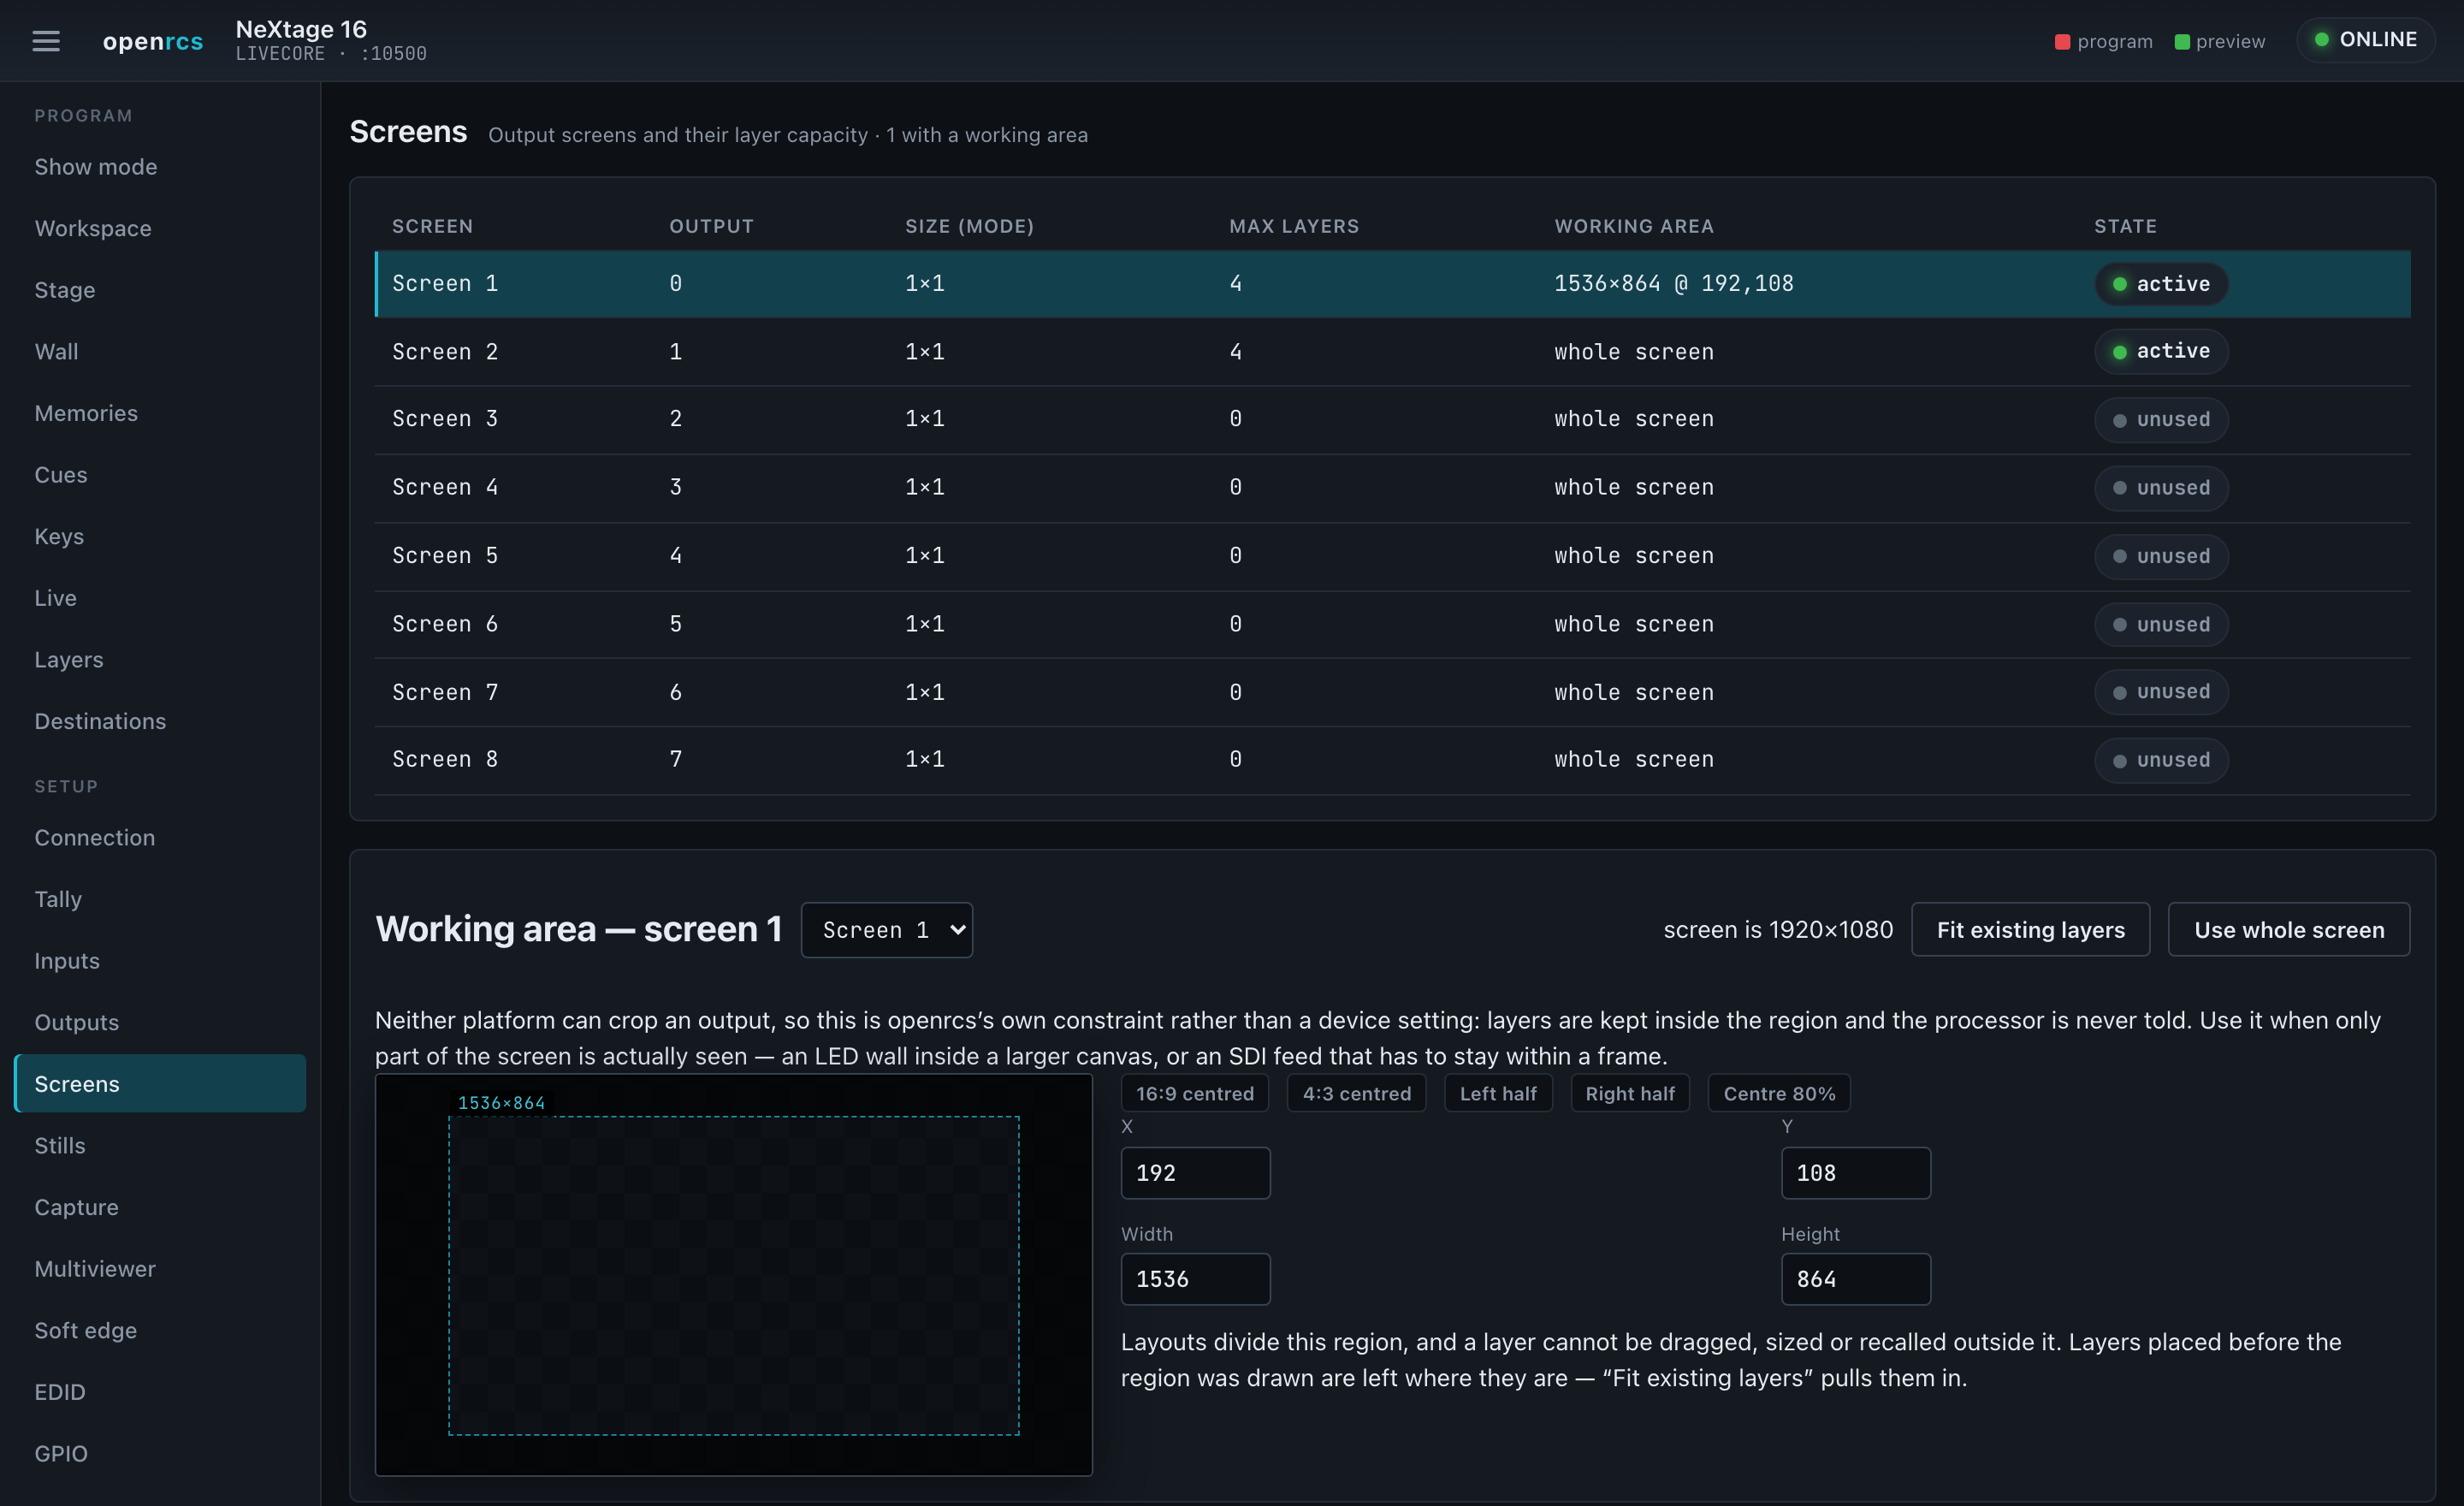
- Working area — a region of a screen that openrcs composes inside. Layouts divide it, and no drag, resize, typed value or memory recall can put a layer outside it. Nothing is written to the processor to set one up. Use it when only part of a screen is really seen — an LED wall inside a larger canvas, or a feed that has to stay inside a frame.
- Show mode — a stripped, big-target front-of-house surface: large CUT ALL / TAKE ALL, a TAKE tile per destination, and a grid of master-memory recall tiles. The one to drive a show from a touchscreen at front-of-house.
- Wall — which output shows which tile of which screen. Each screen is a grid of output tiles (its size in tiles is set here), and the outputs that carry it sit on the tile they show, marked program or preview. Click an output, then a tile, to move it; Apply to device commits the layout with the frame’s global output update, which re-syncs the outputs.
- Destinations — take, cut, T-bar and step-back whole screen groups as one destination, with a grouping editor and a TAKE ALL GROUPS.
- Shows — capture the device’s writable state (the live look, the memory banks, input or output setup) to a portable JSON file and restore it. Restore re-reads the device first and writes only what differs. Also hosts Confidence, an instant cache-based undo that can auto-snapshot before every take.
- Plan — build a look with no device attached (reads preview your staged values), then push it to the processor on connect. Staged work persists across a reload; “Seed from look” starts from the current on-screen state.
- Cues now chain: mark a cue autofollow and it runs the next one after a per-cue wait, with a HOLD to pause and per-cue notes.
On LiveCore, a take now animates the T-bar directly rather than firing the device’s own take verbs — on real hardware those leave the group stuck mid-transition, so openrcs sweeps the bar over the transition time instead.
Workspace
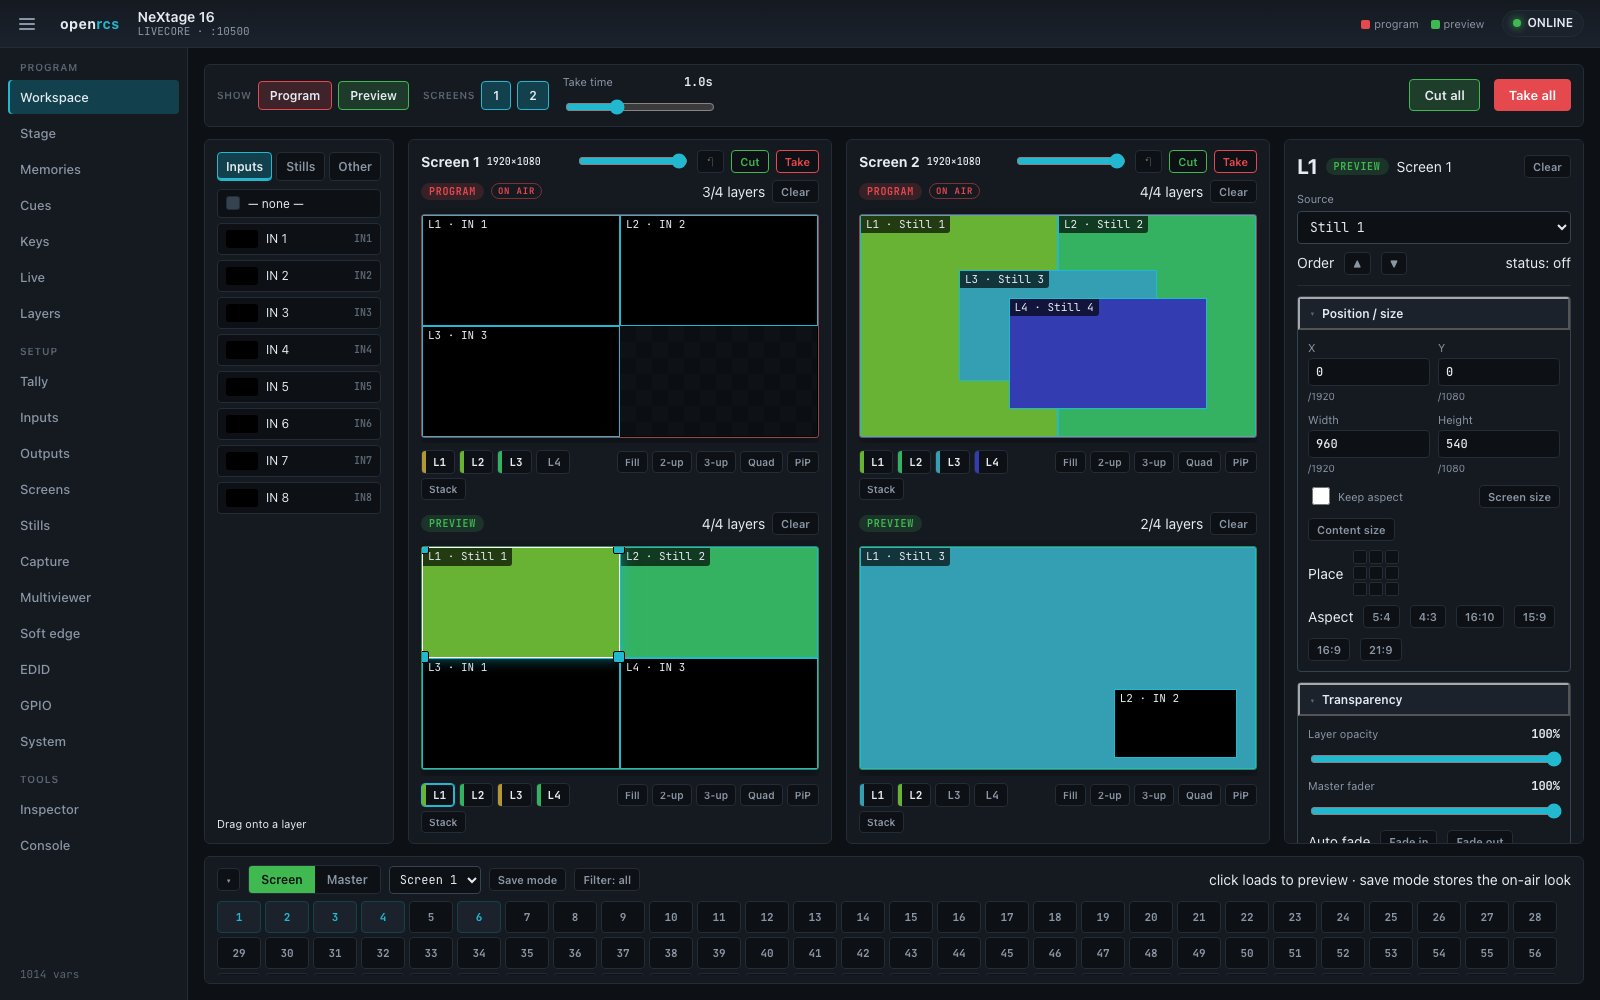
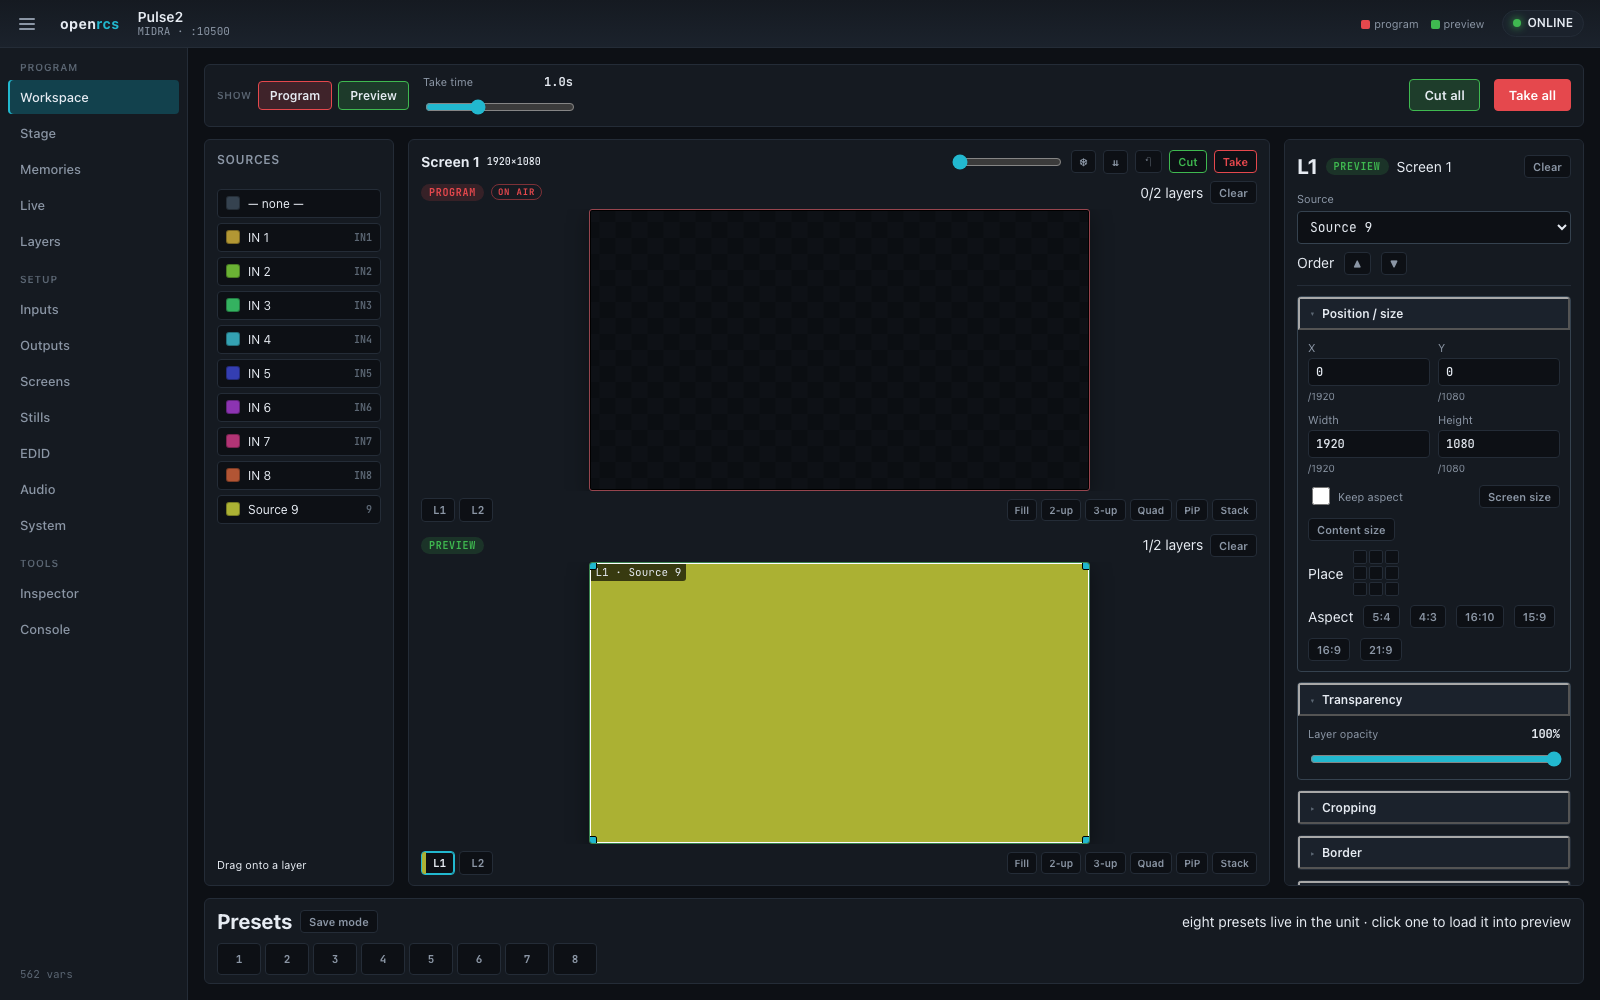
One page that mirrors how you actually drive a show, with everything in reach: the source palette down the left, every active screen in the middle with its program above its preview, and the layer properties panel on the right. The page fits the window — the previews grow to fill the space — and the memory strip along the bottom folds away when you want more room. Collapse the main menu with the button top-left (it stays collapsed) for more space still.
-
Drag a source onto a layer. Drag from the palette onto a layer rectangle, onto a layer slot, or onto bare canvas — dropping on the canvas puts the source on the first free layer, where you let go. Clicking a source arms it instead, for touch panels: arm, then tap a layer. Arm — none — to clear a layer. The palette has Inputs, Stills and Other tabs on LiveCore.
-
Live thumbnails. Where the device offers them (LiveCore inputs), the palette and the layers on the canvas show the actual picture on that input, refreshed a few times a minute. openrcs turns the device’s snapshot system on for you.
-
Drag and resize layers directly on each canvas, with every screen live at once, and use the layout presets — Fill, 2-up, 3-up, Quad, PiP, Stack — to arrange a screen’s assigned sources into a common look in one click.
-
The layer properties panel opens when you select a layer, and exposes everything the device holds for it: source and z-order, position and size (with keep-aspect, screen size, content size, a nine-point placement pad and aspect ratio presets), transparency and the master fader, cropping and aspect override, border style, colour, size and opacity, opening and closing transitions with their directions, timing and speed, the flying curve, and the effects — force transition, smooth move, flip, black & white, negative, sepia, solarise, strobe. A Midra unit shows its own equivalents instead, including per-layer opening and closing durations and a layer freeze.
-
Program sits above preview for each screen, tagged red and green, with the live one marked ON AIR. Each canvas edits its own context, so you can build the next look underneath what is on air. Show picks which of the two you want; Screens toggles hide the ones you are not touching.
-
Take and Cut per screen, plus a T-bar to run the transition by hand, a step back to the look before the last take, and — on a Midra — screen freeze and reload-program. Take all and Cut all in the top bar cover every visible screen, with a take time you set once.
On a LiveCore, which preset bank is program moves as you take; openrcs reads that from the device rather than assuming, so the ON AIR tag always follows the real output. If a transition stalls, a ··· button appears to complete it.
-
Unusable sources are flagged. A layer pointed at an input the frame does not have can never open, and a take waiting on it never lands — openrcs marks those layers amber and offers to clear them, rather than letting you discover it mid-show. On a Midra the same marking covers inputs with no signal, which the device silently refuses to put on a layer at all; if a drop does not take, the page says so instead of pretending it worked.
-
Memories along the bottom. On LiveCore that is the device’s 144 screen memories and 144 master memories, with save mode, load, load-and-take, erase, editable labels, and the per-category filter so a recall can bring in only the layer geometry, or only the sources, and so on. On a Midra it is the eight presets that live in the unit.
Stage
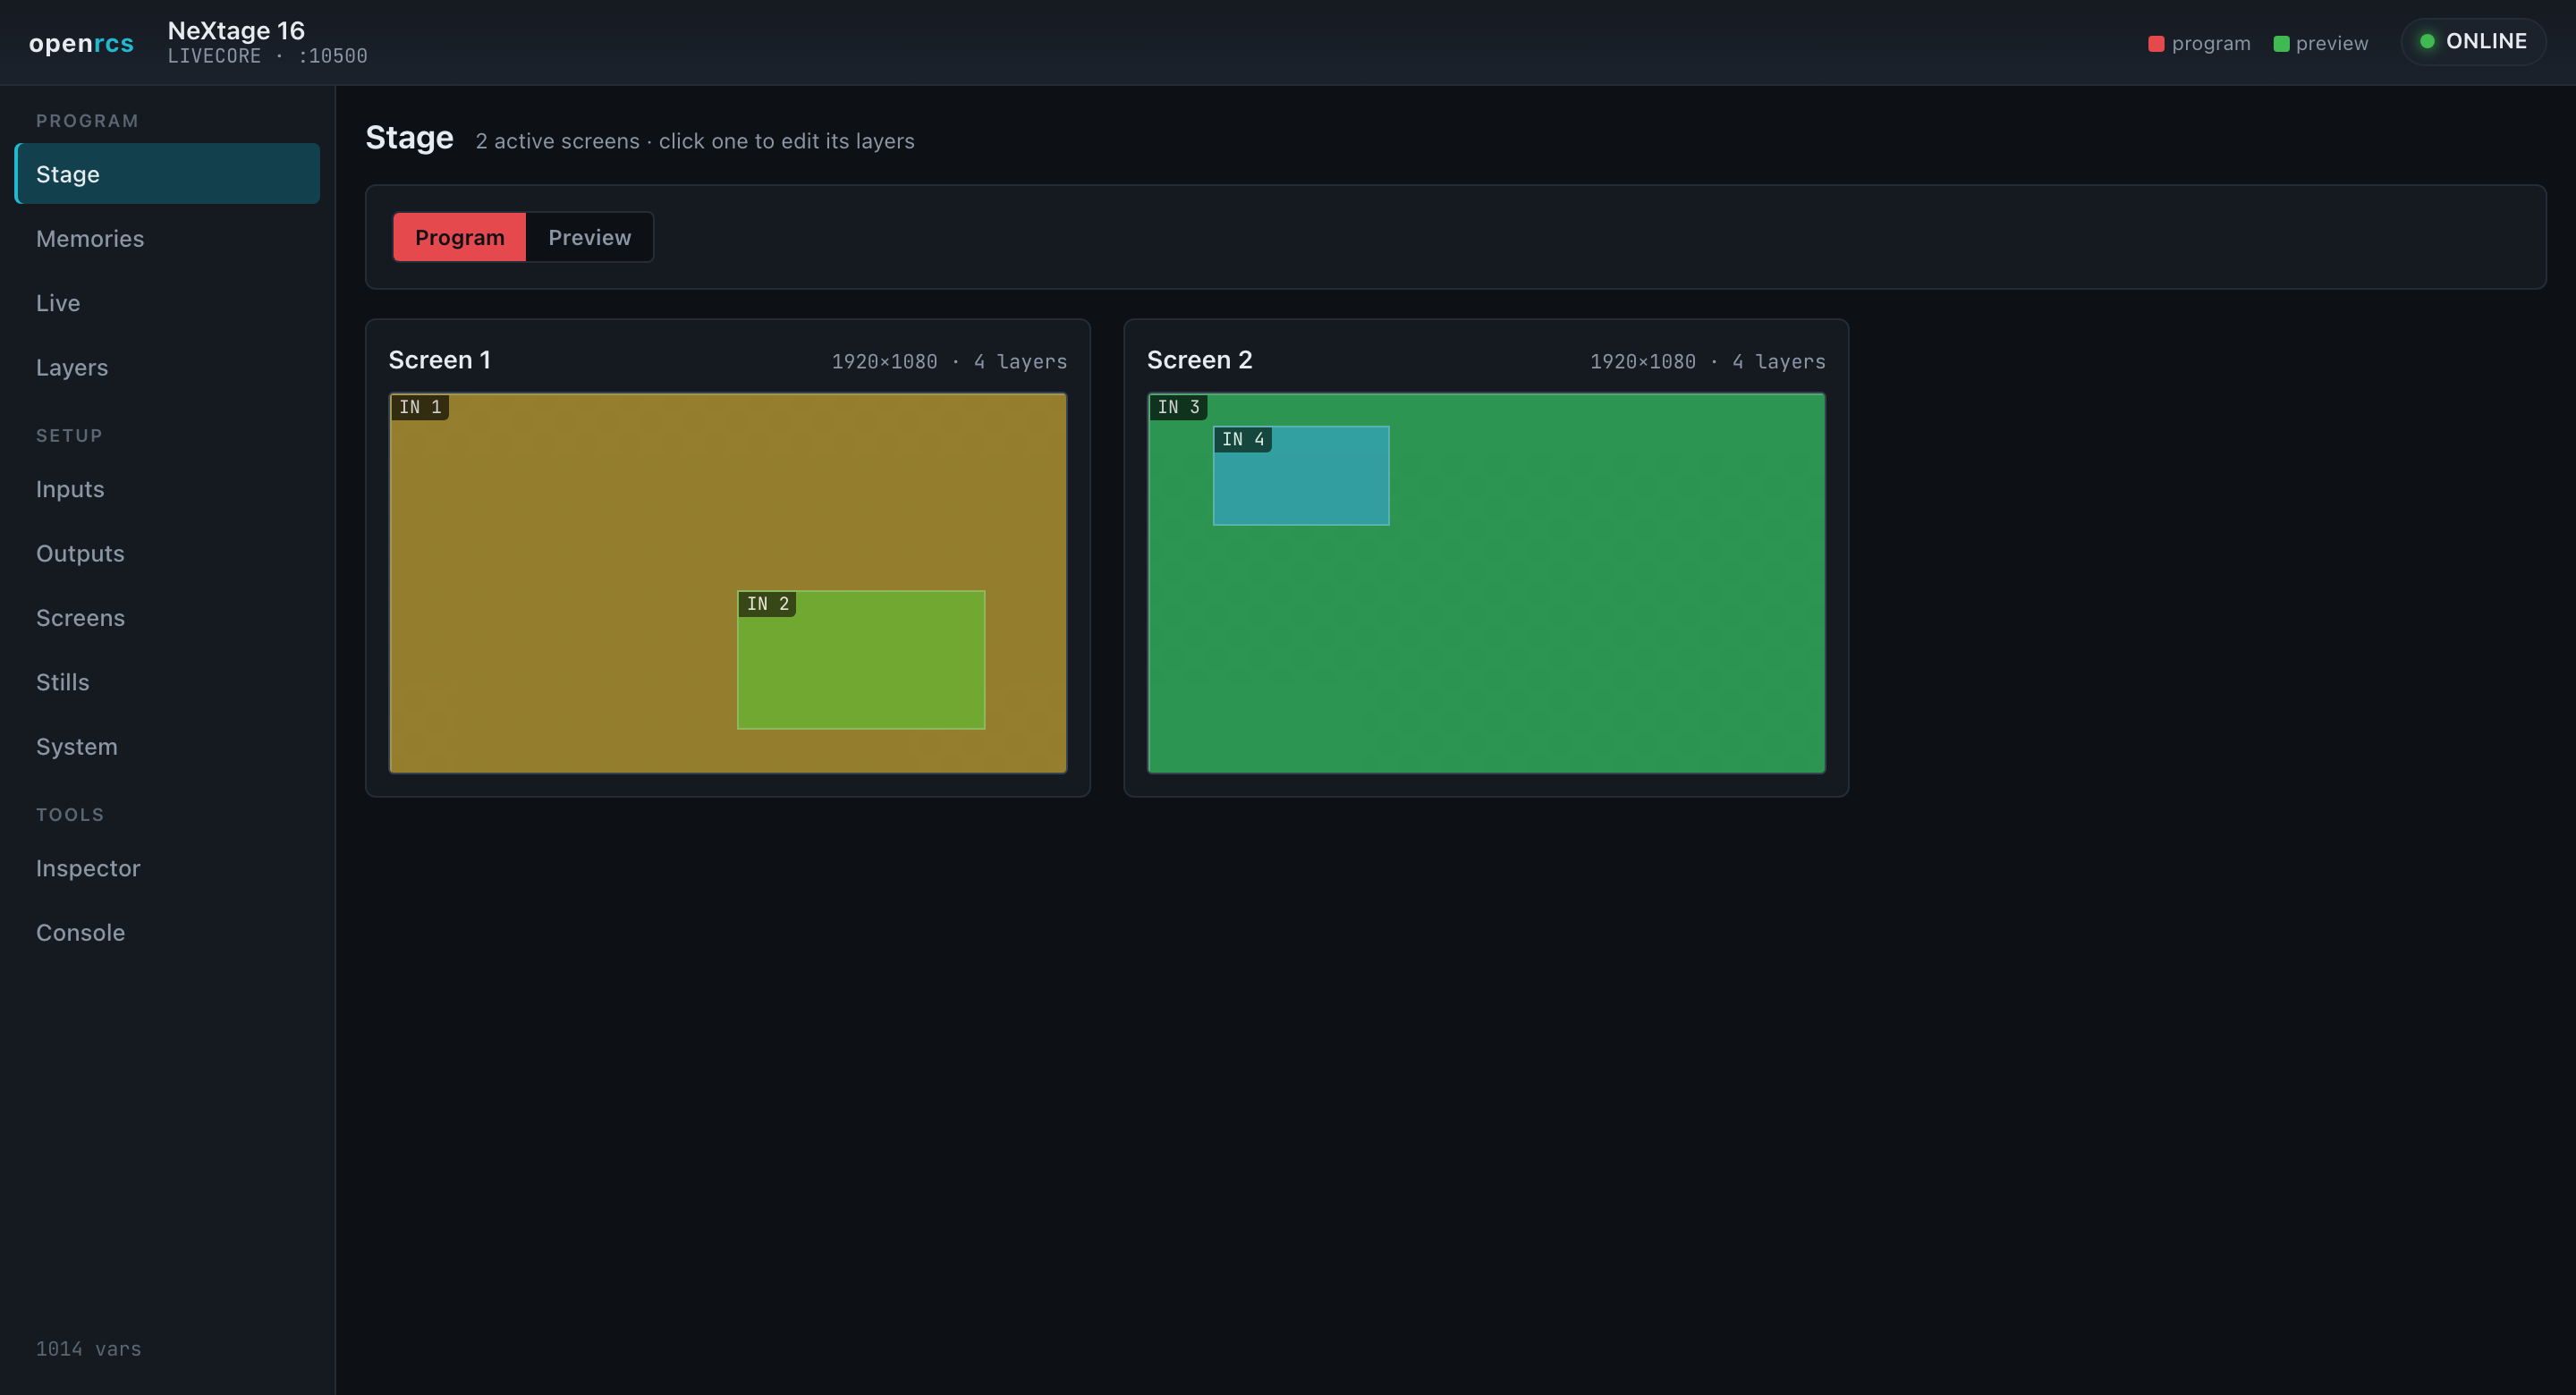
A mission-control overview: every active screen, drawn to scale with its live layers, in one place. Layers are coloured by source so the same input reads the same across screens. Toggle Program / Preview, and click any screen to jump straight into its layer editor.
Memories
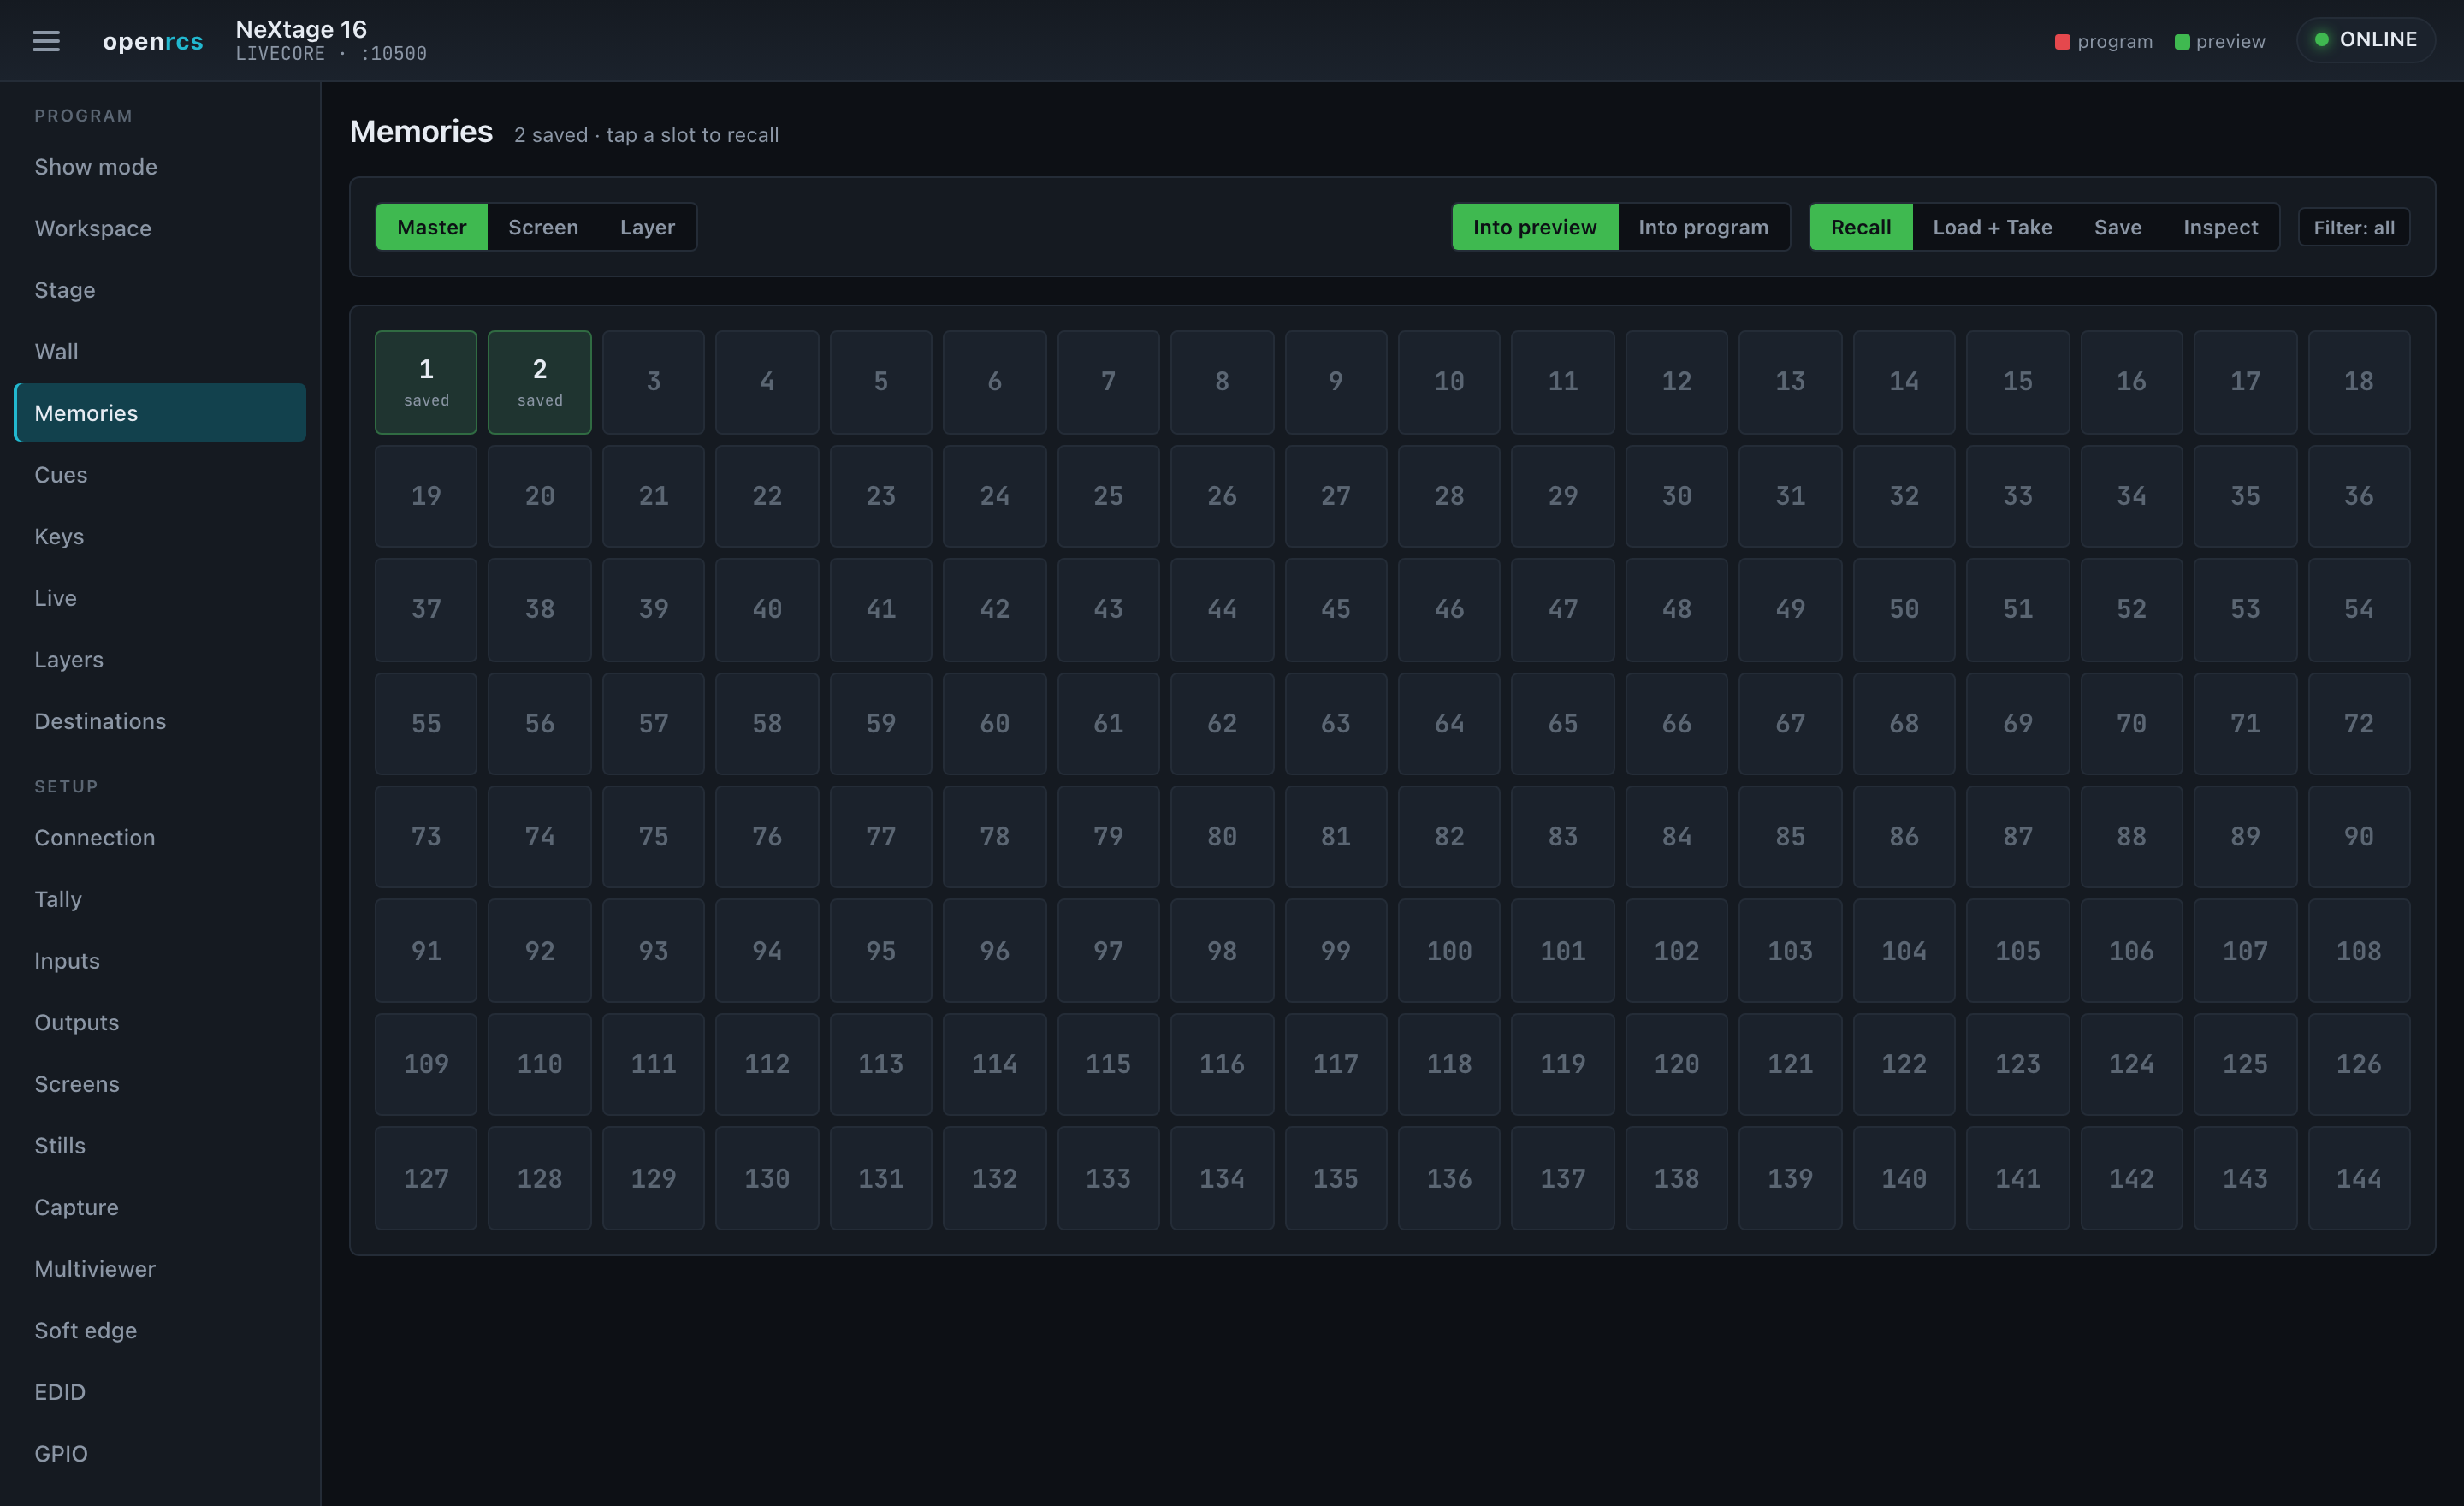
Recall, store and take memories. Toggle between Master memories (whole-device presets across all screens) and Screen memories (per-screen presets), and choose what a slot tap does:
- Recall — load the memory into preview.
- Load + Take — load it and take it to program in one action.
- Save — store the current state into the slot you tap.
Saved slots light up, driven by the device’s own validity flags, so the grid always reflects what is actually stored on the hardware. Inspect mode shows a scaled thumbnail of a stored memory’s layout — source, size and position of every layer — without recalling it. On Midra, memories follow that family’s model instead: eight preset slots, each captured from the live program, with the same inspect-thumbnail, recall and erase.
Layer memories
The third tab in Memories. Pick the layer to capture from — screen, program or preview, and which layer — then switch to Capture and tap a slot. The slot stores every property that layer has: 40 of them on a LiveCore, 27 on a Midra, read from the variable table your processor actually advertised rather than a fixed list.
To use one, set Apply to — any screen, either bank, any layer — and tap the slot. The category chips apply here exactly as they do to a screen memory, so you can drop a layer’s position and size onto another layer without disturbing its source.
Two things worth knowing:
- A recall is verified, not assumed. openrcs re-reads the layer afterwards and names anything that did not land. A Midra silently refuses a source with no signal — no error, no echo — and this is the only way to see it.
- A capture records which platform it came from and refuses to apply on the other one. The two families spell the same properties with different ranges, so the numbers would land but mean something else.
Video out — Midra
Most Midra frames carry a second output beside the numbered ones. On a frame where it is the SDI plug, this is the only SDI the unit has, and this view is where it lives.
Mode decides what the plug is for. It is not a display setting — it reassigns the plug:
| Mode | What the plug does |
|---|---|
| Recording | An independent feed with its own format and an area of interest. The format list is the RCS’s own — PAL and NTSC in 4/3 and 16/9, 480p/576p, 720p, 1080i/p/sF, 2K; a frame that has only been seen at PAL 4/3 (720×576) in this mode is the extent of what has been checked. |
| Mirror output 1 | The plug becomes an extra plug of output 1, carrying that output’s full raster. HD if the output is HD. |
| Mirror output 2 | The same, for output 2. |
Only the modes your frame offers are enabled; it reports which ones it has.
In Recording mode you also get a source — which screen the feed is a view of, including the two tiled combinations — and an area of interest: drag the rectangle, or type a size and centre, to send a crop of that screen instead of all of it.
The video out cannot be pointed at an input. Every source it offers is a screen. To put one input on that plug, put the input on a layer of a screen the video out is looking at.
There is no HD area of interest. The crop exists only in Recording mode, and Recording mode is standard definition. If you need a framed HD feed, mirror an output and constrain the composition with a working area instead.
Working area
Neither platform can crop an output at HD. When only part of a screen is actually seen, openrcs can constrain itself instead: set a working area on the screen in Setup → Screens and everything composes inside it.
- Layout presets divide the region rather than the raster — a quad is four cells of the part you see.
- A layer cannot be dragged, resized, typed or recalled outside it.
- Nothing is written to the processor. It never knows.
Shape presets cover the usual cases (16:9 or 4:3 centred, half the screen, centre 80%), or type the four numbers. Setting a region deliberately does not move anything that is already placed — Fit existing layers does that when you want it, across every preset bank so a take cannot bring an overhang back.
Cues
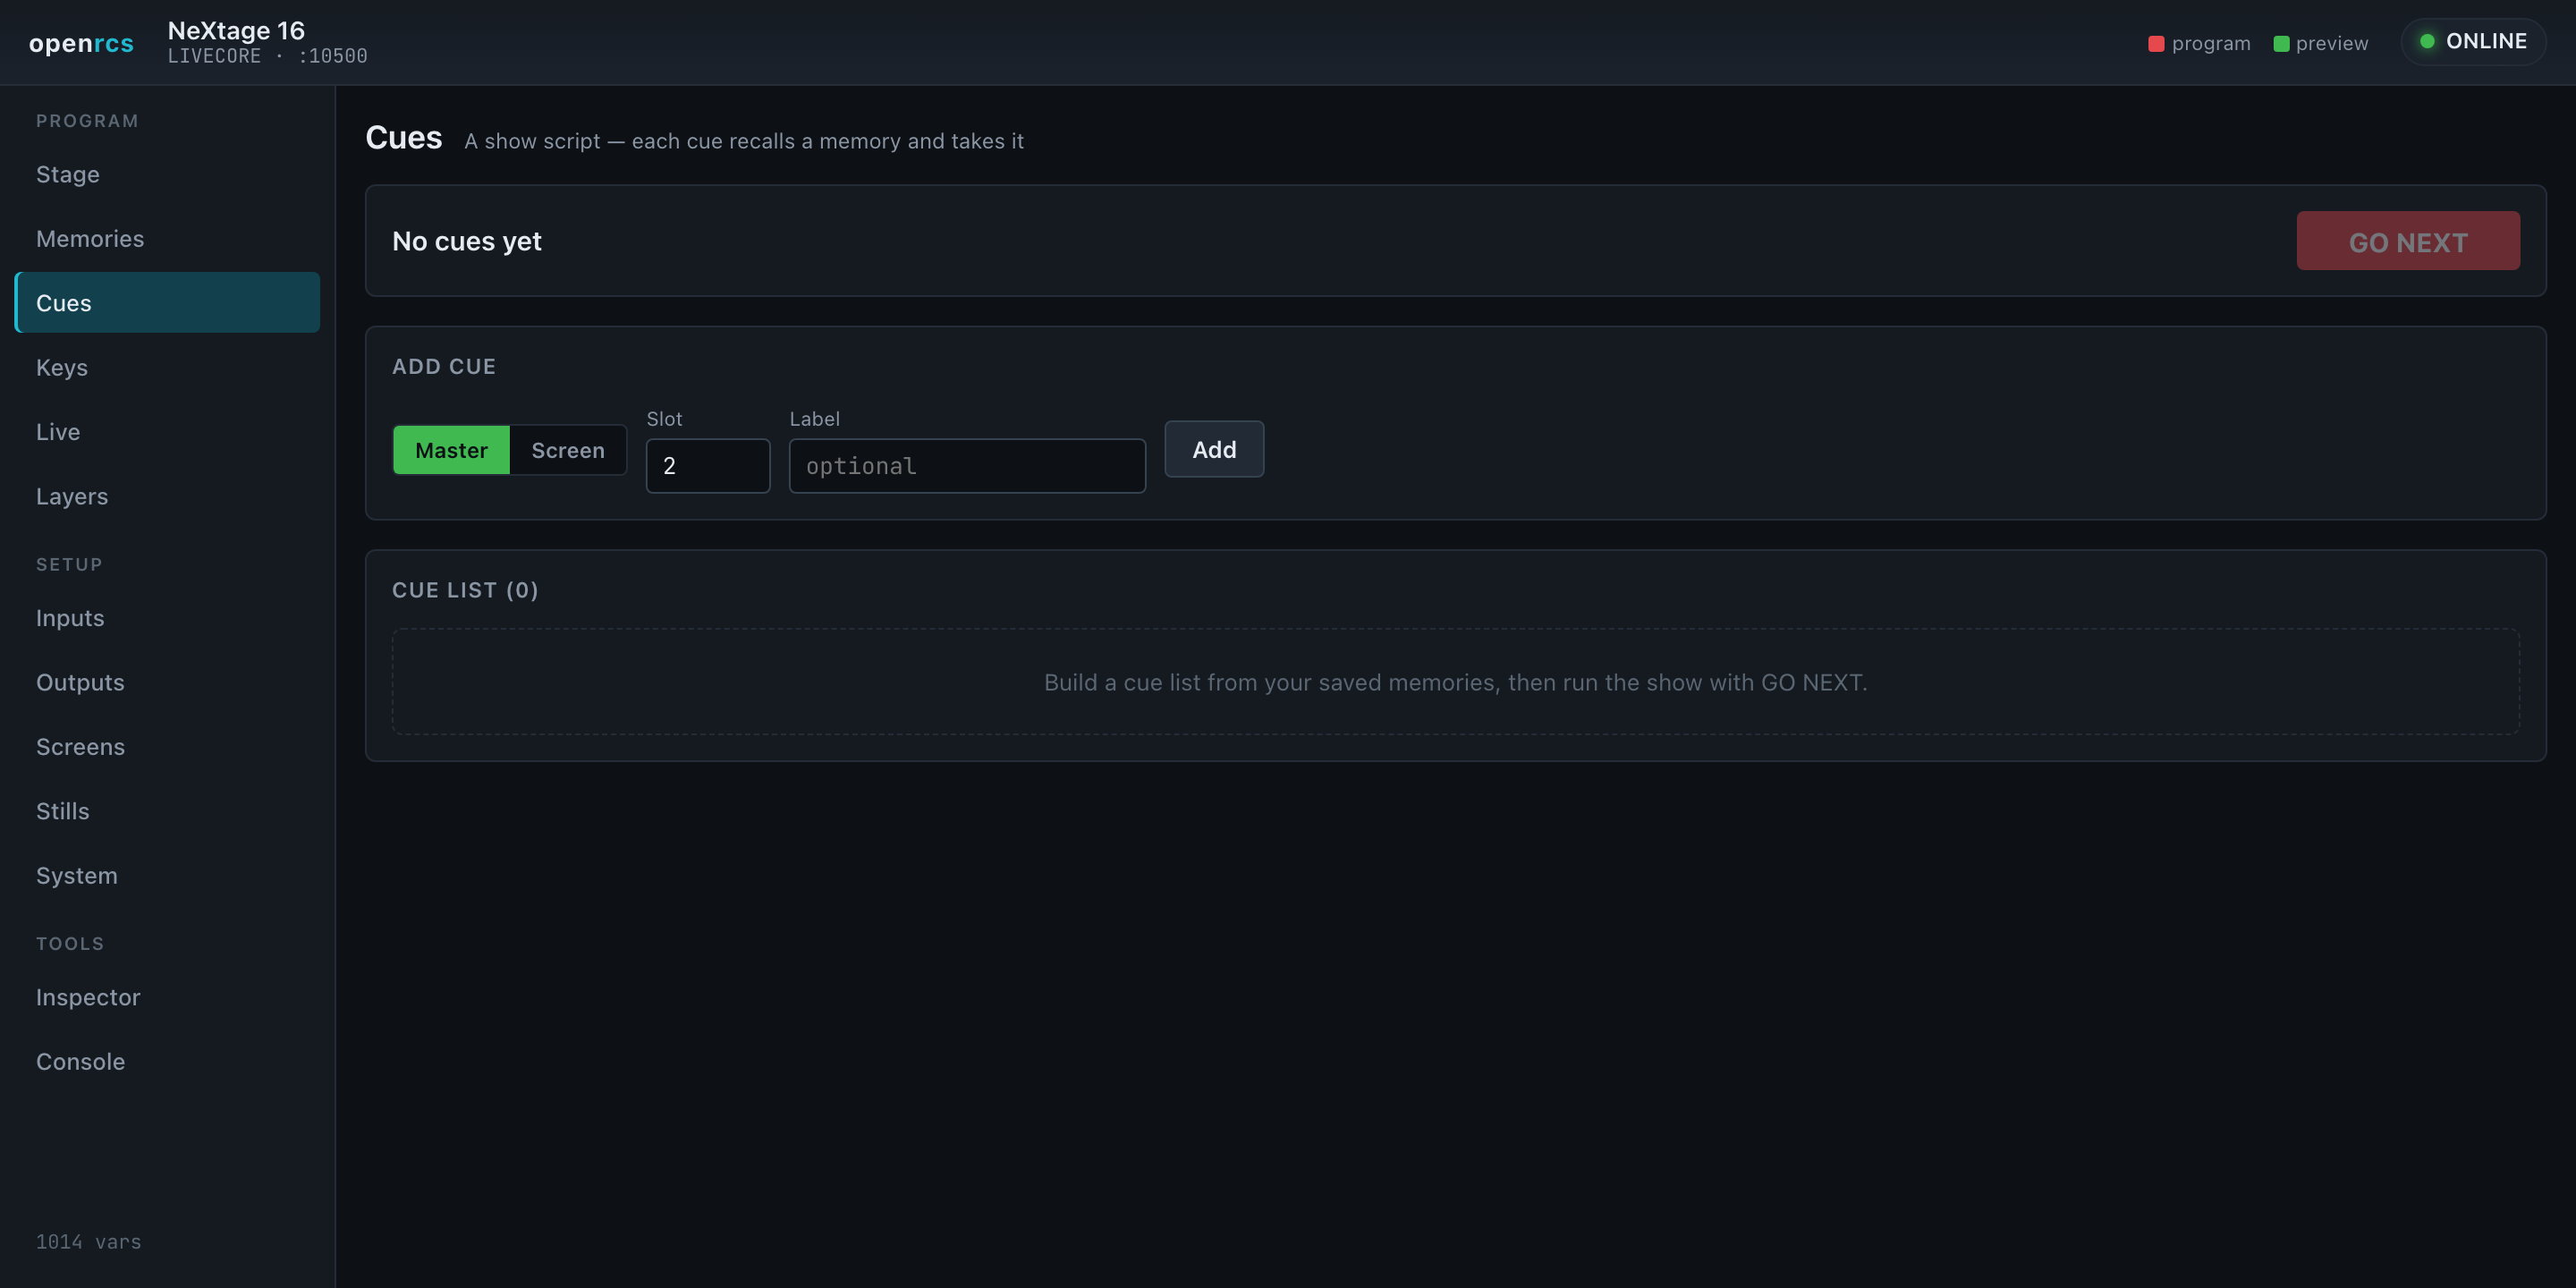
Turn your memories into a show script. Each cue recalls a master or screen memory and takes it; GO NEXT runs the list step by step. Preview or Go any cue directly, reorder and rename, and the current cue is highlighted. Cues are saved in the browser, so your running order survives a reload.
Keys
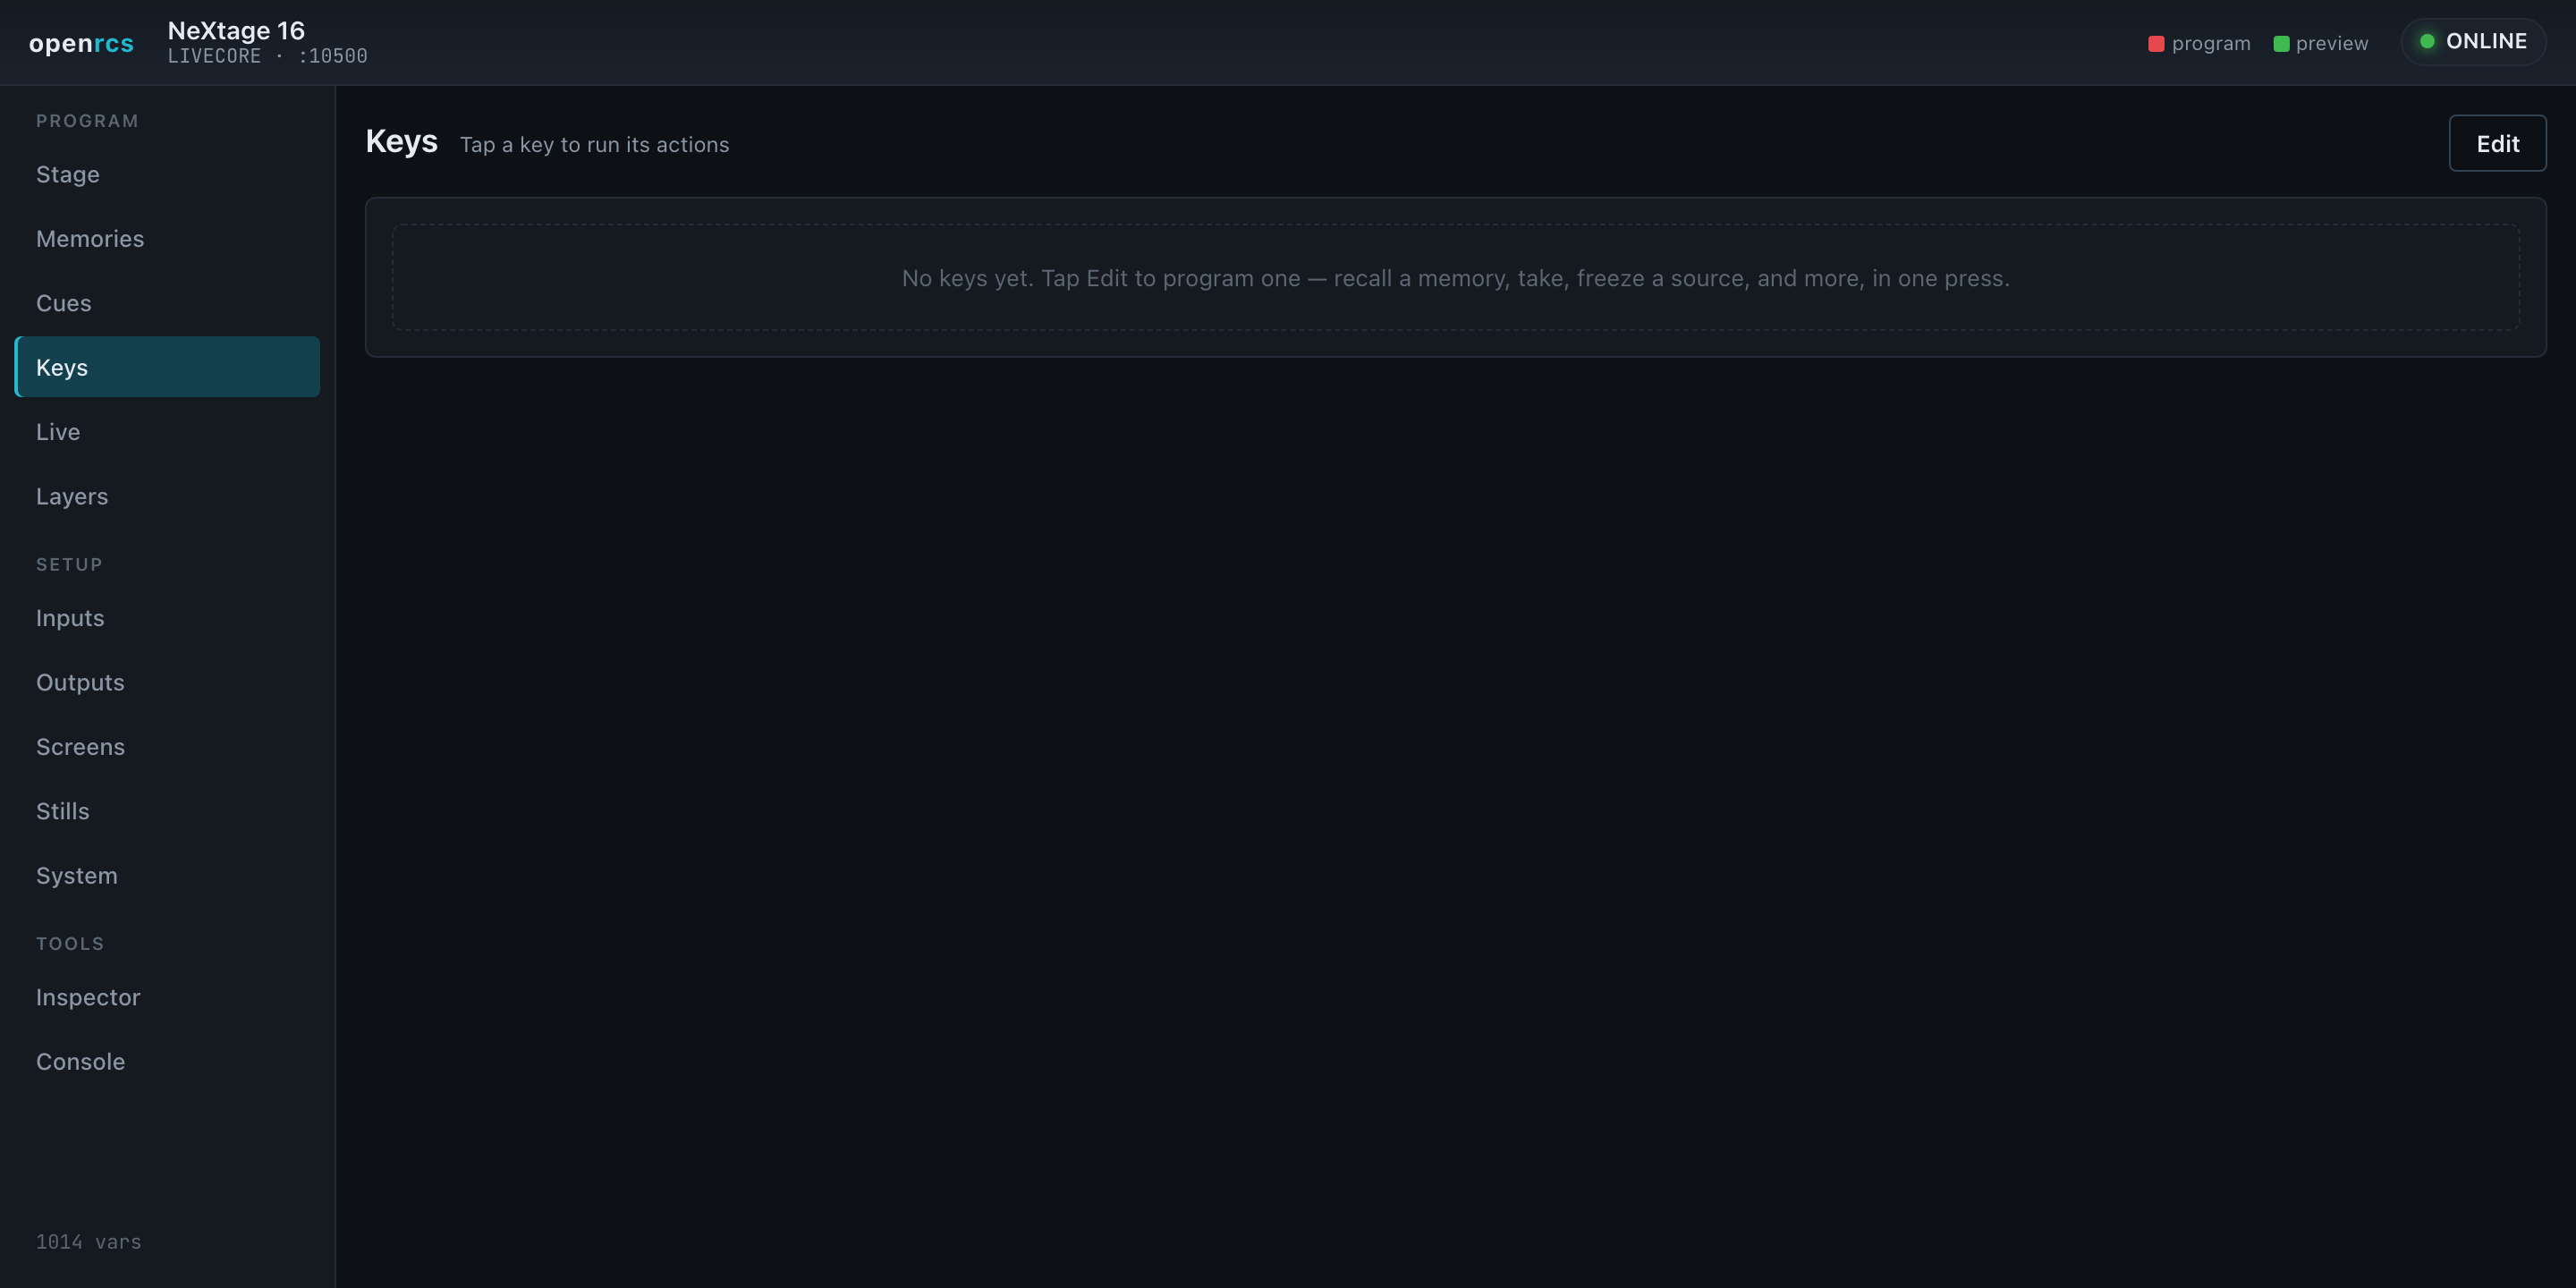
Programmable one-tap buttons. A key runs a sequence of actions — recall a memory (with take), take a screen or all screens, freeze an input, black an output, master-fade — so a whole cue-to-air, a panic black, or a freeze is a single press. Tap Edit to build them; they persist in the browser.
Live
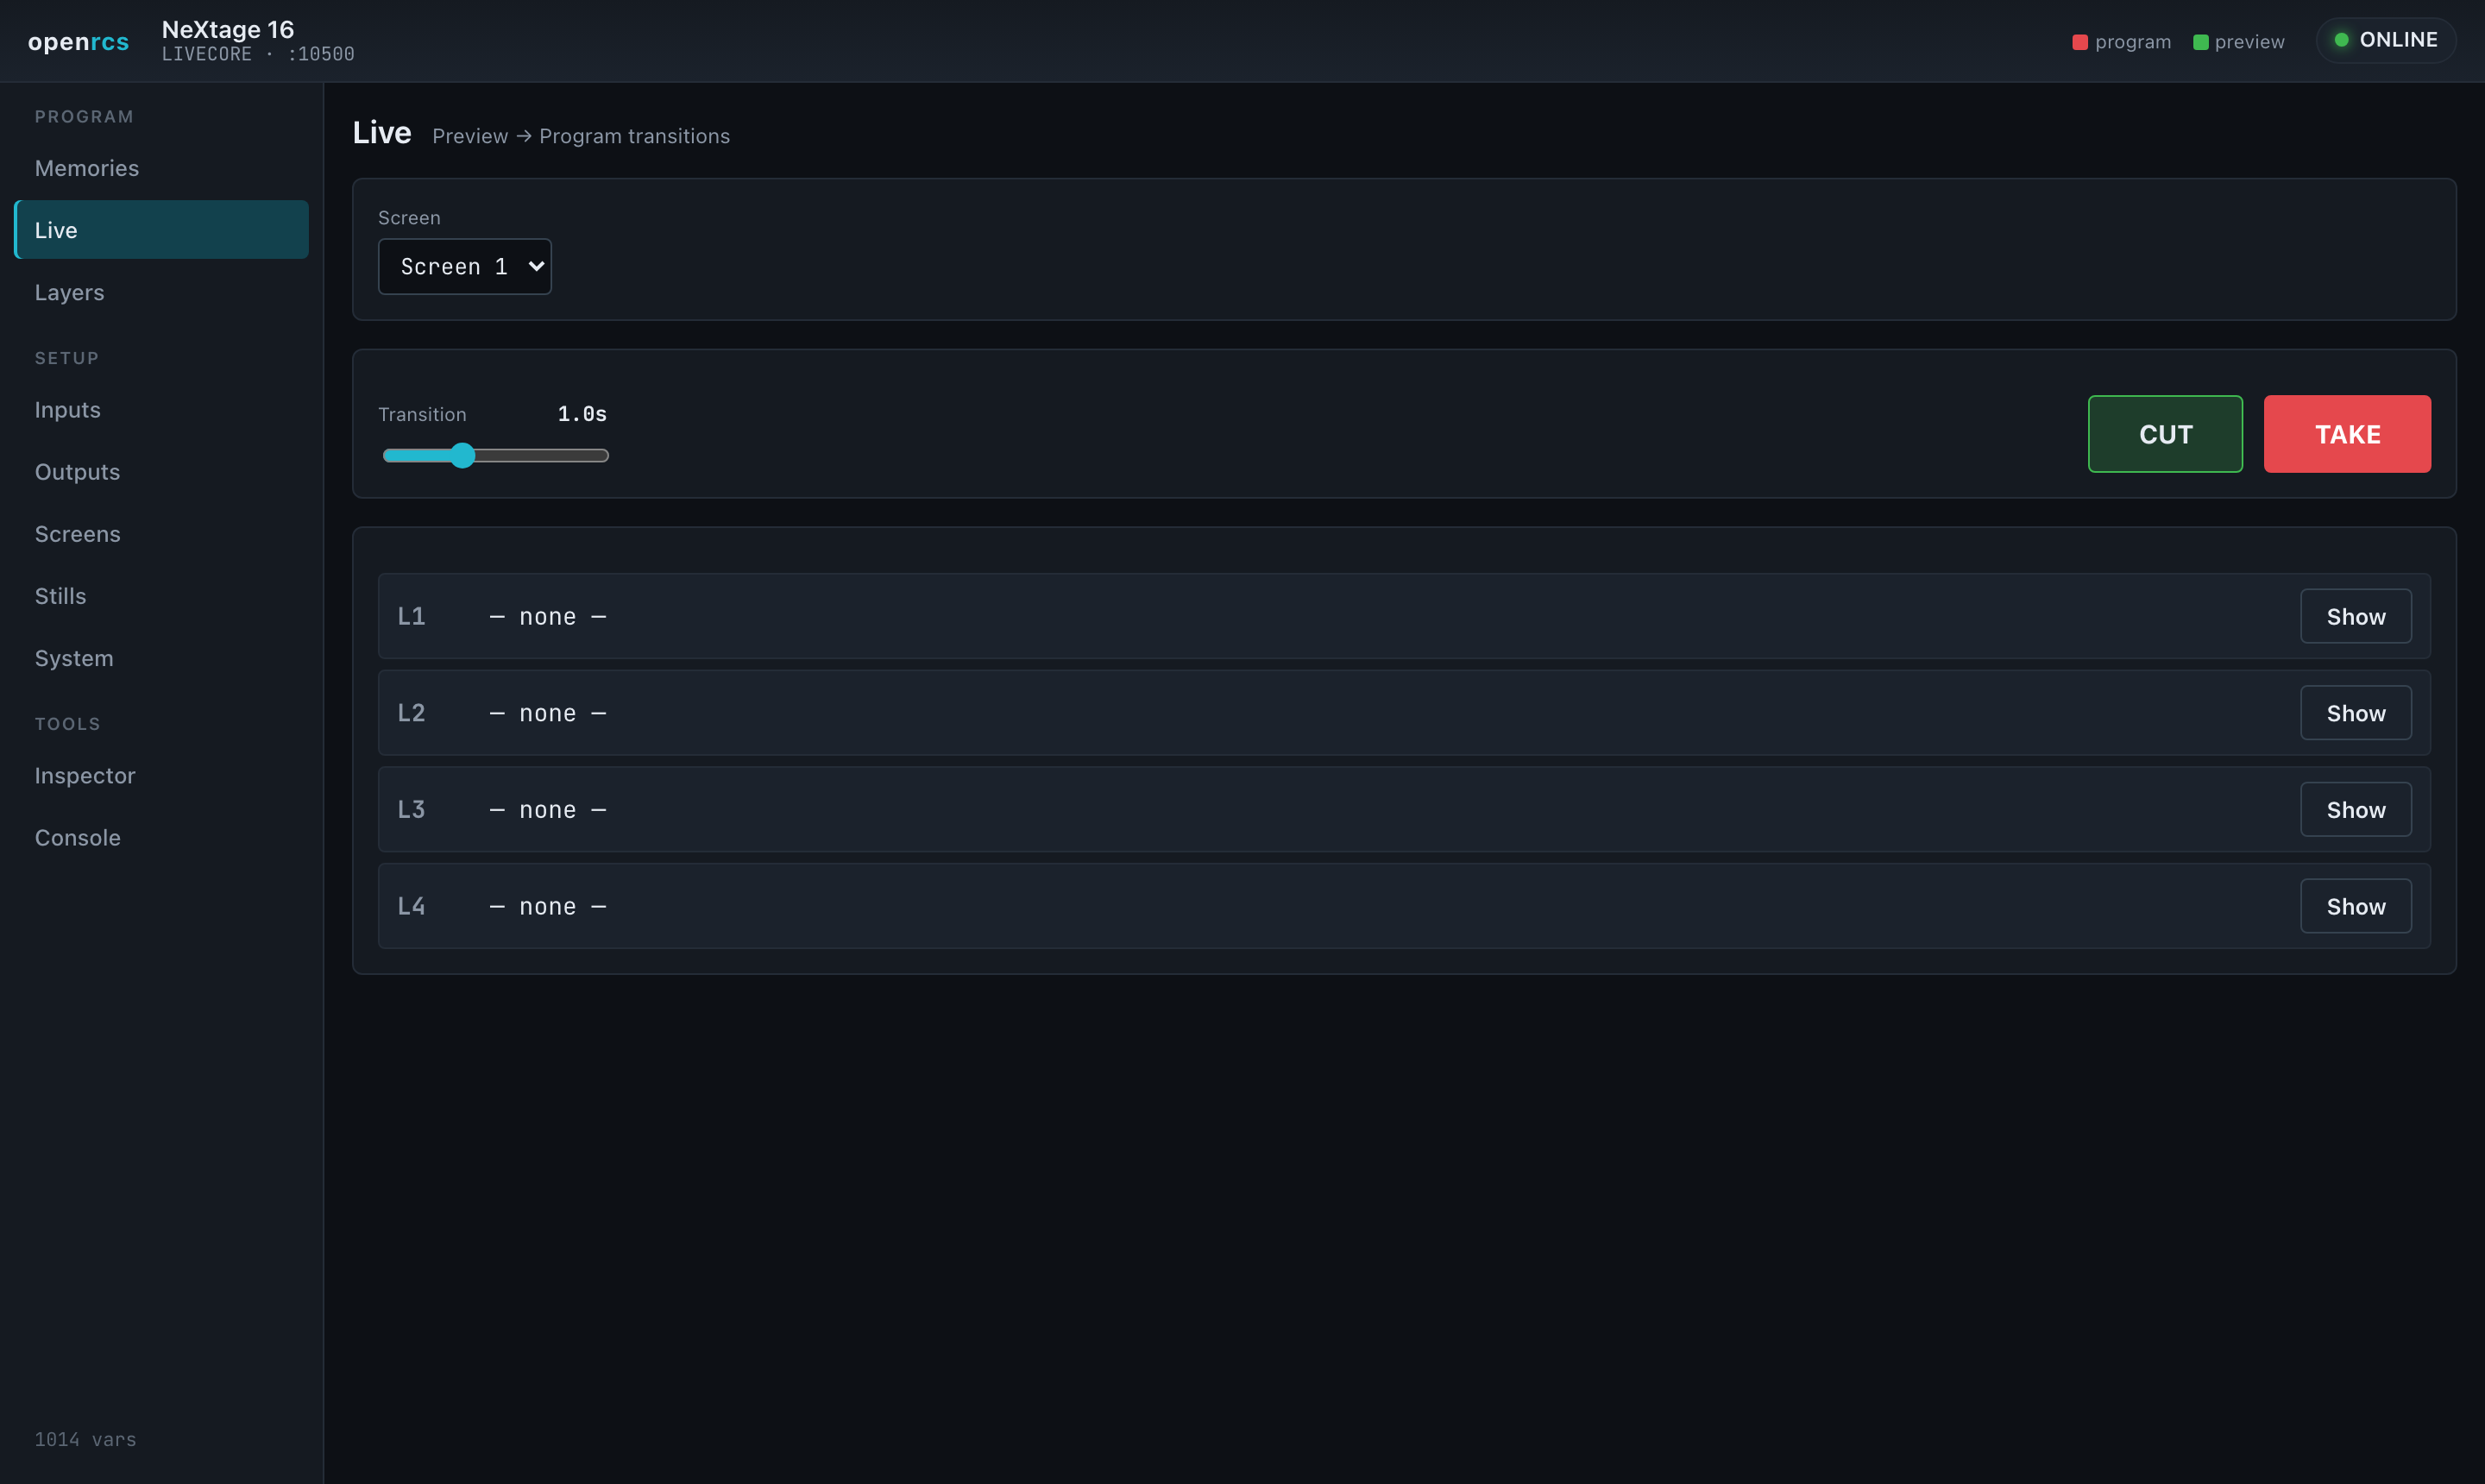
The take bar: choose a screen, set a transition time, and move preview to program with TAKE, or switch instantly with CUT.
Layers
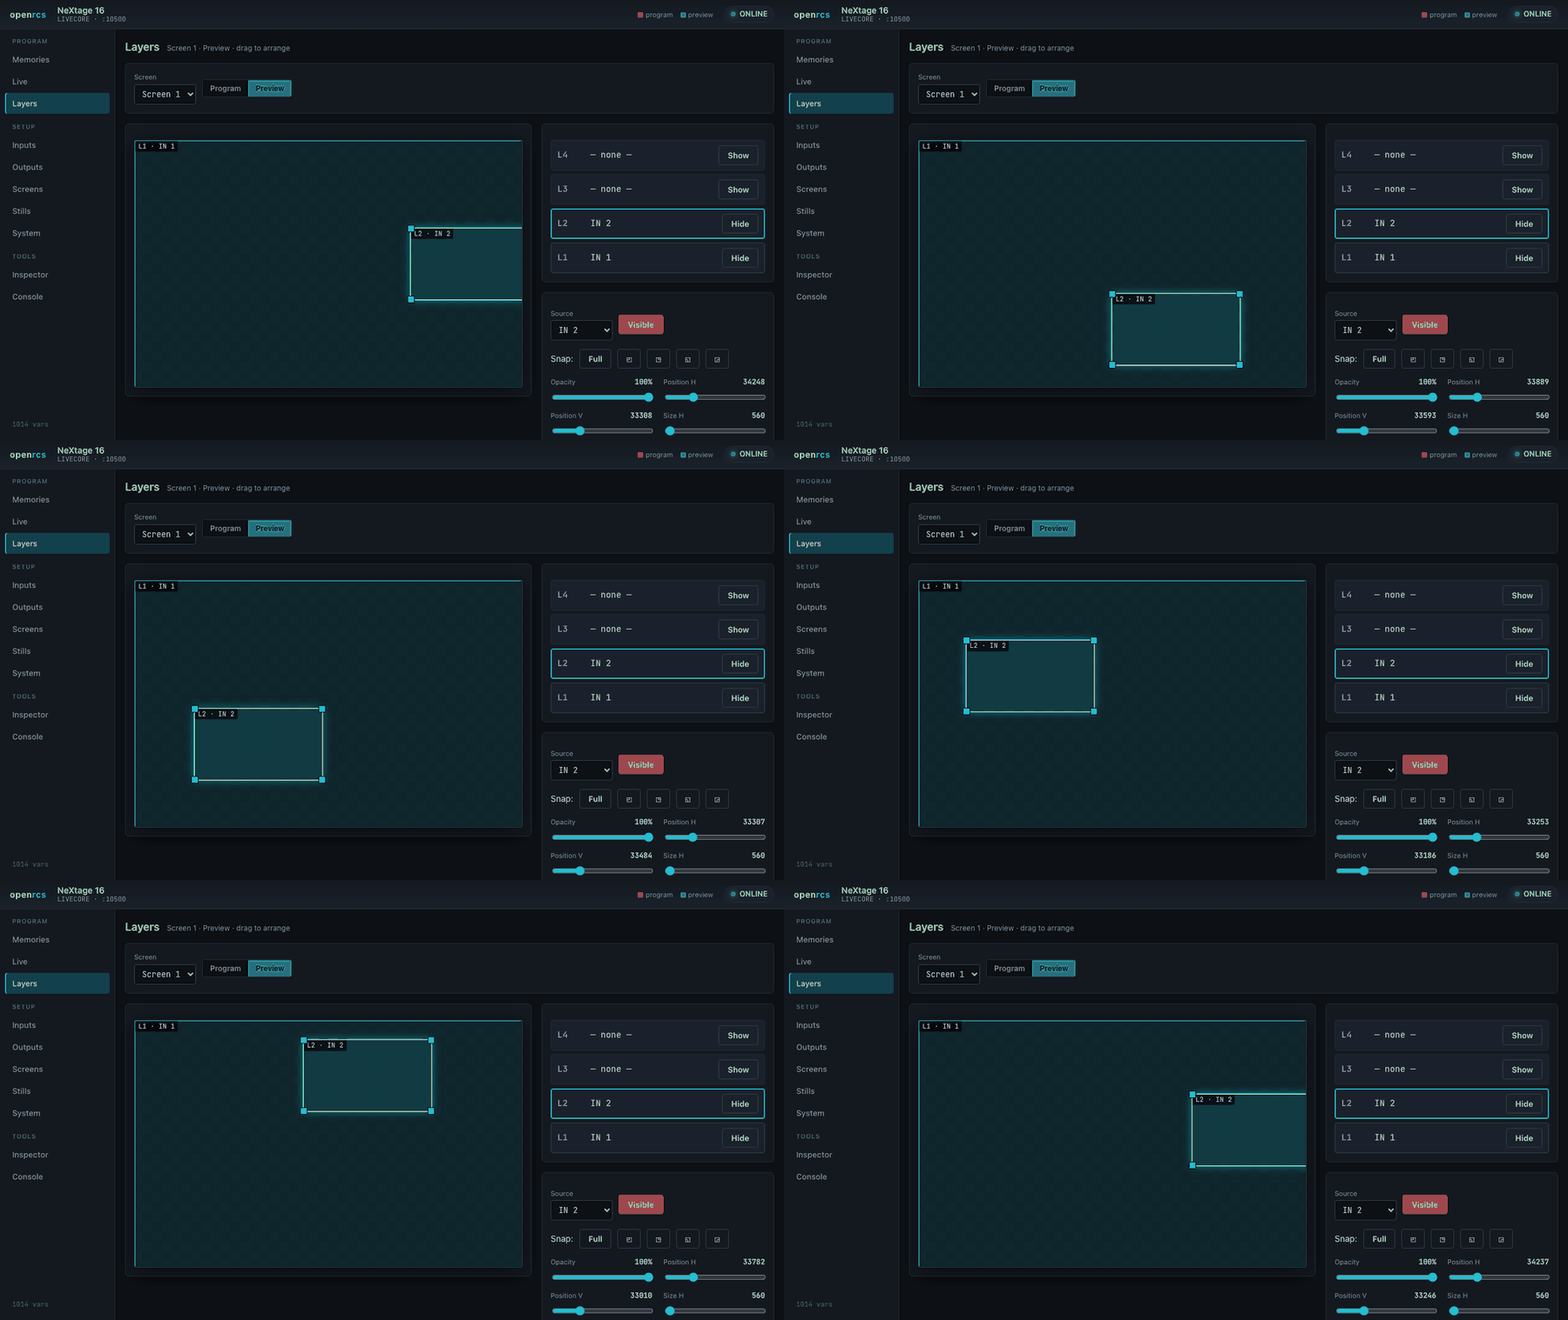
Arrange sources on the screen visually. Each layer is a rectangle on a canvas that represents the output: drag to move, drag the corners to resize, and use the snap presets to fill the screen or drop a layer into a quadrant. The layer stack on the right mirrors the canvas — assign a source and fine-tune position, size, opacity, border, crop and per-layer transitions, and raise or lower a layer in the stack. A Program / Preview toggle chooses which buffer you are editing, and each screen has a native Background (colour or a background set).
On Midra, a Layout picker offers the processor’s built-in arrangements — choose one and the device lays the layers out for you, ready for sources.
Setup
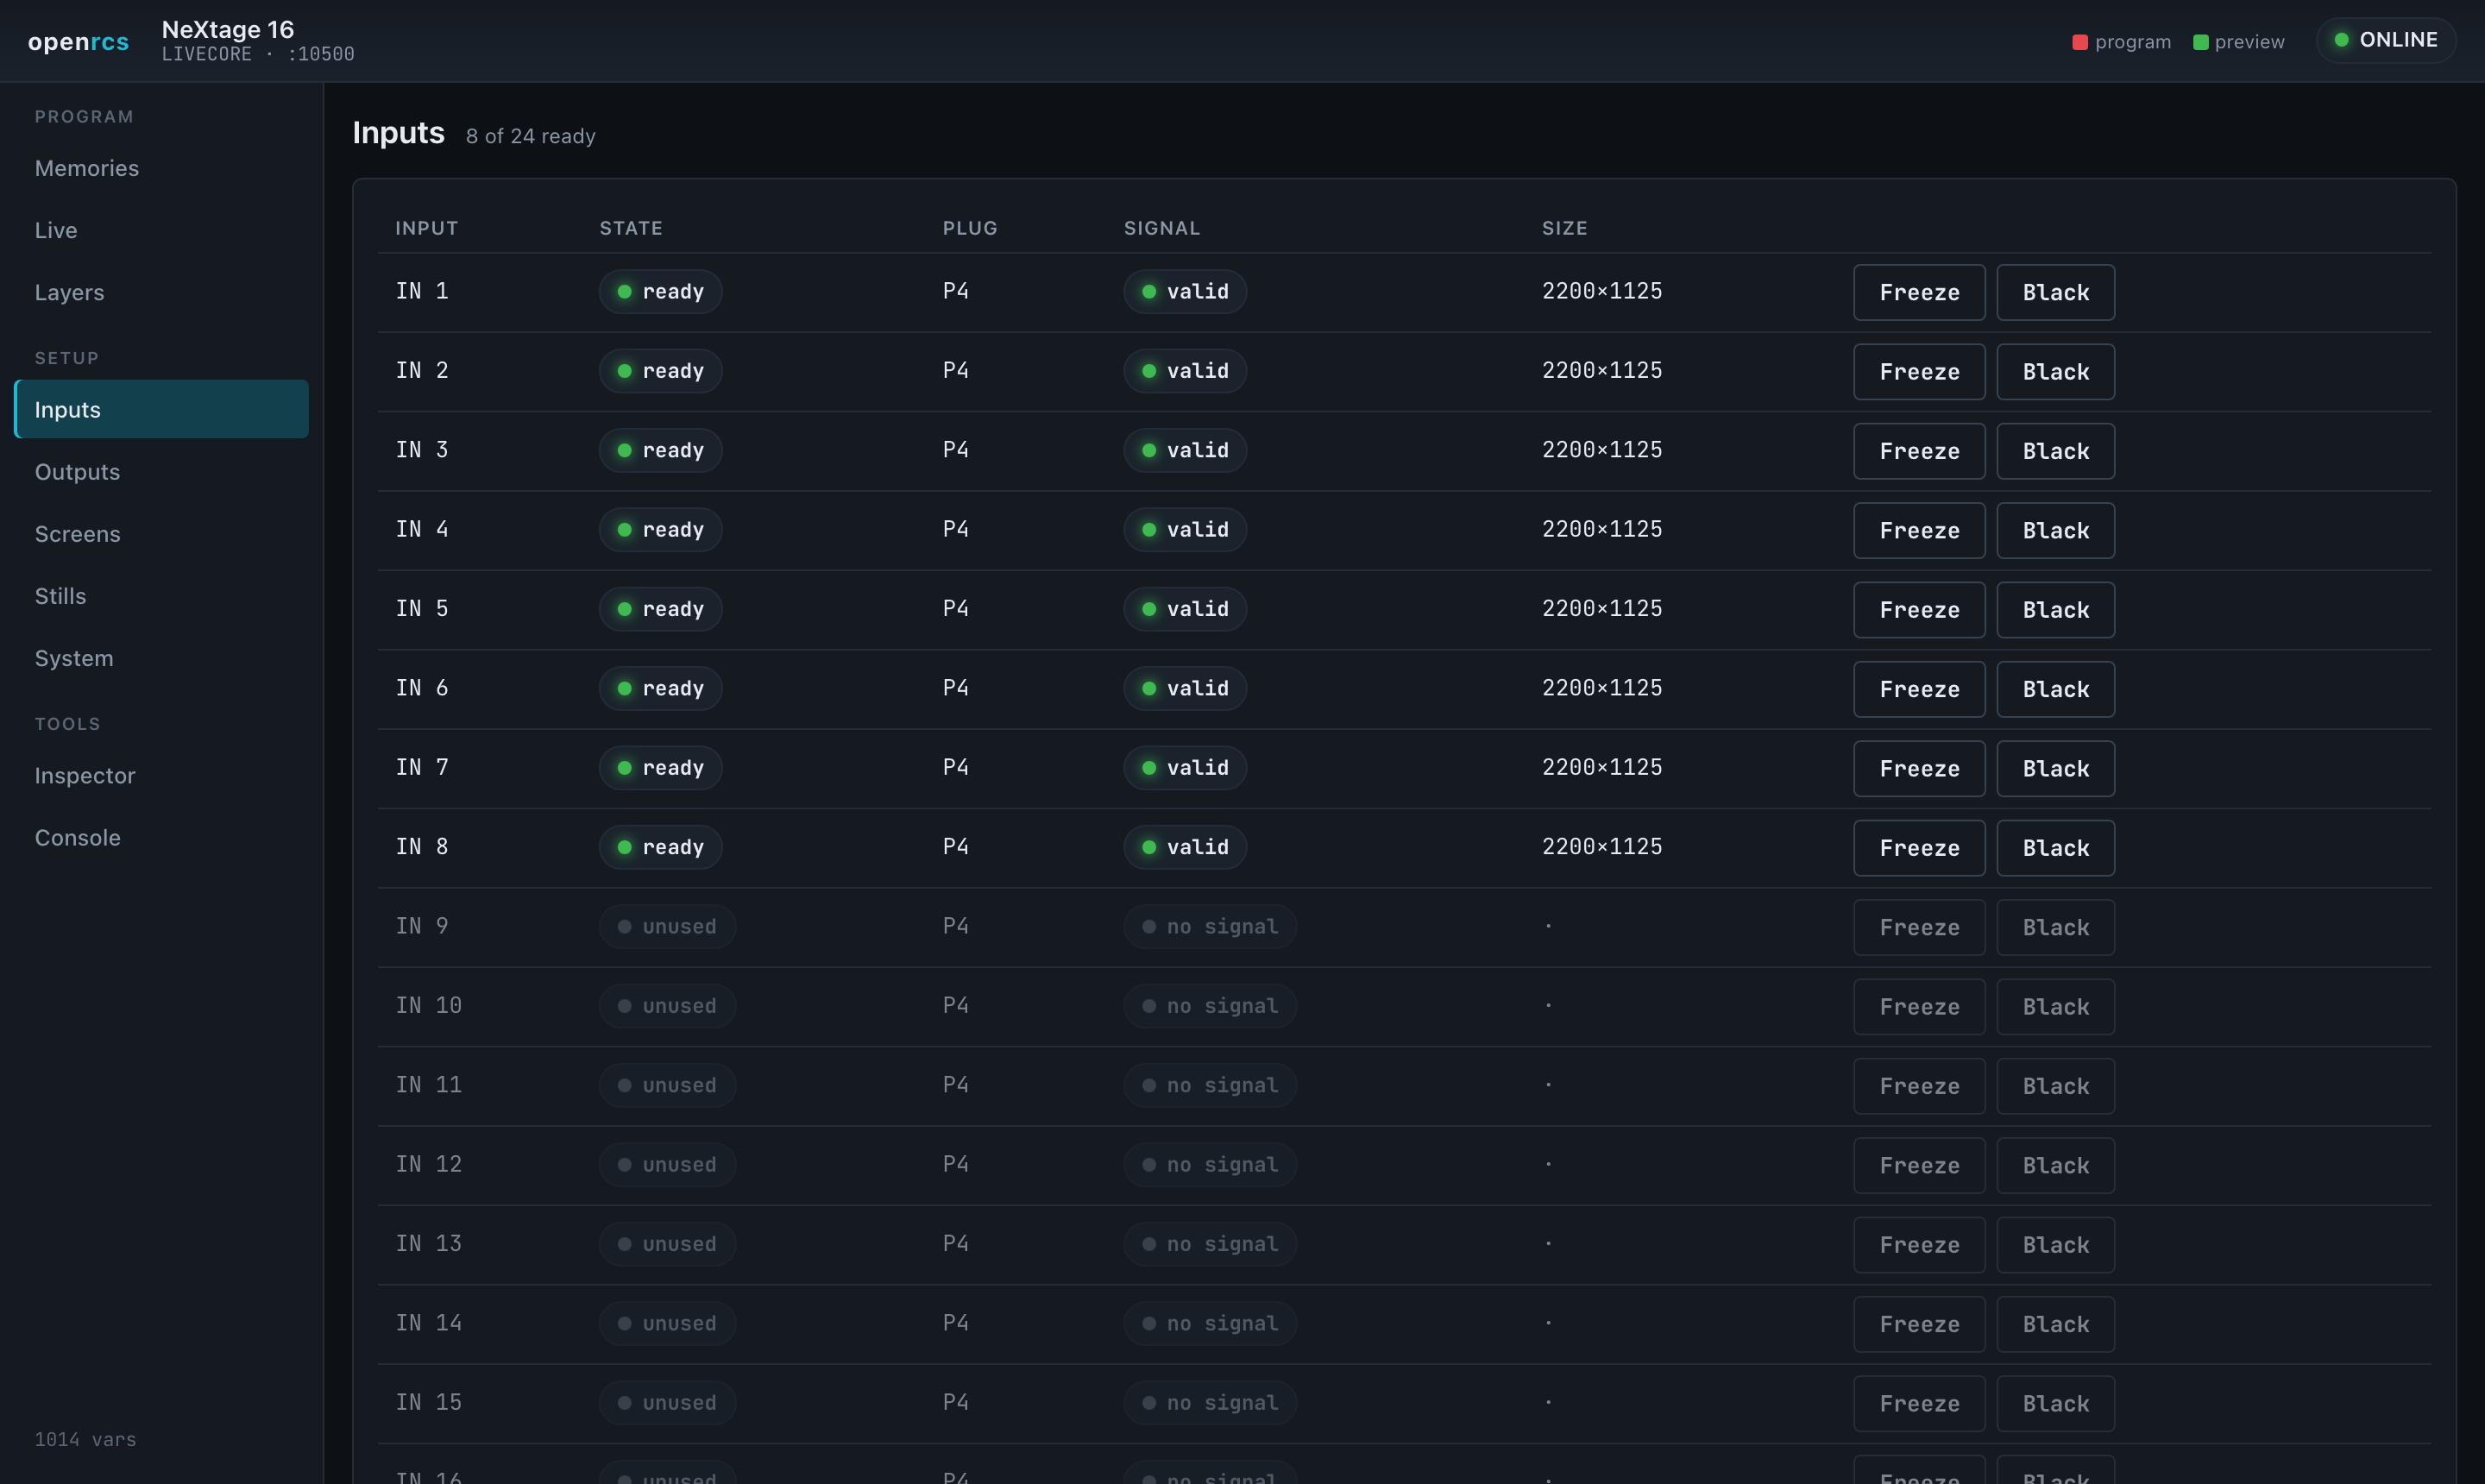
The Setup views cover configuration and monitoring. Which ones appear depends on the device:
- Tally — a live on-air grid: each source lights red on program, green on preview, straight from the device’s own tally bus.
- Inputs — every input with its availability, active plug, live signal status and detected size, plus freeze and black.
- Outputs — the physical outputs, their connected displays, format, size, HDCP and output processing (brightness, contrast, gamma, gain). The format and rate lists are the device’s own, named as its RCS names them — HDTV 1080p, Computer 1920×1080 (16:9 1080p), Internal rate — and the table shows each output’s format the same way.
- Screens — the output screens and their layer capacity.
- Stills — the still/logo library as a grid (LiveCore), or the frame store (Midra), showing what’s stored and its size.
- Capture — grab a frame from a live source into the still library: pick a source and capture the full frame or a graphical region.
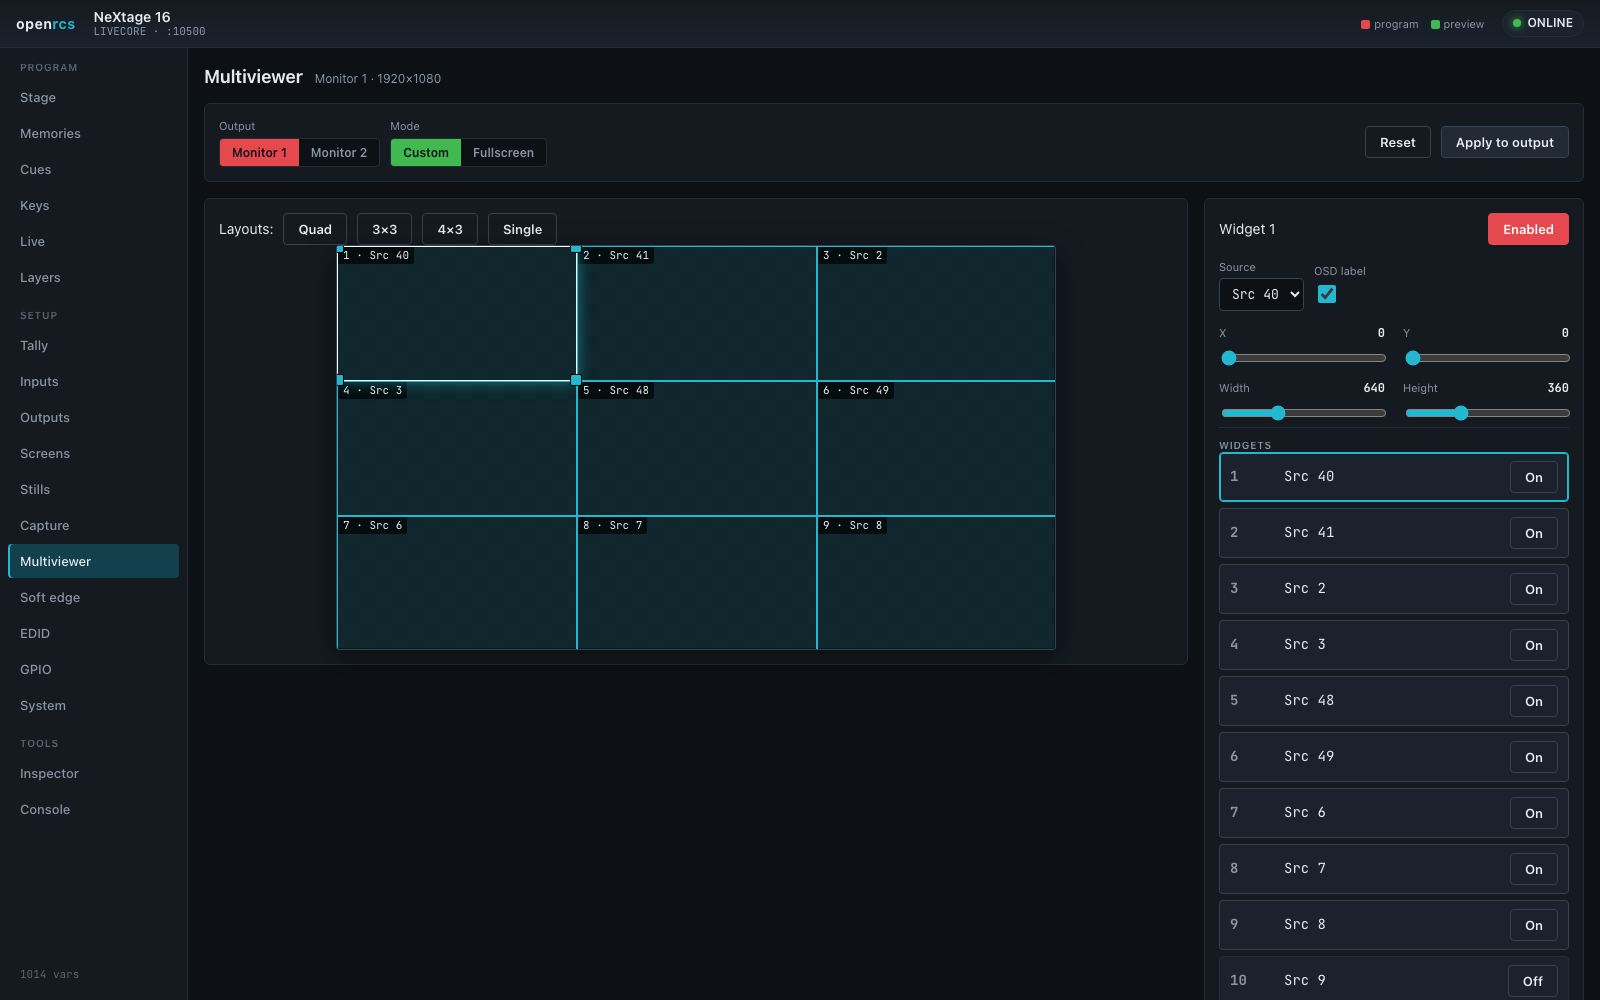
- Multiviewer — a drag-and-resize layout designer for the monitoring outputs: place up to twelve widgets, pick each one’s source, and store layout memories.
- Soft edge — a per-edge blend editor for multi-output screens: click an edge to feather it into its neighbour and set the black level.
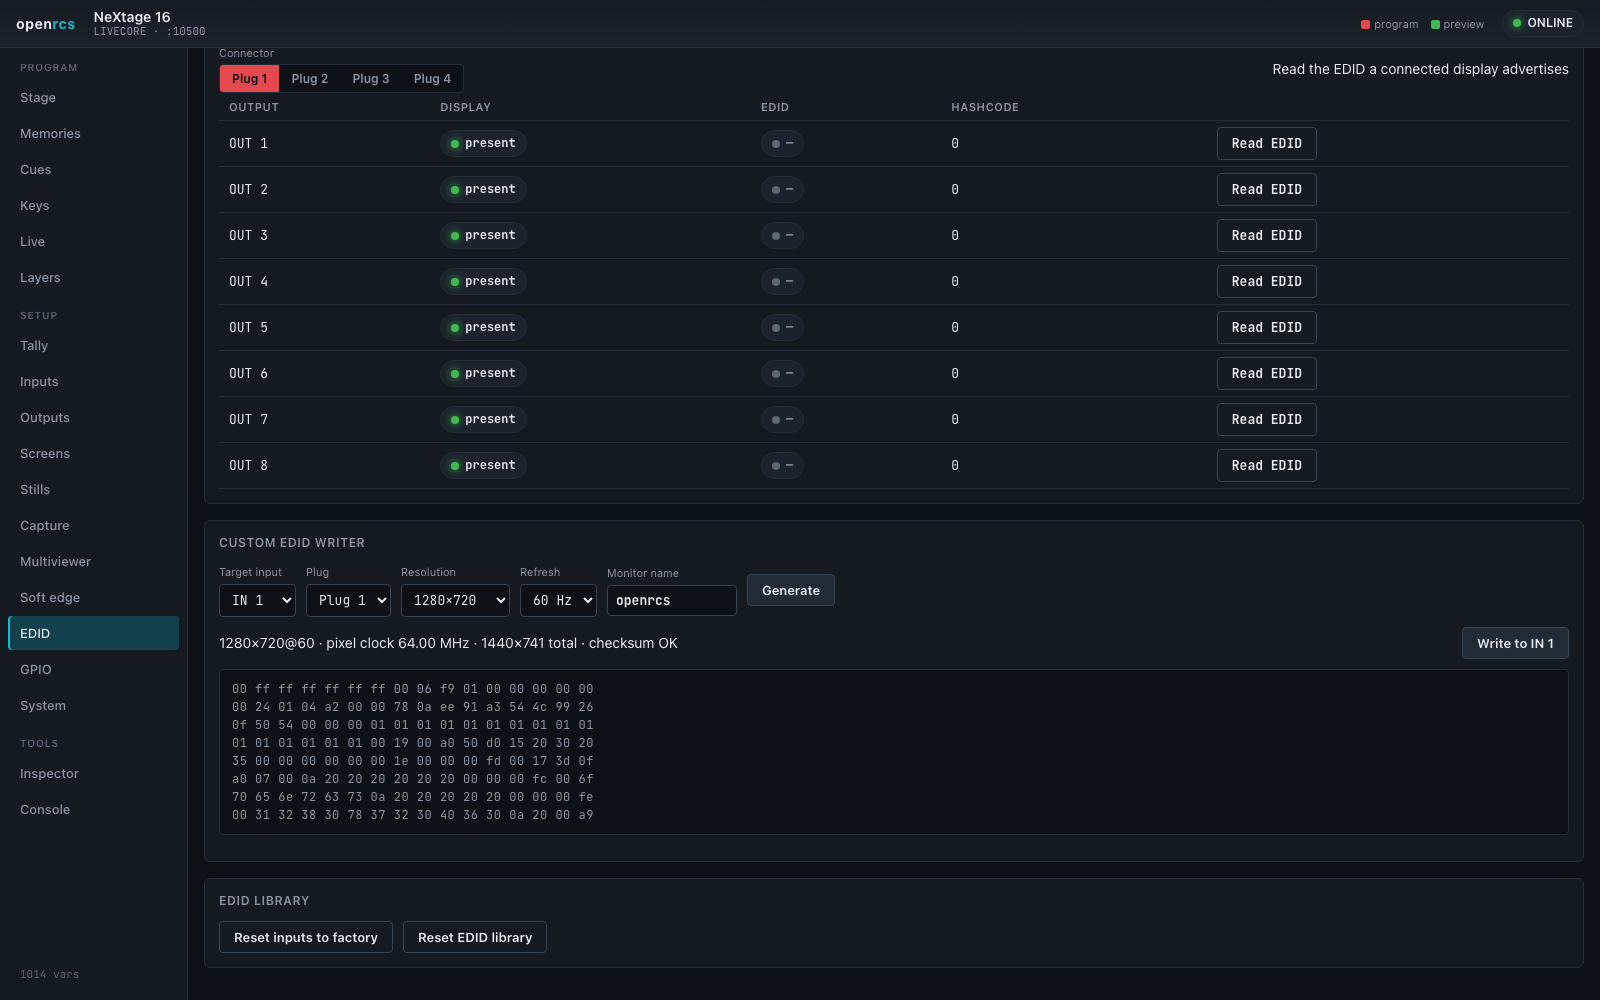
- EDID — set an input’s preferred format and read the EDID a connected display advertises. The custom-EDID writer builds a valid EDID for any resolution and refresh rate and writes it to an input, so a source outputs exactly what you want.
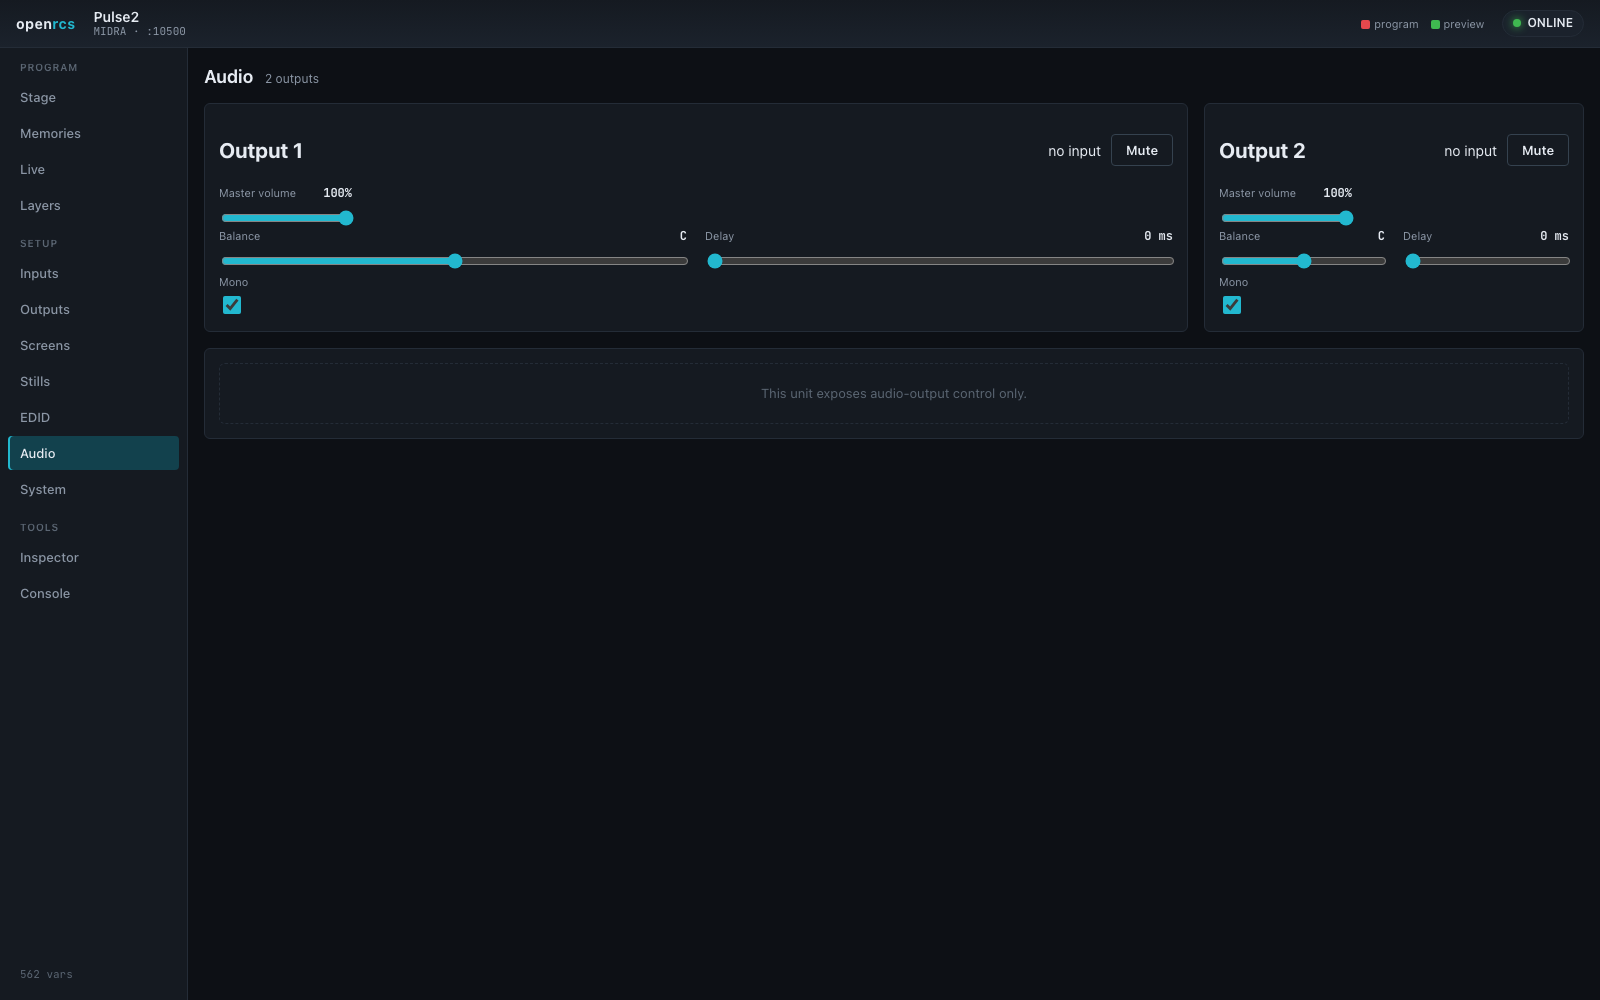
- Audio — output volume, balance, delay and mute, plus per-input channel levels where the device provides them.
- GPIO — trigger inputs and tally/relay outputs.
Inputs and outputs also carry image adjustment: click an input row for brightness, contrast, colour, hue, RGB gain and crop; each output has its own processing and a format/rate selector.
System
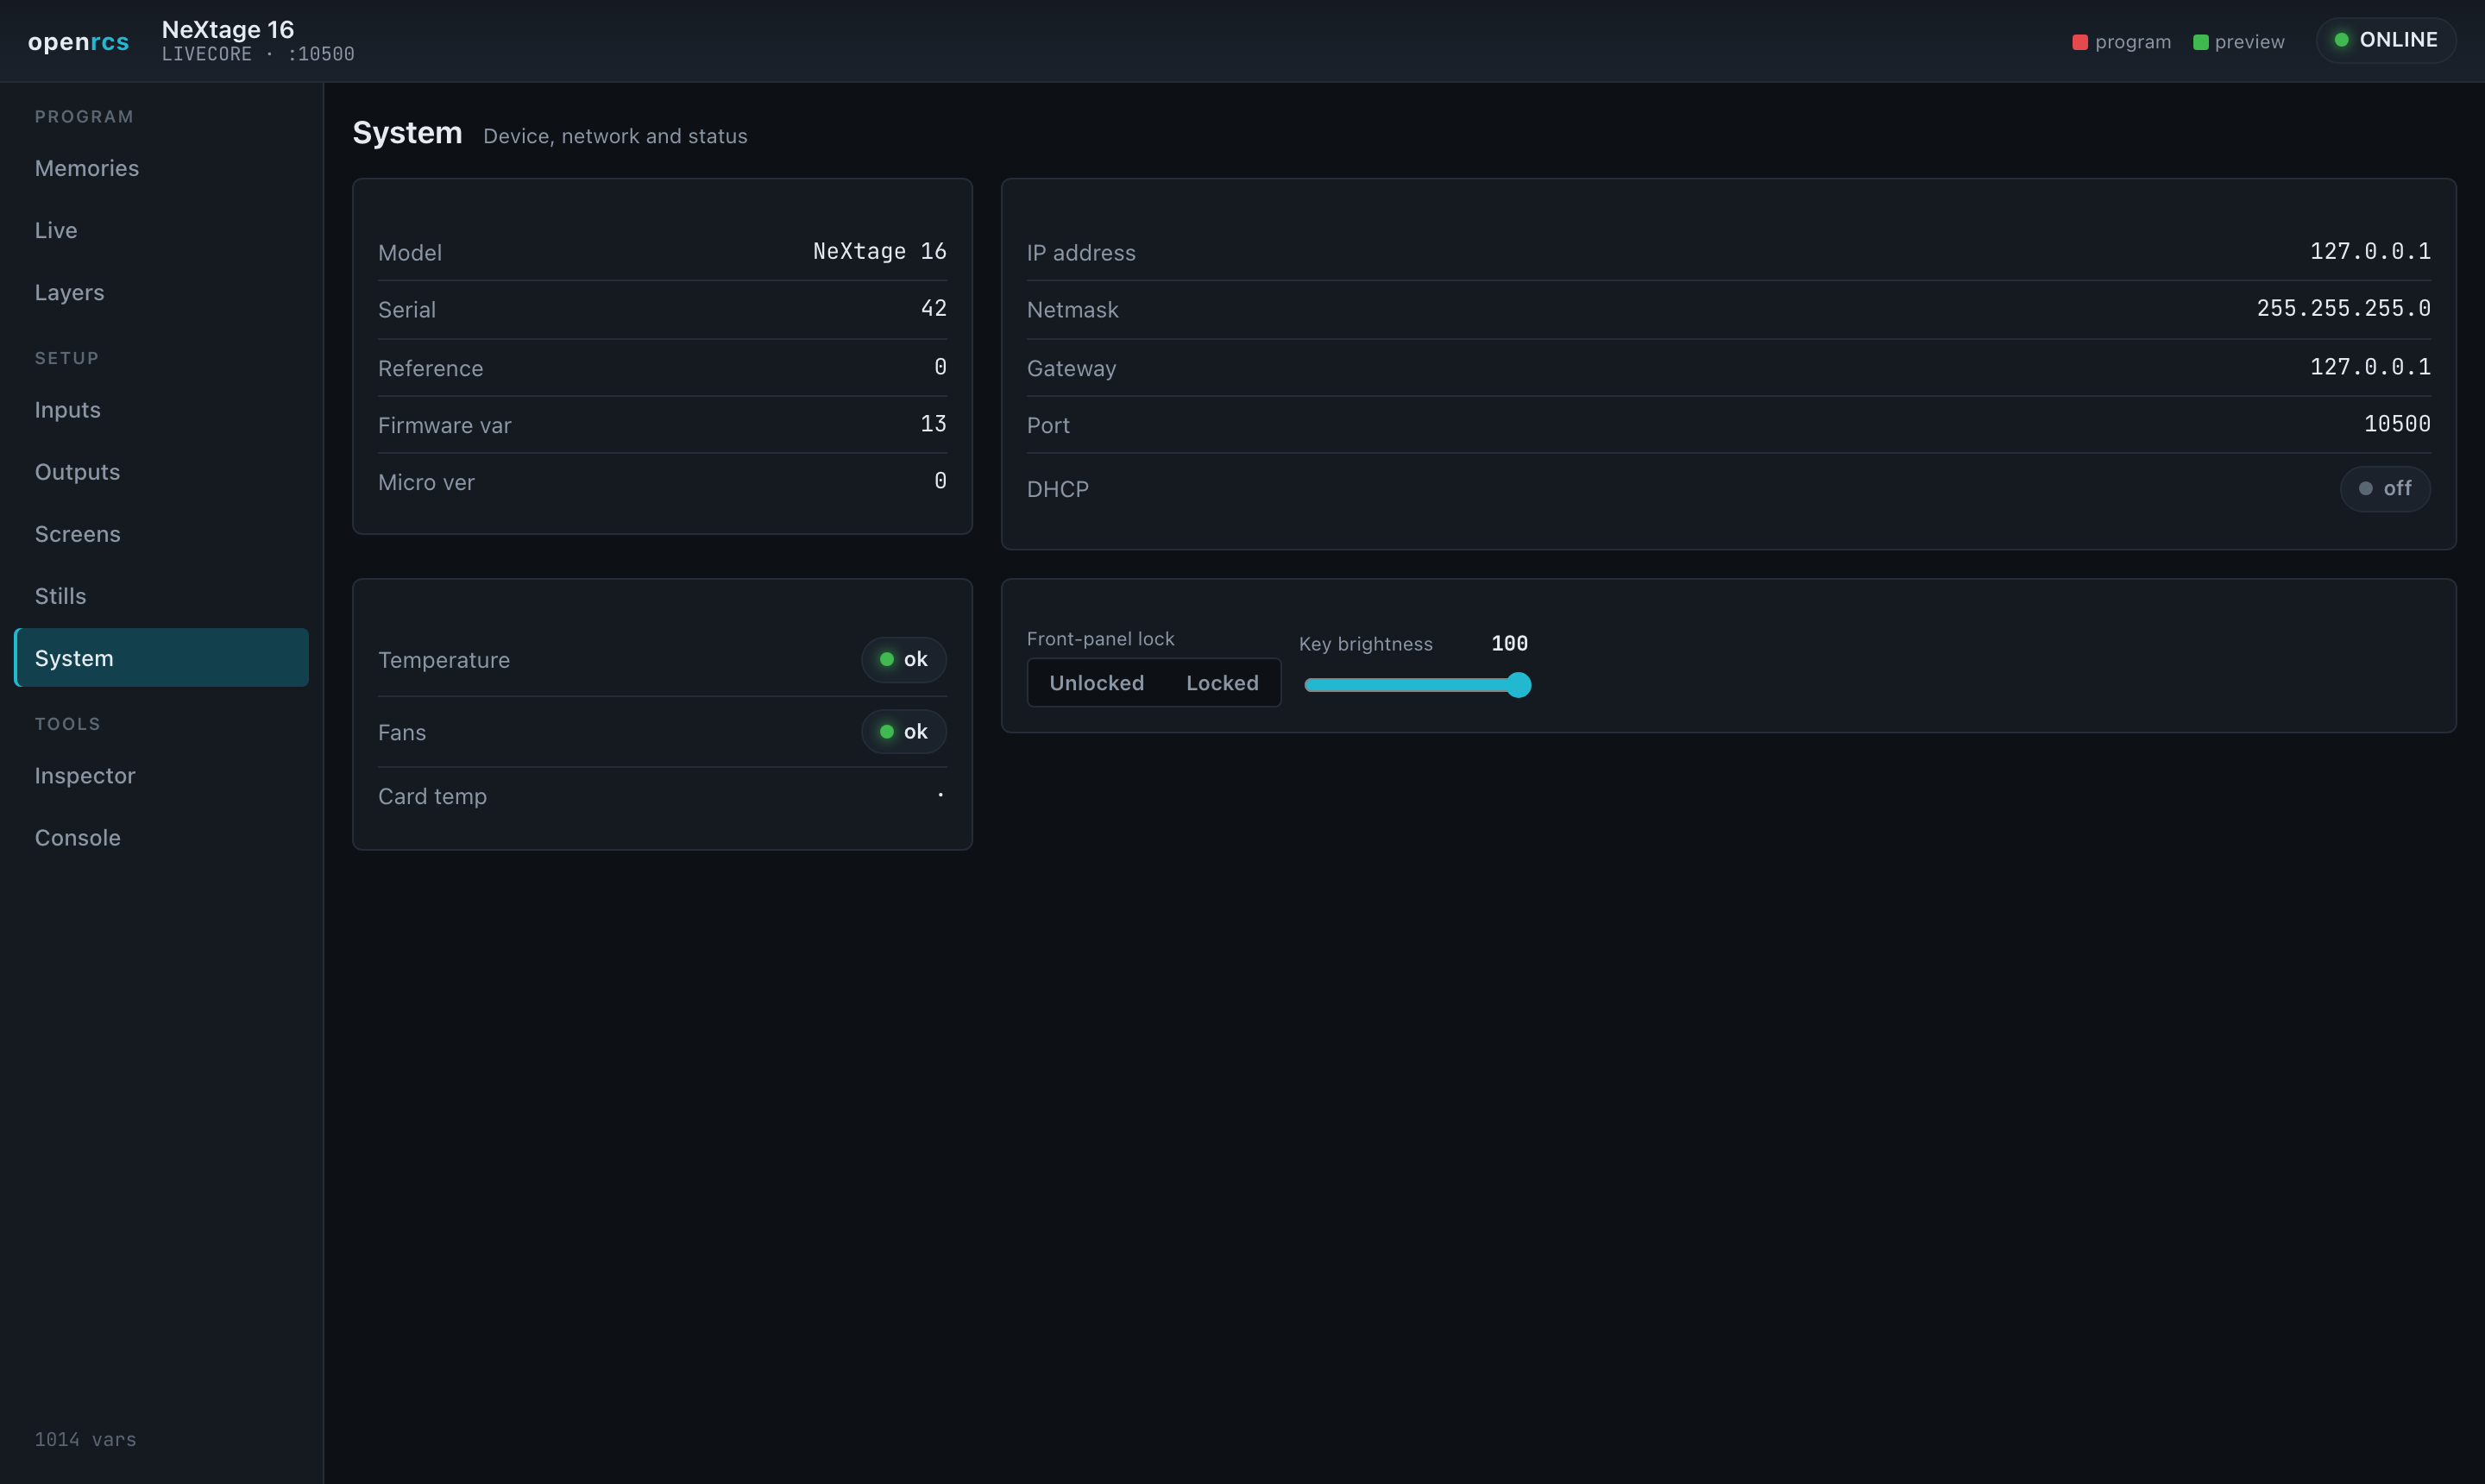
Device identity, network settings, temperature and fan health, and front-panel lock and brightness.
Tools — Inspector and Console
- Inspector — search, read and set any of the device’s variables. Useful for anything the dedicated views don’t yet cover.
- Console — the raw protocol, sent and received, for diagnostics.
Sharing a view
Each view has its own URL (…/#layers, …/#memories, and so on), so you can
bookmark or link straight to the panel you want.
LivePremier, Midra 4K and Alta 4K
The current range — LivePremier (Aquilon C / RS), Midra 4K (QuickVu 4K, Pulse 4K, Eikos 4K, QuickMatrix 4K) and Alta 4K (Zenith 100 / 200) — speaks a different protocol from the two families above, the vendor’s published AWJ, and openrcs drives it through a surface of its own, plus the Connection view it shares with everything else. None of the Midra/LiveCore views apply to these processors, so the nav does not offer them. LivePremier gets Screens and Presets; Midra 4K and Alta 4K get those two with more on them, and Layers and Inputs besides.
- Screens — every screen (and, on a Midra 4K or Alta 4K, every auxiliary) the processor has in service, with the transition state it is holding, which preset buffer is on program and which is preview, its take time — one on Midra 4K / Alta 4K, an up/down pair on LivePremier — and Take and Cut per destination. On Midra 4K and Alta 4K the row also has a Memory column (which bank slot each buffer was loaded from, program / preview), a take time you can type, a T-bar, Freeze for the destination, PGM → PRW (copy program to preview), Step back and a swap flag, and the panel has Take all and the Quick preset — the device’s emergency key: one switch puts fade to black, a library image or a master memory (pick which) on every covered program output, and takes it off again; the destination buttons beside it say which are covered and which are showing it now. Two of those are not what the same words mean on a LiveCore: Step back here is the device’s own — it reverts the last change to layer settings, an edit undo, and does not return to the previous look; and swap is the preset toggle: on, a take swaps the two buffers; off, it copies preview to program and leaves preview as it was. Take all fires one take per destination in service, which is exactly what the vendor’s Web RCS does.
- Layers (Midra 4K / Alta 4K) — one screen at a time, program or preview, its fitted live layers drawn on a canvas at the applied configuration’s size, each showing the unit’s own picture of its input. Drag a layer to move it and its corners to resize; Fill / 2-up / 3-up / Quad / PiP lay the fitted layers out in one tap. The panel on the right edits the selected layer: its source (an input by number and label, or colour), centre and size in pixels, Freeze and a Fader with Fade in / Fade out — both live on the screen rather than the buffer, so they hold through a take — and, folded away below, opacity, crop, mask, effects, border, shadow and transitions with the ranges the device declares. BG and Top beside the layer buttons are the preset’s two fixed layers: the background (one of the eight sets Preconfig built, or a plain colour, with its opacity) drawn as the canvas ground, and the top frame (one of the screen’s four top-frame slots) drawn over everything at the slot’s own size, draggable like a layer. An auxiliary has no layers on this platform; picking one shows its single background source instead. Every write is read back; with Live updates on, the device pushes the whole destination as it changes.
- Presets — the processor’s preset banks: one 1000-slot screen bank on LivePremier; on Midra 4K and Alta 4K the Screen (200), Aux (200) and Master (50) banks as chips. Pick preview or program, pick the destination (or every one in service), and tap a slot to recall it; a slot the device reports as empty cannot be recalled. With a single destination selected, the slot on its program is outlined red and the one on its preview green. On Midra 4K and Alta 4K the bank also writes: Save stores the chosen destination’s program or preview into a slot, Label names one, and Erase clears one on a second tap. A master save from program or preview also stores every destination in service into its own bank — the device does that, at a slot number of its choosing, and out of the box that number is 1 for every destination, which is how a master save silently overwrites screen memory 1. openrcs points those at the master’s own slot number instead and refuses the save if any of them is already in use; or save from the memories each buffer already holds, which writes no bank slot at all. Banks are read fifty slots at a time — each slot costs two reads — and Read slots… fetches the next page.
- Show (Midra 4K / Alta 4K) — every screen and auxiliary in service side by side: each screen’s program or preview (one switch for all) on its own canvas, editable exactly as on Layers — drag, resize, snap, the layout presets — with a quick source and opacity for the layer you touch and Open in Layers for the rest; each auxiliary’s source with its picture; Take and Cut per destination, Take all and Cut all. Show mode puts everything in one big column with large take buttons, for a front-of-house table or a touch screen.
- Cues (every AWJ family) — a cue list over the memory banks. A cue is a master memory, or a screen’s or auxiliary’s memory on one destination; Go loads it to preview and takes it a quarter of a second later, Cut loads it straight to program, Arm loads it to preview and leaves it there. Per-cue autofollow with a wait chains cues; Hold stops the chain. The list is kept in this browser for this processor — neither Web RCS has a sequencer, so there is nothing on the device to keep it in.
- Plan (every AWJ family) — with plan mode on, every value you set on the other pages is staged here instead of written, reads show the staged values so the look previews as you build it, and Push writes the lot when a processor is there. Takes, recalls and every other trigger still go straight to the processor: they are actions, not state.
- Inputs (Midra 4K / Alta 4K) — every input the unit has, with its picture, its active plug, connector and the signal on it, Freeze and Black, and where the device says it is on air (program / preview) — from the processor’s own tally lists, so nothing is inferred. Tap an input to set its plug up: which plug is active, its label, signal type and HDCP from the lists the device allows, HDR mode and nits, the picture (brightness through RGB offsets, sharpness, pulldown), aspect (what the signal is, what to show it as, how a layer fills it), a predefined or typed crop applied with the device’s own trigger, the keyer — off, chroma, luma or cut and fill, with the parameters of whichever is chosen and the sampling assistant; the device says which inputs have a keyer and which can be a fill, and offers only those — the LUTs: a conversion LUT (colour space and HDR on the way in) and a correction LUT after it, each auto or a slot from the library the device offers this plug — and the EDID the plug presents, decoded (make, name, preferred timing) and replaceable from the device’s library of factory and saved EDIDs.
- Audio (Midra 4K / Alta 4K) — the clock and rate, then every routing point the device has: for each screen and auxiliary the audio layer its program and preview buffers carry (one source per buffer, saved with the memory and swapped by the take), whether its output follows that layer, a live layer’s content or a source routed straight; each video output (the screen it shows, direct, or none), the multiviewer (a widget or direct, and which widget shows VU meters), the two line outs and the four Dante groups (a screen or direct, and the channel pair), mutes on all of them, the ten custom sources built channel by channel from any embedded, Dante or analogue channel the unit lists, and level readings of one input and one output at a time, on request. What the quick preset does to audio is here too. The Dante panel shows the card’s state and its channels’ subscriptions; the subscriptions themselves are made in Dante Controller.
- Setup (Midra 4K / Alta 4K) — the device’s configuration: a template
to load, the four layer resources (off, one seamless layer or two split ones,
and which screen), every output’s role (screen, auxiliary, multiviewer, off)
and the screen or auxiliary it feeds, which screens and auxiliaries are in
service and each screen’s background layer type — every choice from the
device’s own validity lists — then Compute, a side-by-side of the
computed and the applied state, and Apply behind a second tap, since
applying rebuilds the whole pipeline and blanks every output for a few
seconds. The second tab is each screen’s canvas: one output, a grid of
outputs (columns, rows, empty-cell size, gaps, which cell each output sits
in) or free placement (canvas size and each output’s top-left corner), each
applied with the device’s trigger, plus the screen’s test pattern and,
on a grid, the soft edge of each gap — blend on or off, a gamma or Bézier
curve, the black level — applied with the grid’s own soft-edge trigger (only
an Eikos 4K blends; the others hold the settings). The third tab is LUTs:
the conversion and correction libraries — each slot’s label, file and colour
spaces, erase — and the four LUT resources, each allocated to an input; a
.cubefile reaches a slot through the Web RCS’s upload. - Presets (Midra 4K / Alta 4K) — in Save mode a panel shows what a save records: for a screen the categories (source, position, size, opacity, crop, mask, border, transitions, effects, flying curve, timing, speed, audio), which live layers, and whether the background and top layers go in; for an auxiliary its four categories; for the master bank which screens and auxiliaries and what of each. The filter is the device’s own and stays set; a memory recalls only what it recorded. In Recall mode, Autoscale on load per screen — the device’s own flag — rescales a memory’s layers to that screen’s canvas on load, or keeps them as saved; the Multiviewer page has the same switch for its layout memories.
- Screens (Midra 4K / Alta 4K) — tick destinations to take, cut or T-bar them as one group (All / Screens / Auxes / None pick them quickly); each keeps its own take time.
- Layers (Midra 4K / Alta 4K) — drags snap to the canvas edges and centre lines and to the other layers’ edges and centres (hold Alt to drag free); the arrow keys nudge the selected layer a pixel, ten with Shift, once the canvas has focus; Copy layer takes every property the panel holds, source included, and Paste puts it onto any layer of any screen or buffer. Twelve layout presets: Fill, 2-up, 3-up, Quad, PiP, PiP ×2, 1 + 2, 1 + 3, 3×2, 4×2, Columns and Rows, over the fitted layers in slot order.
- Multiviewer (Midra 4K / Alta 4K) — the monitoring output’s windows on a canvas at that output’s size: drag to move, corners to resize, Quad / 3×3 / 4×3 / 4×4 grids over the windows this unit can use. The panel sets a window’s source (an input, a screen’s program or preview, a timer), its on-screen label and whether it is shown. Twenty layout memories with the same recall / save / erase / label modes as the preset banks, and the three timers — clock, countdown or stopwatch, with start, pause and stop.
- Outputs (Midra 4K / Alta 4K) — every output with its picture, what the applied configuration uses it for, its format and rate, the plug’s state, and — tap one — its label, a format from the list the device allows for that role (applied through the device’s own update trigger), a test pattern switched on and off, and the picture settings: gamma, brightness, contrast, saturation, hue and RGB gains. Below those: the area of interest (the part of the format the screen’s canvas fills, in thousandths, with overscan) and the pitch for LED walls, each applied with its own trigger; HDR mode and nits with what the output is sending; colorimetry; the plug’s pixel encoding, HDCP policy (from the list the plug allows), embedded audio and SDI level, with whether HDCP is up on the link; the output’s conversion and correction LUTs; the connected display’s EDID, decoded, with a button to save it into the device’s EDID library under a name and slot so an input can present it; and custom formats — sixteen slots to name and erase, and an editor that takes a size and rate (CVT) or every porch and sync (full), Checks it on the device, shows the totals and pixel clock it worked out, and saves it into a slot, after which every output’s format list offers it.
- Stills (Midra 4K / Alta 4K) — the fifty-slot still library with each image’s name and size, erase behind a second tap, a capture of any input, output or the multiviewer into the next free slot or one you pick, and every screen’s four back and four top frame slots with the library slot each points at and its picture.
- System (Midra 4K / Alta 4K) — model, series, firmware and serial, the network address, the temperature sensors and case fans with their alarms, the front-panel lock and brightness, and a reboot behind a second tap. Below: the two configuration slots on the device — back the whole configuration up into one under a label (every module the device lists, stills included), label, restore (behind a second tap; the device unpacks the slot, applies every module it holds and reboots) or erase it; export to a file and import from USB stay with the Web RCS — and streaming: ten RTMP destinations (label, URL, key, whether keys are kept), which one to stream to, the picture source, profile and quality, the audio (following the picture or a source, which pair, mute) and start / stop with the device’s status.
- Inspector (every AWJ family) — every property this bridge has read so far, searchable; a box to read any path and write any value as JSON; and the wire log. What the dedicated views do not cover yet is reachable here.
What the simulators accept but do not act on is written but unproven: a timer never leaves idle, a capture never completes, the tally lists never fill, a stream never starts, a custom format is never erased (the slot stays), a grid change never moves the canvas size, and no simulator input reports a chroma / luma keyer (cut and fill is offered on the odd inputs and was set).
The pictures come from the processor’s own HTTP server — port 80 on a unit. A simulator serves them wherever it was started, so Connection has a Thumbnails from field for that case alone; leave it empty for a real unit.
- Live updates asks the processor to push changes; it tells a client nothing until asked. One switch for all these views: until it is on, what you see is what was last read, and every write reads its target back rather than assuming it landed.
A wrong pick is caught rather than shown as an empty show: LivePremier and the 4K boxes share a port but not an object model, so if the surface was pointed at one while set to the other, a banner names the processor it actually found and says which platform to pick in Connection.
On Midra 4K and Alta 4K, recalling a preset also overwrites the destination’s take time with the one stored in the memory — that is the processor’s own behaviour, and the Screens view shows the new time straight after the recall.
PLS300
The Pulse PLS300 is the generation before Midra: the same port and framing, one screen, two outputs (main and preview), ten inputs numbered 1–6 and 9–12, and one preset grid — a current preset on air, a next preset you edit, the previous look, and four user presets. Nothing of the Midra/LiveCore surface fits that model, so the PLS300 has eight views of its own, plus the shared tools (Shows, Plan, Inspector, Console) and Connection. Everything here comes from the vendor’s published Programmer’s Guide and has been exercised only against a simulated unit built from it; no PLS300 has been connected yet. Before one is: the unit ships with LAN off — enable it on the front panel (Control menu) — and answers on TCP 10500.
- Live — the next preset’s five layer slots (background frame, background live, PiP, two logos) with the source now on air beside a picker for what goes on next; TAKE, the T-bar, auto-take and preset-toggle switches; the unit’s six quick layouts; which layer the preview output shows; the four user presets as one-tap recalls into next; per-input freeze (or freeze all); and output black for main and preview.
- Layers — a canvas of the main output, to scale, for any of the seven presets: drag a layer to move it, its corners to resize, or type the numbers. Opacity, crop, border, and the opening and closing effects with their direction and duration. Editing Current changes the picture on air.
- Memories — the four user presets and the previous look. Recall puts one into next, Recall + take puts it on air, Save stores current or next into a slot; right-click a slot to inspect what it holds. All of it is the unit’s own preset-copy verb, which the panel at the bottom also exposes directly.
- Inputs — each input’s type, signal, size and rate, freeze and autoset; click a row for its picture, geometry, aspect, crop and keying settings, and HDCP on the DVI inputs. The EDID of the four plugs that carry one, and the backup input the unit falls to when a source drops.
- Outputs — main and preview: format, rate, analog and digital signal types, sync polarity, test pattern, background colour, anti-flicker, gamma, sharpness, HDCP, and the frame-lock reference and mode with what the unit reports it is locked to.
- Audio — master volume, mute, stereo and delay per output, the auxiliary input, and per-input level, balance and audio-source map, with SDI de-embedding channel picks on the SDI inputs.
- Pictures — the six frames and six logos the unit stores, with their sizes; capture one from an output (position, size, keying, animated-logo frame count) or delete one.
- System — device identity and versions, the fitted options, network (read-only — turning LAN off would end the session), front-panel lock and brightness, standby, the display device on the RS-232 port, and the resets behind an arm switch.
Notes
Both families have been driven against real hardware — a NeXtage 16 (LiveCore) and a Pulse2 (Midra). The PLS300 has not: its table and its views are from the Programmer’s Guide alone. A few behaviours still depend on the device: assigning a live input needs a signal present on it, and some capabilities vary by model and firmware (openrcs hides what a given unit doesn’t implement). Per-variable ranges are the device’s declarations — the hardware is always the final authority. The full protocol is documented in the openrcs-protocol reference.
The AWJ side is newer. Its LivePremier paths come from the vendor’s published guide and have been read from two Aquilon C frames; its Midra 4K / Alta 4K paths were read off a Pulse 4K. The operations underneath — take, cut, recall, the subscription behind Live updates — are confirmed on both kinds of hardware, but by a separate test harness: openrcs’s own surface for these processors has been driven end to end only against the vendor’s simulators. Treat the wire as settled and the surface as in field testing.