

Digiface Dante USB guard
A guard for the USB socket on the back of a Digiface Dante, so a snagged lead can't pull the plug out or lever the socket.
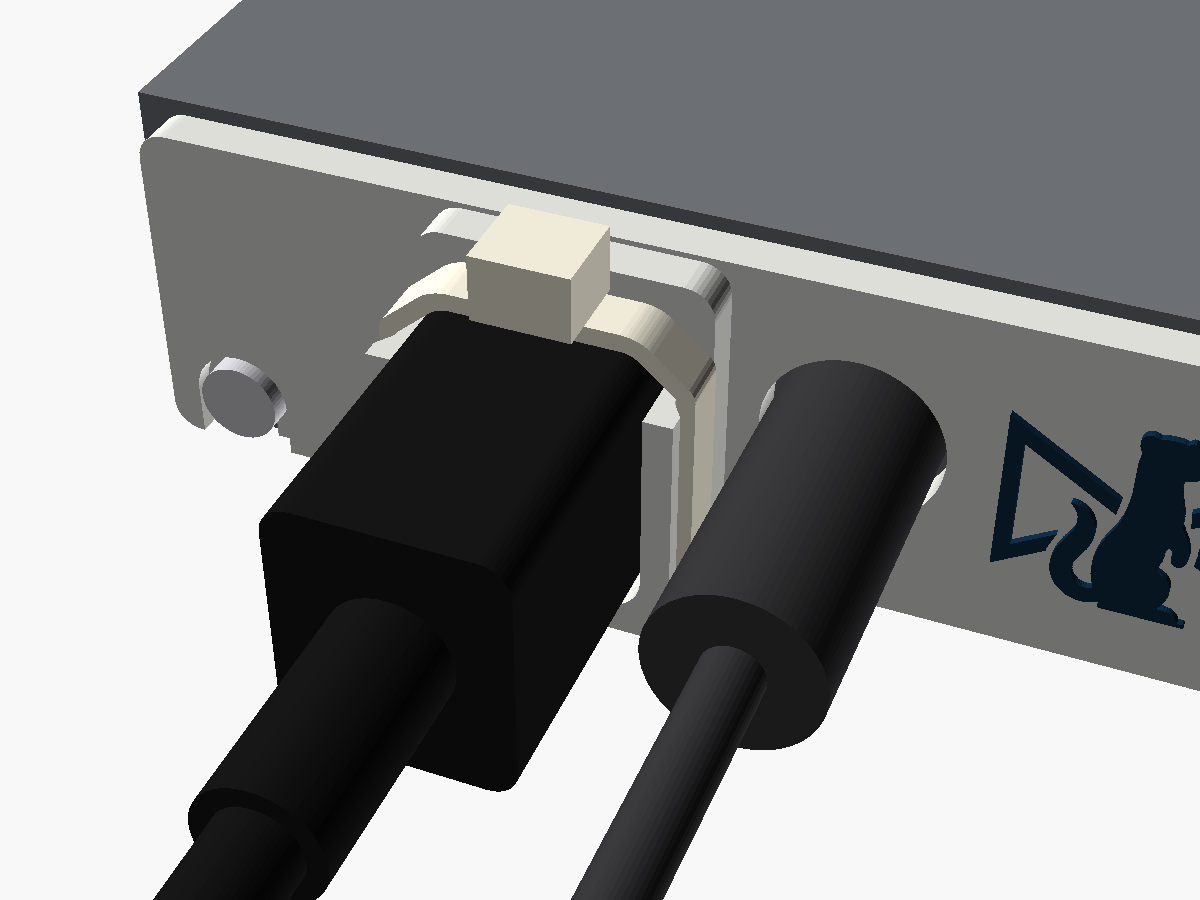
What it does
The Digiface Dante takes its power and its audio through one USB-B socket on the back. A USB-B plug is held in by friction and nothing else, so a lead that gets snagged or stepped on either pulls it out, and the Digiface goes quiet and dark in one go, or swings on it and works at the socket's solder joints.
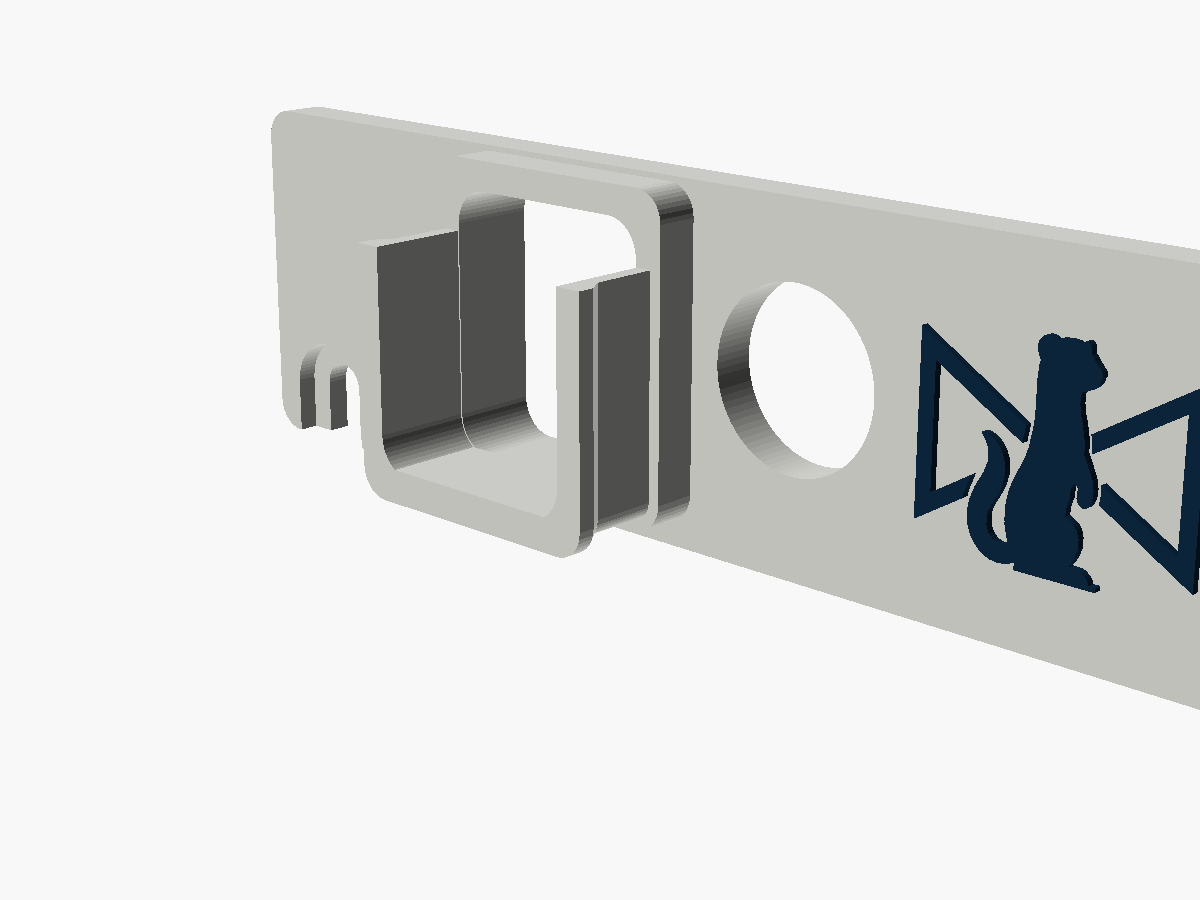
This guard is a plate that hangs on two of the Digiface's own rear-panel screws, with a short collar round the front of the plug. A cable tie goes round the back of the collar and over the top of the plug, and clamps it down onto the collar's floor, so a tug on the lead goes into the tie, the collar and the screws rather than the socket. The whole thing stands 13 mm off the panel. The status LED shows through a window, and the locking power plug goes through its own hole.
Where it stands
v0.2. I've modelled it and checked it in software, but I haven't printed one or fitted it to a real Digiface. v0.1 had a hood the length of the plug with a gate behind it, and it stood 37 mm off the panel, so v0.2 swaps that for a short collar and a cable tie. Every position on the rear panel was read off RME's product render rather than measured, and the plug numbers are a typical cable's, not yours, so measure your cable and print the gauge before the guard. The steps below are written from the model. Once one has been on a real Digiface, I'll update this page with anything that turned out differently.
Print your own
Fitting it
You'll need
- A screwdriver for the Digiface's rear-panel screws
- The USB cable you'll be using with it, measured before you print
- A cable tie 2.5 to 4.8 mm wide, and side cutters to trim it
- Perhaps two M3 screws 2 mm longer than the originals (see step 5)
Measure your cable and print the gauge first. Every position on the rear panel came from RME's render, not a Digiface on the bench, and the plug size is a guess until you've measured yours.
The gauge goes on the same way as the guard. It's a thin copy of the plate with a stub of the collar, and it shows whether the slots land on the screws, the collar lines up with the socket and your plug, the LED shows and the power plug goes through, before you print the whole thing.
- Unplug the USB cable.
- Loosen the left and centre rear-panel screws by about four turns. Seen from behind, the left one is the one next to the LED.
- Slide the plate up from below so both slots go round the screws, under their heads. The heads drop into channels in the plate.
- Tighten the screws until they're snug, not hard. PETG creeps if it's clamped too tight.
- Check each screw still bites at least three turns. If one doesn't, swap in an M3 screw 2 mm longer.
- Plug the USB cable in through the collar until it seats.
- With the plug pushed fully home, wrap a cable tie round the back of the collar, in the recessed band: under the floor, up both sides, and over the top of the plug where the collar is open. Put the head on top, pull it tight and trim the tail.
How it holds
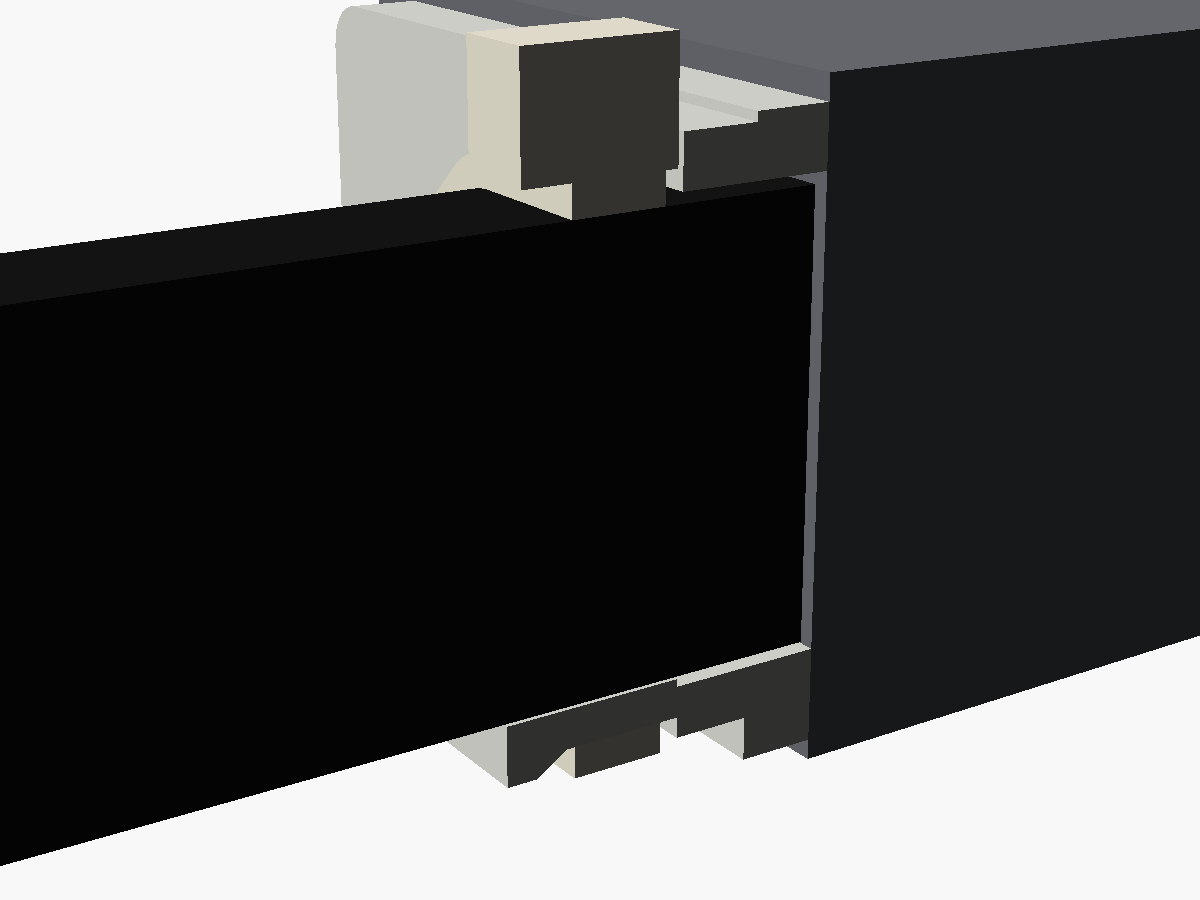
The collar's front ring surrounds the plug's moulding with 0.4 mm to spare, and its floor and sides carry on behind it, so a knock or a sideways yank pivots the plug against the collar, not the socket. Behind the ring the collar is open on top and its sides stop short of the moulding's top, so the cable tie lies on the plug itself and clamps it onto the floor, which sits only 0.1 mm under it. A pull on the lead goes into the tie, the collar and the two screws. The tie holds by grip, not a hard stop, and how hard a pull it takes hasn't been tested yet.
Measure your cable first
USB-B plugs are standard where they go into the socket and not at all outside it: every cable's moulding is a different size. The collar is drawn for a typical one, 15 × 17 mm, and that's a guess, not your cable.
Before you print, measure the moulding's width and its height. They go at the top of section 3 of src/params.scad in the source. The height matters most: the collar's floor sits 0.1 mm under the moulding so the tie can't pull the plug down and lever the socket, and that only works if the height is right. If your moulding is shorter than about 13 mm, set its length too, so the tie lands on the moulding and not the flexible boot. Then run build.sh and print what it writes.
The tie's head
It goes on top. With the 17 mm moulding the model is drawn for, a 3.6 mm tie's head stands about 2 mm above the top of the Digiface; a smaller moulding or a 2.5 mm tie brings it down. If something stacked on the Digiface overhangs the back, put the head underneath instead, which needs the Digiface to stand on feet taller than about 2.5 mm.
What changed from v0.1
v0.1 had a hood the whole length of the plug's moulding and a gate that clicked in behind it. It stood 36.7 mm off the panel, with the gate's tab 4.2 mm above the top of the case: far too big for what it does. v0.2 is 13 mm and nothing of it stands above the case. The cost is that the gate was a hard stop and the tie holds by grip.
The strain-relief hook
RME's guide says the back panel has a hook for taking the strain off the leads. Neither of RME's renders shows one, so it isn't in the model, and if your Digiface has one it may sit where the plate goes. The gauge will show you, which is one more reason to print it first.
Will your leads fit?
| USB-B plug moulding | 15 × 17 mm across, as drawn |
|---|---|
| Moulding length | At least 13 mm, so the tie lands on it; 30 mm as drawn |
| Cable tie | 2.5 to 4.8 mm wide; drawn with a 3.6 mm one |
| Power plug | Up to 11 mm across its locking collar |
The USB numbers are placeholders for a typical cable, not a measurement of anyone's. Measure yours and change them in the model before you print.
Taking it off
- Cut the cable tie.
- Unplug the USB cable.
- Loosen the left and centre rear-panel screws about four turns and slide the plate down off them.
- Tighten the screws again.
What's been checked
In software only, against the model. Nothing has been printed yet, which is what the second list is for.
in software The plate stays inside the edges of the rear panel, and the collar below the top of the case. Nothing of the guard stands above it.
in software The collar clears the power plug by 2.6 mm and the LED window by 0.55 mm, and the cable tie clears the power plug by 2.2 mm.
in software No piece runs into the case, either plug, the screws or another piece. The cable tie, as drawn, touches the collar and the top of the plug and nothing else.
in software Pushed 0.5 mm past its clearance sideways or up, the plug hits the collar. Pushed down, it meets the collar's floor almost at once. Pushed 0.3 mm down onto the plug, the tie bites into it, so it really lies on the plug and not on the collar's sides.
not yet Every position on the rear panel, which came from RME's render. The gauge is there to check them.
not yet Whether your USB cable fits. The plug numbers are placeholders.
not yet How hard a pull the cable tie holds. It grips rather than stops, and nobody has pulled on one yet.
not yet Whether the screws keep enough thread once the plate is under their heads.
not yet The strain-relief hook RME's guide mentions, which isn't in the model.
not yet Whether the power plug's lock turns freely in its hole.
Where the numbers came from
The case size is from RME's Digiface Dante user's guide, which is all RME publish about its shape. The screws, sockets and LED were measured off RME's product render, scaled by that published width and cross-checked against a second render, so they're good to about half a millimetre. The plug numbers are a typical cable's. The design itself is my own, written from scratch.
More views

Fitted one?
Tell me how it went
If you've put one on a real Digiface Dante, I'd like to hear about it, good or bad: whether it seated, whether your plug went in, and anything that got in the way.